
Pruning
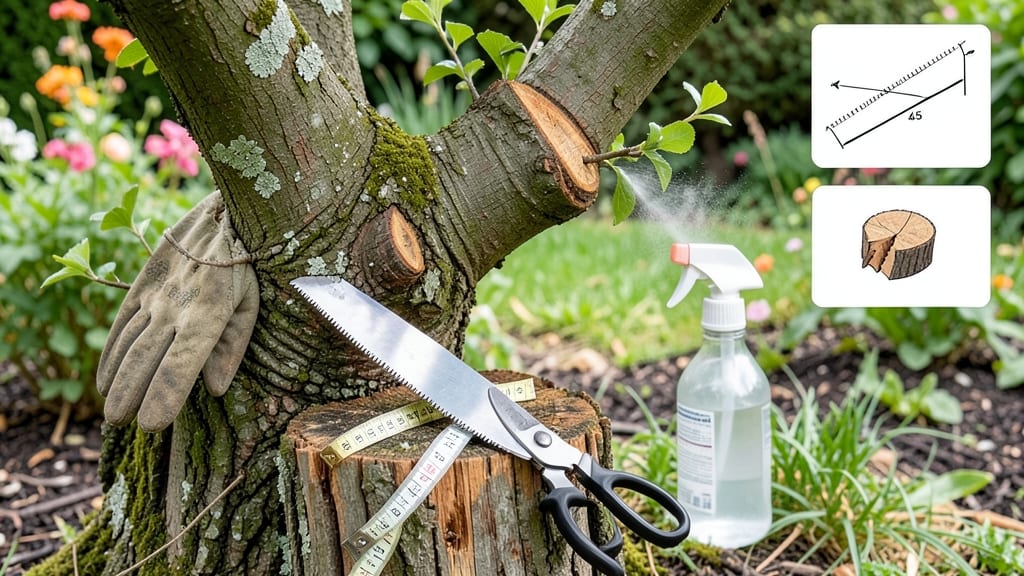
That one stubborn branch has been taunting you all summer—until now. ✂️ The best way to cut a tree branch isn’t brute force; it’s a clean, angled cut that heals your tree faster and keeps it looking sharp.
I’ve made every beginner’s mistake—tearing bark, leaving stubs, even dropping branches on my toes—so you don’t have to. You’ll need sharp tools (pruners for small branches, a pruning saw for thicker ones), gloves, and a ladder if the branch is high.
The real secret? Three simple cuts—one to undercut, one to remove, and one to smooth the bark collar. Skip this, and your tree fights back with weak growth or disease. After you’re done, your tree will thank you with faster healing and fewer pests.
No more ugly stubs or split bark—just clean lines that look like a pro did it. (And yes, I mean you.) Works for fruit trees, shade trees, or even that overgrown bush hogging your yard. Let’s get those branches off safely—without turning your yard into a lumberjack’s disaster zone.
📚 In This Guide
- What you need
- Instructions
- Tips and common mistakes
- Wrapping up and next steps
What you need
- ● Pruning Shears or Hand Pruners – For small branches (½-inch thick). Opt for bypass pruners (cleaner cuts) over anvil types.
- ● Loppers – For medium branches (½-inch to 2-inch thick). Choose bypass loppers with a 10-12-inch handle for leverage.
- ● Pruning Saw – For larger branches (2+ inches thick). A curved-tooth saw works best for wood.
- ○ Chainsaw (Optional but Helpful) – For thick, stubborn branches (3+ inches). Use a 14-16-inch bar for versatility.
- ● Rope or Branch Grabber – To safely lower heavy branches after cutting.
- ● Work Gloves – Cut-resistant (ANSI-rated) to protect your hands.
- ● Safety Goggles – ANSI Z87.1-rated to shield against debris.
- ● Ear Protection – 30 dB noise reduction (for chainsaw use).
- ○ Hard Hat (Optional but Recommended) – If working near power lines or in windy conditions.
- ● Ladder or Extension Pole – For high branches (stable, 3-point contact if climbing).
- ● Tree Wrap or Pruning Sealant – To protect cuts from pests/disease (apply to large wounds).
- ● Marking Paint or Chalk – To mark cut lines before sawing.
- ● First Aid Kit – Just in case (bandages, antiseptic wipes, tweezers).
- ● Weather Check – No rain/slippery conditions (wait for dry, calm days).
Step-by-Step instructions for making clean tree branch cuts
Here's my foolproof method for removing branches safely—no bark stripping, no ugly stubs, just professional-looking cuts every time.
✂️ Step 1: Assess the Branch and Plan Your Cuts
Start by examining the branch you're removing. Look for the branch collar—that swollen area where the branch meets the trunk or larger limb. This natural ridge tells you exactly where to cut. Never remove bark or saw into the trunk beyond this point, as it creates open wounds that invite disease and pests.
For branches over 4 inches thick, make three cuts instead of one. First, cut underside first about 12-18 inches out from the trunk—this reduces weight before the final cut. For thinner branches, a single clean cut at the collar works fine. Always wear gloves and safety glasses when working with power tools or sharp blades.
🪴 Step 2: Make the First Cut (Bottom Cut Only)
Position your pruning saw or chainsaw at a 45-degree angle facing upward, just outside the branch collar. The cut should be about one-third of the way through the branch. This creates a notch that prevents the bark from tearing when you remove the branch completely. I like to make this cut on the side of the branch closest to the trunk—this ensures the weight falls naturally away from the trunk.
Take your time here. A rushed cut will splinter the wood and damage the branch collar. You'll know you're in the right spot when you see the branch collar clearly visible above your cut line. If you're using a chainsaw, keep the chain running at a moderate speed to avoid binding.
✂️ Step 3: Make the Top Cut and Remove the Branch
Now move to the top of the branch, about 1-2 inches further out from the trunk than your first cut. Make a straight horizontal cut that meets the angled bottom cut. This creates a clean break line that won't snag on clothing or wildlife. The branch should now hang by just a thread of wood—gently pull it away from the trunk to complete the removal.
For branches under 2 inches thick, you can skip the notch and make a single clean cut at the branch collar. The key is to never leave a stub—stubs rot and weaken the tree over time. If you're working high up, use a rope and pulley system to lower the branch instead of dropping it, which can damage the tree or injure someone below.
🌿 Step 4: Smooth the Cut and Seal (If Needed)
Inspect the cut area. If the bark is torn or jagged, use a pruning knife to smooth it out, following the natural shape of the branch collar. Avoid cutting into the trunk—this creates an open wound that can take years to heal. For large cuts on fruit trees or valuable shade trees, apply a tree wound sealant to protect against pests and disease, but skip it for most ornamental trees—research shows sealants often do more harm than good.
Step back and admire your work. A properly made cut should look like a clean, angled notch with no rough edges. The branch collar should still be intact, forming a natural barrier that helps the tree heal. If you see sap bleeding heavily, don't panic—this is normal and will slow within a few hours. Water the tree deeply afterward to help it recover from the stress.
⏰ Step 5: Clean Up and Monitor the Tree
Remove all debris from the ground, especially if you're dealing with diseased branches—this prevents spreading spores to other plants. Disinfect your tools with rubbing alcohol or a 10% bleach solution before storing them to avoid cross-contamination. I like to schedule a follow-up check in 4-6 weeks to ensure the tree is healing properly and no signs of infection appear.
Watch the tree closely for the next two growing seasons. Healthy healing will show as new growth around the branch collar and a gradual fading of any initial sap flow. If you see mushrooms growing at the cut site or oozing sap that doesn't stop, the tree may have a deeper issue that needs professional attention. Most trees recover beautifully with proper cuts—this is how you keep them strong for decades.
Tips & tricks for perfect tree branch cuts
These pro-level techniques will help you achieve flawless cuts every time—just like the arborists do.
Branch Collar Precision: The branch collar is your guidepost—never cut into it or beyond it. If you accidentally nick the trunk, use a pruning knife to carefully smooth the edge back to the collar's natural ridge. This small detail makes all the difference in how quickly your tree heals. I've seen cuts that looked perfect initially develop rot because the collar was damaged.
Cut Angle Matters: That 45-degree angle in Step 2 isn't just arbitrary—it creates a natural stress point that prevents bark tearing when you remove the branch. For thicker branches, imagine slicing a wedge of pie: the angle should be steep enough to create that notch while still allowing the weight to fall away from the trunk. A shallower angle risks tearing the bark as you remove the branch.
Safety First: Here's what nobody tells you—if you're working with a chainsaw, always cut with the chain running at moderate speed. A slow chain can bind in the wood, and a fast chain can cause kickback. I've seen people nearly lose control because they revved the engine too high. For hand saws, keep the blade sharp—dull blades require more force and create rough cuts that damage the tree.
Seasonal Timing: Late winter or early spring is ideal for pruning most trees when they're dormant. This timing minimizes stress on the tree and prevents disease entry points. If you must prune in summer, do it on a cooler day to reduce water loss through the fresh cuts. I've noticed that trees pruned in peak summer often show more stress symptoms like leaf scorch.
Pro Tips for Best Way To Cut A Tree Branch
- These pro-level techniques will help you achieve flawless cuts every time—just like the arborists do.
- Branch Collar Precision: The branch collar is your guidepost—never cut into it or beyond it. If you accidentally nick...
- Cut Angle Matters: That 45-degree angle in Step 2 isn't just arbitrary—it creates a natural stress point that prevent...
Frequently asked questions
about cutting tree branches safely and effectively—your go-to guide for clarity and confidence!What’s the safest way to cut a large tree branch?
For branches thicker than 3 inches, use the three-cut method to avoid bark tearing or splitting. Start with an undercut 18 inches from the trunk, then make a top cut just outside the undercut. Finally, sever the branch cleanly at the collar. Always wear gloves and safety glasses!
When is the best time of year to trim tree branches?
Late winter or early spring (just before buds swell) is ideal for most trees. This timing minimizes stress and lets you see the branch structure clearly. Avoid pruning in fall (except for disease-prone trees) or during active growth periods—it can weaken the tree.
Can I cut branches in extreme heat or cold?
No—avoid pruning in extreme temperatures. Heat causes sap to flow excessively (making cuts messy and increasing disease risk), while cold can brittle wood, making branches harder to cut cleanly. Aim for mild, dry days (50–75°F) for the best results.
What if my branch won’t cut cleanly—what’s the fix?
If the branch resists cutting or the blade gets stuck, it’s likely due to a compression wood buildup (common in oaks or pines). Adjust your saw angle slightly upward, use a sharp, heavy-duty pruning saw, or make a small notch to relieve pressure before the final cut.
Are there alternatives to cutting branches myself?
Yes! For large or high branches, consider hiring a certified arborist ($100–$300/hour) or renting a pole saw ($50–$100/day). If the branch is dead or diseased, call a professional—removing it safely prevents property damage or injury.
Wrapping up and next steps
Cutting tree branches safely and effectively doesn’t have to be intimidating—with the right tools, technique, and timing, you can prune like a pro! 🌳✂️ Remember to use sharp tools, make clean cuts, and prioritize tree health by avoiding bark damage.
Whether you’re trimming for aesthetics, safety, or growth, confidence comes with practice.
Ready to tackle your next pruning project? Start small—grab your tools, pick a manageable branch, and follow the steps you’ve learned. Before you know it, you’ll be shaping your trees with precision and pride! 🌟