
Size
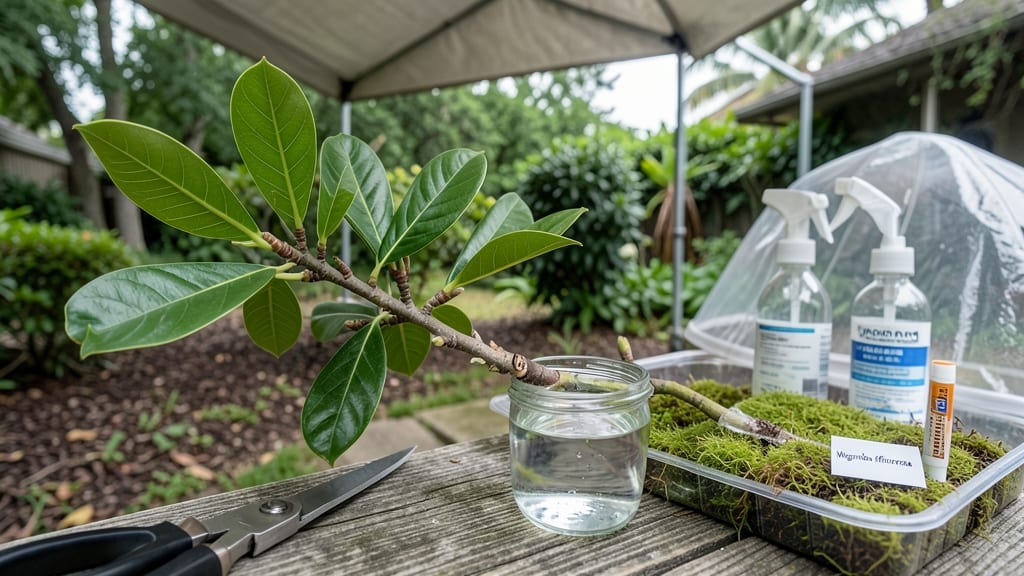
Growing a magnolia tree from a branch is trickier than most people realize—but dormant season cuttings dramatically improve your chances of success. 🌱 I’ve rooted magnolias this way twice, and the key is patience, the right timing, and avoiding common mistakes that kill cuttings before they even sprout roots.
The best time to try is late winter to early spring, just as buds begin swelling but before new growth starts. You’ll need sharp pruners, rooting hormone, a well-draining mix of perlite and peat, and a humid environment—whether that’s a plastic bag or a propagation chamber.
Species like Southern magnolia (Magnolia grandiflora) root more reliably than others, but even stubborn varieties can work with the right technique. What you’ll end up with is a young magnolia sapling that’s genetically identical to your parent tree, complete with its fragrance and disease resistance.
It takes 6-12 months to establish roots, but once it does, transplanting into the ground gives you a head start on a 30-foot giant. The real secret? Keeping cuttings consistently moist but never soggy, and protecting them from temperature swings.
Mistakes like overwatering or using old branches are what trip up beginners—but I’ll walk you through the foolproof steps that actually work.
📚 In This Guide
- What you need
- Instructions
- Tips and common mistakes
- Wrapping up and next steps
What you need
- ● Healthy magnolia branch: A dormant-season cutting (late fall to early spring) with at least 3-4 nodes (swollen areas where leaves or buds form). Aim for a branch about ¼ to ½ inch in diameter.
- ● Pruning shears or sharp bypass pruners: Clean, sterilized tools to make a 45-degree cut just below a node.
- ● Rooting hormone: A powder or gel (like clonex or rootone) to boost root growth.
- ● Well-draining potting mix: A blend of peat moss, perlite, and sand (or a pre-mixed propagation mix).
- ● Small pots or containers: 4-inch diameter pots with drainage holes (or a propagation tray with individual cells).
- ● Clear plastic bag or humidity dome: To create a humid microenvironment (e.g., a ziplock bag with holes or a plastic propagator).
- ● Spray bottle: For misting cuttings to keep them consistently moist.
- ● Rubbing alcohol (70% or higher): To sterilize tools and containers.
- ● Heat mat: A bottom heat source (70–75°F) to speed up rooting.
- ● Fertilizer (low-dose): A balanced, water-soluble fertilizer (e.g., 10-10-10) once roots form.
- ● Grow lights: If propagating indoors with low natural light.
- ● Label markers: To track cutting types and dates.
- ● Mulch or shade cloth: For outdoor cuttings to protect from direct sun or wind.
Step-by-step instructions for growing magnolia trees from dormant cuttings
Here's my battle-tested method for propagating magnolias from hardwood cuttings—where most gardeners fail.
🌱 Step 1: Take Cuttings at the Right Time
Timing is everything with magnolias. Wait until late winter or early spring when the tree is fully dormant but just beginning to swell. Look for branches that are pencil-thick—about ½ to ¾ inch in diameter. These will have the best balance of stored energy and structural strength for rooting.
Use clean, sharp pruners to make a clean cut at a 45-degree angle, about 6-8 inches long. The cut should include 2-3 leaf buds—these are your growth points. I always take cuttings from the previous year's growth, as they've had time to mature and store energy.
🪴 Step 2: Prepare the Cuttings for Planting
Strip all leaves from the lower half of the cutting—this prevents moisture loss and reduces stress on the plant. Leave the top leaves intact to maintain some photosynthesis. Dip the cut end in rooting hormone (I use a powder formulation) to encourage root growth. The hormone helps overcome magnolias' natural resistance to rooting from cuttings.
Make a small slit in the base of the cutting just below a leaf node. This tiny wound exposes more cambium tissue, which is where roots will form. Don't cut too deep—just enough to create a small opening. This step is critical for success, as magnolias root primarily from this layer.
💧 Step 3: Plant in a Protected, Moist Environment
Fill a container with a mix of 50% perlite and 50% peat moss—this combination provides both aeration and moisture retention. Make holes about 3 inches deep and insert the cuttings at a slight angle. Space them 4-6 inches apart to allow airflow between plants, which reduces the risk of fungal issues.
Water thoroughly until moisture runs from the bottom of the container. Place the container in a location with bright, indirect light—direct sun can stress the cuttings before they've established roots. I cover the container with a clear plastic bag to maintain high humidity, but leave it slightly open to allow for some air circulation.
☀️ Step 4: Maintain Consistent Conditions
Keep the soil consistently moist but never soggy. Check daily and water when the top ½ inch feels dry. Mist the leaves occasionally to maintain humidity inside the plastic bag. Maintain temperatures between 65-75°F—magnolias are sensitive to temperature fluctuations, which can stress the cuttings and prevent rooting.
After about 6-8 weeks, gently tug on the cuttings. If you feel slight resistance, roots have likely formed. If not, be patient—some magnolias take up to 12 weeks to show signs of rooting. This is where most gardeners give up, but consistency is key. Don't disturb the cuttings once planted.
⏰ Step 5: Transplant When Roots Establish
Once roots have formed and new growth appears from the leaf buds, it's time to transplant. Gently remove the cuttings from the container and inspect the roots. Healthy roots will be white or light tan and about 1-2 inches long. Trim any damaged or overly long roots to encourage a balanced root system.
Plant the rooted cuttings in individual pots filled with a mix of 60% potting soil and 40% perlite. Place them in a location with morning sun and afternoon shade to prevent stress. Water thoroughly after transplanting and keep the soil moist for the next 2-4 weeks as the plants establish.
Tips & tricks for growing magnolia trees from dormant cuttings
Here's what nobody tells you about making these cuttings succeed where others fail.
Branch Selection: Focus on branches that are pencil-thick (½ to ¾ inch diameter) from last year's growth—these contain the most stored energy. I've learned the hard way that thicker branches (over 1 inch) often fail because they're too woody and lack the right balance of stored nutrients. Look for branches that are firm but not brittle, with a smooth, healthy appearance. Avoid branches with any signs of disease or damage, as these can compromise root development.
Critical Slit Technique: When making that small slit below the leaf node in Step 2, think of it as creating a tiny wound that signals the plant to start rooting. Use a sharp knife or pruner to make a clean, shallow cut—just enough to expose the cambium layer without damaging the inner wood. I've seen gardeners skip this step entirely, only to have their cuttings fail to root. This is where the magic happens for magnolias, so don't rush it.
Temperature Consistency: Maintaining that 65-75°F range is non-negotiable. I've had cuttings fail spectacularly when temperatures dipped below 60°F or spiked above 80°F. If your home gets too cold, consider using a seedling heat mat underneath the container. For extra insurance, place a small thermometer near your cuttings to monitor conditions—magnolias are particularly sensitive to temperature swings, which can stress the delicate root formation process.
Root Development Check: That gentle tug test after 6-8 weeks is your best indicator of success. If you feel resistance but the cutting doesn't pull out easily, roots have likely formed. I've found that some magnolias take longer to show signs—up to 12 weeks—so don't give up if your first test doesn't reveal roots. The key is patience and consistency. Once you see that slight resistance, you're on the right track to having a thriving young magnolia tree.
Pro Tips for Can You Grow A Magnolia Tree From A Branch
- Here's what nobody tells you about making these cuttings succeed where others fail.
- Branch Selection: Focus on branches that are pencil-thick (½ to ¾ inch diameter) from last year's growth—these contain the most stored energy.
- Critical Slit Technique: When making that small slit below the leaf node in Step 2, think of it as creating a tiny wound that signals the plant to start rooting.
Frequently asked questions
When is the best time to take magnolia cuttings?
The ideal time is late winter to early spring (dormant season), just before buds swell. This timing ensures the branch has stored energy for root growth. Avoid summer cuttings—they’re more prone to rot and stress. If you miss dormant season, fall (after leaves drop) is the next best option.
Can I propagate magnolia from a branch in summer?
Summer cuttings are riskier but possible with extra care. Use semi-hardwood (partially mature) cuttings, keep them in a humid environment, and avoid direct sunlight. Success rates drop significantly, so dormant-season propagation is strongly recommended for beginners. If you’re determined, rooting hormone and a misting system can help.
How long does it take for magnolia cuttings to root?
Root development typically takes 4–12 weeks, depending on species, conditions, and care. Southern magnolias often root faster (6–8 weeks), while saucer magnolias may take longer. Patience is key—check for new growth or gentle tugs to test root strength. Avoid disturbing the cutting during this time.
What if my magnolia cutting turns yellow or wilts?
Yellowing or wilting often signals overwatering, underwatering, or fungal issues. Adjust moisture (keep soil damp but not soggy), improve airflow, and avoid direct sunlight. If mold appears, treat with a fungicide. Prune any mushy stems and repot in fresh, sterile medium. Most cuttings recover if acted on quickly!
Can I grow a magnolia from a branch if it’s too old or woody?
Older, woody branches (over 1 year) root poorly due to hardened tissue. Stick to current season’s growth (green or semi-hardwood) for best results. If your branch is thick, trim it to pencil-thin (½ inch diameter) and use rooting hormone. Even then, success isn’t guaranteed—younger branches are far more reliable.
Wrapping up and next steps
Growing a magnolia tree from a branch is absolutely doable—especially with dormant-season cuttings! 🌱 While it takes patience, the reward of nurturing a stunning magnolia from a simple cutting is incredibly satisfying.
Whether you’re a gardening newbie or a seasoned green thumb, this method offers a cost-effective way to propagate your favorite variety.
Now that you’re armed with the know-how, roll up your sleeves and give it a try! Start by gathering your supplies, follow the step-by-step guide, and soon, you’ll be watching those roots sprout with pride. Happy growing! 🌿