
Pruning
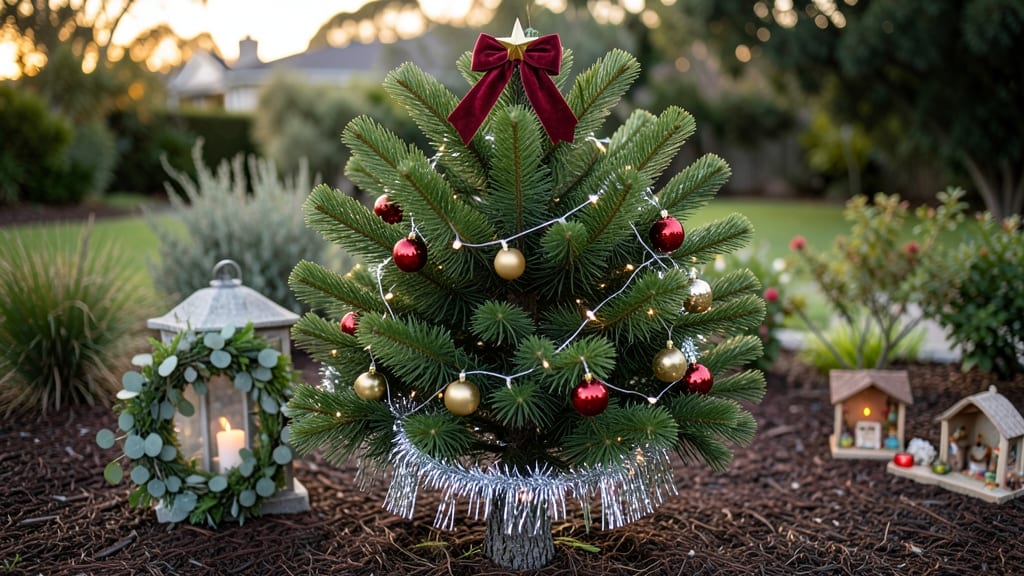
Your Christmas tree outside house can be more than a holiday centerpiece—it’s a year-round garden statement. ✨ I’ve transformed my front yard with pruning techniques that keep evergreens looking lush long after December, blending holiday charm with permanent landscaping.
The secret starts with selecting the right tree species—think fragrant pines or sturdy spruces that hold their needles well. Prune strategically in late winter to shape growth while maintaining that festive silhouette, and add seasonal accents like wreaths or lights that double as garden decor.
This approach turns a temporary holiday display into a cohesive part of your landscape.
By next summer, you’ll have a tree that stays vibrant, supports local wildlife, and frames your home’s entrance with evergreen elegance. The pruning hacks I’ve perfected ensure it never looks out of place—just a thoughtful garden feature, not a seasonal afterthought.
Works for any climate with the right tree choices, and the same principles apply to shrubs or mixed evergreen borders. Let’s make your Christmas tree a year-round asset that neighbors admire year after year.
📚 In This Guide
- What you need
- Instructions
- Tips and common mistakes
- Wrapping up and next steps
What you need
- ● Christmas Tree: A live, potted tree (e.g., Nordmann fir, Fraser fir, or Colorado blue spruce) in a sturdy container (15–20 gallons for mature trees).
- ● Pruning Tools: Bypass pruners (for clean cuts on small branches)
- ● Loppers (for thicker branches, 1.5–2.5 inches in diameter)
- ● Hand saw (for stubborn, larger limbs)
- ● Safety Gear: Work gloves (cut-resistant for protection)
- ● Safety goggles (to shield eyes from debris)
- ● Cleaning Supplies: Rubbing alcohol (70% or higher) or bleach solution (1 part bleach to 9 parts water) for sterilizing tools
- ● Paper towels or rags
- ○ Decorative Extras (Optional but Fun!): Weatherproof outdoor lights (LED string lights, 100+ feet)
- ● Ornaments (plastic or resin for durability)
- ● Tree skirt or mulch (to hide the pot and protect roots)
- ● Stakes or a tree stand (for stability if planting outdoors long-term)
- ● Location: A spot with partial shade (4–6 hours of sunlight daily) and protection from harsh winds or direct sun.
- ● Soil & Water: Well-draining soil mix (peat moss, perlite, and pine bark)
- ● Watering can or hose with a gentle spray nozzle
- ● Timing: Prune in late winter or early spring (before new growth) for best results.
- ● Local Regulations: Check if your area permits outdoor Christmas trees year-round (some HOAs or cities have rules!).
Step-by-Step instructions for pruning your Christmas tree for year-round beauty
Turn that holiday centerpiece into a living landscape star with these precision pruning techniques.
✂️ Step 1: Assess and Plan Your Pruning Strategy
Start by examining your tree's natural shape and growth patterns. Look for areas where branches are overcrowded or growing inward—these are your primary targets. I always mark these spots with a small piece of twine or colored tape before making any cuts, so I don't accidentally remove healthy growth. Focus on maintaining the tree's natural pyramid shape while creating space for new growth.
Pay special attention to the lower branches. These often become sparse after years of holiday decorations, but they're crucial for that full, lush look. If your tree is mature, you might need to remove entire lower branches to open up the trunk. Remember, you're not just pruning for holidays—you're shaping a year-round feature that will enhance your landscape.
✂️ Step 2: Use Proper Pruning Techniques for Healthy Growth
Always make clean cuts just above a bud or lateral branch using sharp, sterilized pruning shears. Cut at a 45-degree angle about ¼ inch above the bud to prevent water from pooling and causing rot. Never leave stubs—they invite disease and look unprofessional. For larger branches, I use a three-cut method: first undercut, then top-cut, and finally remove the branch stub.
Remove no more than 25% of the tree's foliage in one season to avoid stressing the tree. Focus on thinning out dense areas rather than shearing the tree uniformly. This approach encourages better air circulation and sunlight penetration, which keeps the tree healthier year-round. Watch for new growth within 4-6 weeks—this is your signal that the tree is responding well to the pruning.
☀️ Step 3: Time Your Pruning for Optimal Results
Late winter or early spring, just before new growth begins, is the ideal time to prune your Christmas tree. This timing allows the tree to recover and grow new foliage before the holiday season. Avoid pruning in fall, as new growth won't have time to harden off before winter. If you must prune in late summer, do so at least 6 weeks before the first frost to give the tree time to heal.
After pruning, apply a balanced, slow-release fertilizer around the tree's drip line to support new growth. Water deeply to help the tree recover from the stress of pruning. You'll notice new shoots emerging within 2-3 weeks, and by the next holiday season, your tree will look fuller and more vibrant than ever.
🌿 Step 4: Maintain Year-Round Care for Long-Term Elegance
Keep the area around your tree's base free of weeds and grass to reduce competition for water and nutrients. Mulch with 2-3 inches of organic mulch, keeping it 6 inches away from the trunk to prevent rot. Monitor the tree regularly for signs of pests or disease, such as yellowing needles, sawdust-like frass, or resinous blisters. Address any issues promptly to keep your tree thriving.
Consider adding a tree ring system or ornamental lights to highlight your tree's beauty year-round. These touches not only enhance the tree's appearance but also make it a focal point in your landscape. With consistent care, your Christmas tree will become a cherished part of your outdoor space, offering elegance and charm beyond the holiday season.
Tips & tricks for transforming your Christmas tree into a year-round landscape star
Your outdoor Christmas tree deserves more than just holiday glory—here’s how to turn it into a living masterpiece that thrives all year long.
The Shape Factor: When assessing your tree’s natural shape in Step 1, don’t just focus on the top. Look for branches growing inward or crossing each other—they’re the first to go. These "hidden" branches often block sunlight and air circulation, which is why your tree might look sparse in certain areas. I’ve seen trees go from scraggly to stunning just by removing these hidden culprits. Think of it as creating a "window" for sunlight to reach deeper into the tree’s canopy.
Precision Cutting Technique: In Step 2, that 45-degree angle isn’t just a suggestion—it’s a game-changer. When you cut too straight, water pools in the wound and invites rot. The angle directs water away from the cut, keeping your tree healthy. For larger branches, the three-cut method prevents bark from tearing, which can stress the tree. Trust me, your tree will thank you with faster healing and fewer disease risks. And always sterilize your tools between cuts to prevent spreading any potential infections.
Timing is Everything: The late winter/early spring window in Step 3 is non-negotiable for most trees. This timing gives your tree the full growing season to recover before winter hits again. But here’s what nobody tells you: if you must prune in late summer, time it so the cuts heal before the first hard frost. I’ve seen trees pruned too late in summer struggle to harden off properly, leading to winter dieback. When in doubt, err on the side of earlier pruning—your tree’s resilience will reward you.
Post-Pruning Care: That 2-3 inches of mulch in Step 4 isn’t just decoration—it’s insulation. Proper mulching helps regulate soil temperature, retains moisture, and suppresses weeds that compete with your tree for nutrients. But here’s the secret: keep that mulch 6 inches away from the trunk. Piling it against the bark can cause rot. Think of it like a donut around your tree’s base—thick in the middle, with a clear ring of bare soil around the trunk.
Pro Tips for Christmas Tree Outside House
- Your outdoor Christmas tree deserves more than just holiday glory—here’s how to turn it into a living masterpiece that thrives all year long.
- The Shape Factor: When assessing your tree’s natural shape in Step 1, don’t just focus on the top.
- Precision Cutting Technique: In Step 2, that 45-degree angle isn’t just a suggestion—it’s a game-changer.
Frequently asked questions
Got questions about keeping a Christmas tree outside your home?
Here are answers to the most common ones—from setup to upkeep—so you can enjoy your evergreen beauty all year long!
Can I leave a Christmas tree outside year-round?
Yes, but it depends on the tree type! Fresh-cut evergreens (like Fraser firs) won’t survive long-term outside due to drying out. Opt for a living potted tree (e.g., Nordmann fir) or a pre-planted outdoor tree (like a blue spruce) for year-round placement. Prune regularly to maintain shape and health.
How do I protect my outdoor Christmas tree from snow and ice?
Use a tree guard (like a plastic wrap or burlap wrap) to shield branches from heavy snow. For ice, gently tap branches to dislodge buildup—never use sharp tools! After storms, check for broken limbs and trim them promptly. A weather-resistant spray (like anti-desiccant) can also help.
When should I prune an outdoor Christmas tree?
Prune after the holiday season (January–February) to avoid removing next year’s growth. Focus on:
- Dead or diseased branches (cut at the base).
- Overgrown limbs (trim to maintain shape).
- New growth (lightly shape in spring/summer).
How do I keep pests and animals away from my outdoor tree?
Pests (like aphids or mice) love Christmas trees! Prevent issues with:
- Neem oil spray (natural pest deterrent).
- Tree wraps (to block rodents from chewing bark).
- Avoid leaving ornaments (they attract animals).
What’s the best way to revive a dried-out outdoor Christmas tree?
If your tree looks brown and brittle, it may be too late—but try this:
- Trim all dead branches (cut back to green growth).
- Deep-water the roots (if potted) or soak the base.
- Apply anti-desiccant to protect needles.
Wrapping up and next steps
Transforming your Christmas tree into a year-round centerpiece is easier than you think! With the right pruning techniques and a little creativity, you can turn holiday magic into evergreen elegance that brightens your home’s exterior all season long.
Whether you’re trimming for aesthetics, health, or both, your tree will stay lush and stunning—proving that the holiday spirit doesn’t have to end on December 26th.
Ready to elevate your outdoor space? Grab your tools, follow the steps, and let your green thumb shine! Next, explore our guide on seasonal tree care to keep your evergreen thriving for years to come. 🌲✨