
Pruning
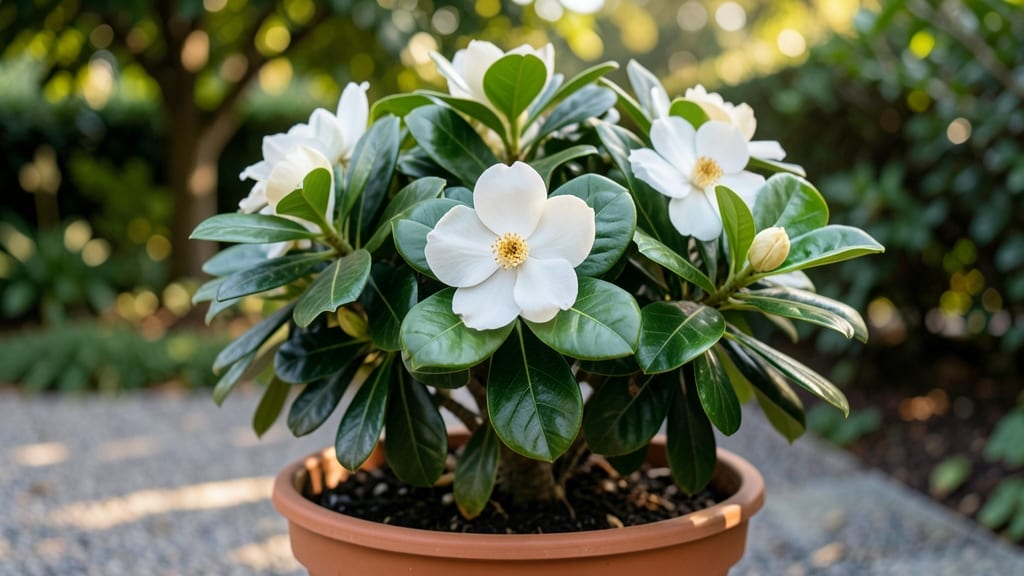
Growing a fragrant gardenia tree in a pot lets you enjoy its intoxicating blooms without needing a yard. 🌿 The secret to keeping one thriving in containers is matching its tropical roots to the right soil, pot size, and care routine—something I perfected after my first gardenia nearly died from overwatering and poor drainage.
Start with a 15-20 gallon container (or larger for mature plants) and well-draining potting mix—gardenias hate soggy roots. Place it where it gets morning sun and afternoon shade, mimicking its natural habitat.
Water when the top inch of soil feels dry, and always use room-temperature water to avoid shocking the roots.
With the right balance, you'll see glossy leaves and heavy blooms from spring through fall. The fragrance alone makes it worth the effort, but the key is pruning spent flowers and fertilizing lightly every 4-6 weeks during growing season. Even in pots, they can live for decades with proper care.
Watch for root-bound signs (roots circling the pot) and repot every 2-3 years in spring. Pests like spider mites are rare but can strike if the air is too dry—just wipe leaves with neem oil if you spot them.
Your potted gardenia will become the most talked-about plant on your porch.
📚 In This Guide
- What you need
- Instructions
- Tips and common mistakes
- Wrapping up and next steps
What you need
- ● Gardenia plant: Choose a compact variety (e.g., Gardenia jasminoides) or a young tree (1–3 years old) from a nursery.
- ● Pot: A 12–18-inch diameter container with drainage holes (terracotta or ceramic works best). Opt for 1–2 inches deeper than the plant’s root ball.
- ● Well-draining potting mix: A blend of 50% peat moss or coco coir, 30% perlite/pumice, and 20% sand or orchid bark (gardenia hates soggy roots!).
- ● Gravel or pebbles: 1–2 inches for the pot’s base to improve drainage.
- ● Pruning shears: Sharp, clean bypass pruners (sterilize with rubbing alcohol before use!).
- ● Gloves: Garden gloves to protect from thorns and sap.
- ● Slow-release fertilizer: Balanced 10-10-10 or acid-loving plant fertilizer (apply sparingly, 2–3 times per year).
- ○ Mulch (optional): Pine bark or sphagnum moss to retain moisture and acidity.
- ● Watering can with a rose nozzle: For gentle, deep watering (avoid overhead spraying).
- ● Access to bright, indirect light (e.g., east or north-facing window, or a shaded patio).
- ● A humidity-loving environment (mist leaves occasionally or use a pebble tray).
- ● Patience! Gardenias thrive with consistent care—they may take 6–12 months to bloom in pots.
Step-by-Step guide to growing a thriving gardenia tree in a pot
Here's how to cultivate a fragrant, compact gardenia that fits beautifully in small spaces.
🪴 Step 1: Select the Right Container and Drainage
Choose a glazed ceramic or plastic pot at least 12-14 inches in diameter with multiple drainage holes—gardenia roots despise soggy conditions. I always opt for unglazed terra cotta for mature plants because it wicks away excess moisture naturally, but plastic works fine for younger specimens. Place a 2-inch layer of gravel or expanded clay pebbles at the bottom to create an air pocket that prevents root rot.
The reason for this layer isn't just drainage—it's about oxygen. Gardenias have delicate root systems that need both water and air to thrive. If your pot lacks drainage holes, drill them yourself using a ½-inch masonry bit. I've seen gardeners skip this step and end up with yellowing leaves and stunted growth within weeks.
🌱 Step 2: Prepare Well-Draining Soil Mix
Never use regular garden soil—it compacts in pots and suffocates roots. Instead, blend equal parts peat moss, perlite, and pine bark fines to create a fast-draining, slightly acidic mix (pH 5.5-6.5). I add a handful of sphagnum moss to the mix for extra moisture retention without compacting. Fill the pot to 2 inches below the rim, leaving room for the plant.
Gardenias are particular about their growing medium. The mix should feel light and fluffy—like crumbled styrofoam—when squeezed. If it holds together like wet sand, add more perlite. This ensures water drains freely while still holding enough moisture for the plant's shallow roots. I always test the mix by pouring water into it; it should drain completely within 10-15 minutes.
☀️ Step 3: Plant and Position for Bright, Indirect Light
Remove the gardenia from its nursery pot and gently loosen the roots if they're circling. Position the plant so the root flare (where roots meet the stem) sits ½ inch below the soil line. Backfill with your prepared mix, pressing lightly to eliminate air pockets. Water immediately after planting to settle the soil around the roots.
Place your potted gardenia in a location with bright, indirect light—think east or west-facing windows or under 50% shade cloth if outdoors. Direct midday sun will scorch the leaves, while too little light results in sparse blooms. You'll know the light is right when new growth appears dark green and compact, not leggy or pale. If leaves start yellowing between the veins, it's a sign of too much light.
💧 Step 4: Establish a Consistent Watering Routine
Water when the top 2 inches of soil feel dry to the touch, which typically means every 5-7 days in warm weather. I use room-temperature water (cold water shocks the roots) and pour it slowly until it drains from the bottom. Never let the plant sit in standing water—gardenia roots rot quickly in soggy conditions. After watering, empty the saucer to prevent salt buildup from accumulating water.
Here's the thing about gardenias: they hate inconsistency. If you water deeply one day and barely the next, the roots struggle to establish. I set a reminder on my phone to check moisture levels at the same time each week. In winter, when growth slows, I reduce watering to every 10-14 days, letting the top 3 inches of soil dry out completely between waterings.
✂️ Step 5: Fertilize and Prune for Compact Growth
Feed your gardenia every 4-6 weeks during the growing season (spring through fall) with an acid-loving plant fertilizer (10-10-10 or 8-3-9 ratio). I mix the fertilizer with water and apply it directly to the soil, avoiding the leaves to prevent burn. In winter, reduce fertilizing to once every 8-10 weeks as the plant enters dormancy. The key is consistency—gardenia blooms best when fed regularly but not overfed.
Prune after flowering to encourage a bushier shape. Cut back overly long stems to just above a leaf node, and remove any dead, yellowing, or crossing branches. I always sterilize my pruning shears with rubbing alcohol between cuts to prevent disease. Pruning isn't just about aesthetics—it stimulates new growth and ensures your gardenia stays compact enough for small spaces. Aim to keep the plant no taller than 3-4 feet if you're growing it in a pot.
Tips & tricks for perfect potted gardenia growth
These small adjustments make all the difference when nurturing a thriving gardenia in limited space.
Container Upgrade: If you're using a plastic pot, consider upgrading to unglazed terra cotta for mature plants—it naturally wicks away excess moisture, which gardenias crave. For younger specimens, plastic works fine, but always ensure the pot has multiple drainage holes. I've found that adding a 2-inch layer of expanded clay pebbles at the bottom isn't just about drainage; it creates essential air pockets that prevent root suffocation. This simple layer has saved me from losing plants to root rot after just a few weeks.
Soil Mix Secret: The 10-15 minute drainage test mentioned in Step 2 is non-negotiable. I've ruined multiple soil mixes by skipping this step—when water pools instead of draining, gardenias develop root rot within days. For extra insurance, add ½ cup of coarse sand to your mix if you're in a humid climate. The goal is a texture that resembles "crumbled styrofoam"—light enough to allow oxygen flow but still able to retain moisture for the plant's shallow roots.
Light Positioning: When placing your gardenia, pay attention to leaf color as your indicator. The dark green, compact growth mentioned in Step 3 is your target—if leaves start yellowing between the veins, move it away from direct sun immediately. I've learned the hard way that east-facing windows provide ideal morning light without the harsh afternoon sun. For indoor gardeners, a simple trick is to rotate your plant quarter-turn weekly to ensure even growth all around.
Watering Consistency: The every 5-7 days guideline works best when paired with the "finger test"—stick your finger 2 inches deep into the soil. If it feels dry, water thoroughly until it drains from the bottom. I've found that using a moisture meter (around $10) eliminates guesswork completely. For winter care, let the top 3 inches dry out completely between waterings—this mimics the plant's natural dormancy period and prevents overwatering during slower growth months.
Pro Tips for Gardenia Tree In Pot
- These small adjustments make all the difference when nurturing a thriving gardenia in limited space.
- Container Upgrade: If you're using a plastic pot, consider upgrading to unglazed terra cotta for mature plants—it naturally wicks away excess moisture, which gardenias crave.
- Soil Mix Secret: The 10-15 minute drainage test mentioned in Step 2 is non-negotiable.
Frequently asked questions
Got questions about keeping your gardenia tree thriving in a pot?
You’re not alone! Here are answers to the most common concerns—from pruning to pests—so you can enjoy your fragrant, compact gardenia with confidence.
How often should I prune a gardenia tree in a pot?
Prune your gardenia lightly 2–3 times a year: after flowering (to shape), in early spring (to encourage new growth), and summer (to trim leggy stems). Avoid heavy pruning—gardenias bloom on old wood! Use sterilized shears to prevent disease.
Can I prune a gardenia tree in winter?
No, winter is the worst time to prune gardenias. Cold stress weakens the plant, and new growth won’t harden off before spring. Wait until late winter or early spring (when buds swell) to prune. If you must trim, do it minimally in mild winter climates.
Why are my gardenia leaves yellowing, even with proper care?
Yellow leaves often signal overwatering or nutrient deficiencies. Check the soil—it should stay slightly moist but not soggy. Feed with an acidic fertilizer (like 8-3-9) every 4–6 weeks in growing season. Yellow edges? It could be fluoride buildup from tap water—switch to rainwater or distilled.
What’s the best pot size for a gardenia tree?
Start with a 12–15 inch pot for young gardenias and upgrade by 2 inches in diameter every 2–3 years. Gardenias hate root-bound conditions, so ensure drainage holes and use a well-draining mix (peat moss + perlite + sand). A slightly root-restricted pot encourages blooms, but never let roots circle the pot!
Will my potted gardenia bloom as much as one in the ground?
Yes! Potted gardenias can bloom just as beautifully if you mimic their natural needs: bright, indirect light, acidic soil (pH 5.0–6.5), and consistent moisture. Deadhead spent blooms to encourage more flowers. Pro tip: A light Epsom salt spray (1 tbsp/gallon) monthly boosts blooms!
Wrapping up and next steps
Growing a gardenia tree in a pot is a rewarding way to bring tropical elegance to small spaces—whether you’re a beginner or a seasoned plant parent! With the right pruning techniques, well-draining soil, and a touch of patience, you’ll enjoy fragrant blooms year after year.
Remember, regular maintenance (like trimming dead growth and ensuring bright, indirect light) keeps your potted gardenia thriving.
Ready to elevate your indoor or patio garden? Start small: pick your pot, gather your tools, and give your gardenia the care it deserves. Before you know it, you’ll have a lush, aromatic centerpiece that turns heads—and fills the air with sweet perfume! 🌸✨