
Pruning
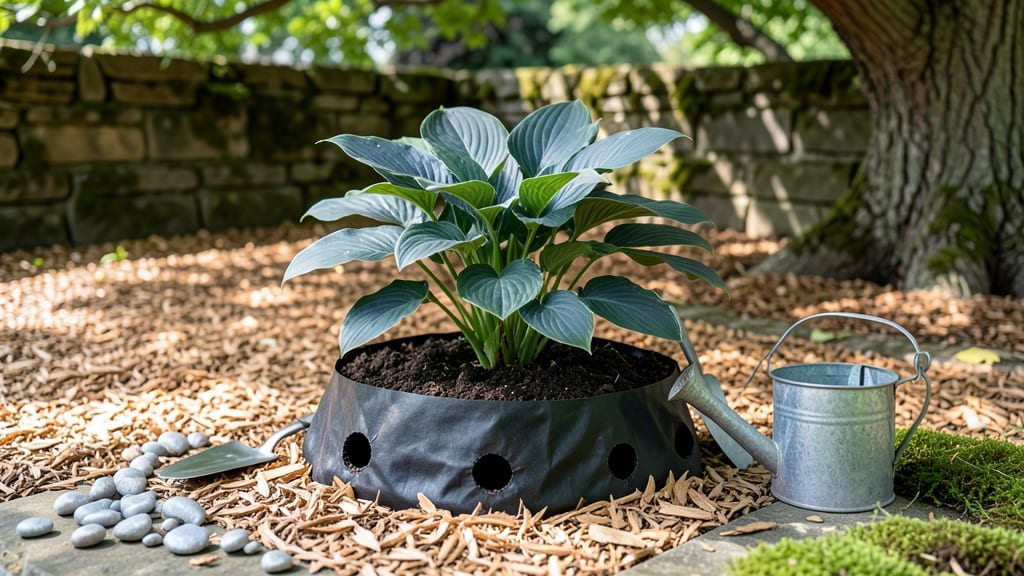
That tree stump isn’t dead weight—it’s a hidden garden gem waiting to happen. 🌿 I turned my own stump into a thriving planter that doubles as a conversation piece, and the best part?
It’s simple enough for a first-time DIYer but looks like a pro designed it. No fancy tools or expensive materials required—just a few household items and a little creativity.
The magic happens in three easy steps: prep the stump, line it to protect your soil, and fill it with plants that love shallow roots.
I used a basic plastic liner and potting mix, but you can get fancy with painted stumps, solar lights, or even a mini water feature. The possibilities are endless, and the sustainability win? You’re giving new life to something that would’ve just rotted away.
By the time you’re done, you’ll have a self-watering planter that stays moist longer, resists weeds, and adds height to your garden beds. My favorite combo is ferns, moss, and small succulents—it looks lush without needing constant care. Plus, kids (and neighbors) love climbing inside to "help" water the plants.
Works for any stump size, from tiny tabletop versions to full-size garden statements. Whether you’re going for rustic charm or modern minimalism, this project proves that garden design doesn’t need to break the bank—or the planet. Ready to get started?
📚 In This Guide
- What you need
- Instructions
- Tips and common mistakes
- Wrapping up and next steps
What you need
- ● Tree stump: A freshly cut (or dried) stump, ideally 6–12 inches in diameter. Pro tip: If the stump is still wet, let it dry for a few days to prevent rot!
- ● Drill or auger: A ½-inch to ¾-inch bit for creating drainage holes (rent one if needed).
- ● Saw (hand saw or power saw): To carve out the top of the stump for planting depth (aim for 4–6 inches deep).
- ● Sandpaper (80–120 grit): To smooth rough edges and create a polished finish.
- ● Landscape fabric: A 12-inch square to line the planter and prevent soil loss.
- ● Potting soil: A 5–10 gallon bag of well-draining mix (add perlite or compost for extra fluff!).
- ● Mulch or decorative stones: 1–2 gallons to top off and beautify your planter.
- ○ Paint or sealant (optional but fun!): Outdoor-safe wood stain or paint to customize your stump (e.g., 1 quart of non-toxic sealant).
- ● Small plants: Succulents, herbs, or flowers that thrive in containers (e.g., 3–5 plants depending on stump size).
- ● Drainage layer: ½-inch gravel or pebbles to improve water flow.
- ● Watering can with a long spout: For easy top-ups without over-saturating.
- ● Stump cap or lid: A decorative cover to hide the raw cut if desired.
- ● LED solar lights: Tiny stakes to add ambiance to your garden oasis!
Step-by-Step instructions for creating a tree stump planter
Transform that old stump into a charming planter with just a few easy tools and materials.
🪴 Step 1: Clean and Prepare the Stump
Start by removing any loose bark or debris from the stump using a pruning saw or handsaw. Cut away any protruding roots or splintered edges to create a smooth surface—this prevents injuries and makes planting easier. If the stump is still attached to the tree, you’ll need to cut it flush with the ground using an axe or chainsaw. Wear gloves and safety glasses for this step; stumps are often rough and splintered.
Once the stump is clean and stable, let it dry completely in the sun for 24-48 hours. This prevents mold growth and ensures your liner stays in place. If the stump is still damp, moisture can cause rot or make the liner slippery. I like to give mine a quick sanding with 80-grit sandpaper to smooth out any rough patches—just enough to avoid splinters when handling.
💧 Step 2: Line the Stump and Add Drainage
Cut a plastic nursery pot liner or heavy-duty trash bag to fit inside the stump, leaving 2-3 inches of extra material at the top to create a rim. This liner prevents soil from spilling out and protects the stump from moisture damage over time. If your stump has deep crevices, fold the liner into them to maximize space. For drainage, poke 4-6 small holes in the bottom of the liner using a screwdriver or knife—this keeps roots healthy by preventing waterlogging.
Place a layer of small rocks or gravel (about 1 inch deep) at the bottom of the liner before adding soil. This creates a drainage layer that keeps excess water from pooling at the roots. If your stump has a natural depression in the center, use a trowel to level the rocks evenly. I always test the drainage by pouring a little water into the liner—if it drains within 10-15 seconds, you’re good to go.
☀️ Step 3: Fill With Soil and Plant Your Choices
Fill the liner with a mix of potting soil and compost (about 60% soil, 40% compost) to give your plants the nutrients they need. Press the soil gently into the crevices of the stump to create a snug fit—this helps the liner stay in place. For a 4-inch diameter stump, you’ll need about 2-3 gallons of soil, while larger stumps (6+ inches) can hold 4-5 gallons. Leave 1 inch of space at the top to prevent spillage when watering.
Plant shallow-rooted annuals like fuchsias, impatiens, or moss—they thrive in the moist conditions a stump planter provides. For a whimsical touch, add air plants or succulents to the crevices along the sides. Water thoroughly after planting, then check the soil every 2-3 days to keep it moist but not soggy. Here’s the thing—stump planters dry out faster than ground-level pots because they’re exposed on all sides, so consistent watering is key.
✂️ Step 4: Maintain and Refresh Seasonally
Fertilize lightly every 4-6 weeks with a balanced liquid fertilizer (10-10-10) to keep your plants vibrant. Since stump planters have limited soil volume, over-fertilizing can burn roots, so always dilute to half-strength. In late fall, remove spent plants and refresh the soil with a new layer of compost. If the liner starts to sag or soil spills out, trim the excess liner material and tuck it back in.
For a long-lasting stump planter, seal the exterior with outdoor wood sealant every 1-2 years to protect it from rot and pests. I like to apply it in early spring before planting season begins. With proper care, your stump planter can last 5-10 years, becoming a charming focal point in your garden. The best part? It’s a zero-waste project that gives new life to something you’d otherwise remove.
Tips & tricks for perfect tree stump planters
Here's what nobody tells you—these little details make all the difference between a charming garden feature and a maintenance headache.
Safety First: I can't stress this enough—stumps are deceptively sharp. Always wear heavy-duty gloves when handling them, even after cleaning. The rough edges can cause nasty splinters that take days to heal. I also recommend wearing long sleeves and safety glasses when cutting—those wood chips fly faster than you'd expect! This is especially important in Step 1 when you're removing bark and roots.
Liner Selection: While plastic nursery liners work perfectly, heavy-duty trash bags can be a great free alternative—just make sure they're thick enough to hold soil without tearing. For extra durability, double up with two thinner bags instead of one thick one. The key is leaving that 2-3 inch rim—this creates a clean edge for watering and prevents soil from spilling over when you're checking moisture levels every 2-3 days.
Drainage Test: That 10-15 second drainage test in Step 2 is your secret weapon. If water pools in the liner, your plants will develop root rot faster than you can say "moldy moss." For stumps with irregular shapes, I like to add a few extra holes around the edges—not just the bottom. Think of it like creating little drainage channels that work together to keep water moving.
Soil Mix Pro Tip: The 60% soil, 40% compost ratio is perfect, but here's the thing about stump planters: they dry out faster than regular pots. To combat this, I add a handful of perlite or vermiculite to the mix—it helps retain moisture while still allowing airflow. This is especially helpful for those shallow-rooted annuals like fuchsias that need consistent moisture without becoming waterlogged.
Pro Tips for Make Tree Stump Planter
- Here's what nobody tells you—these little details make all the difference between a charming garden feature and a maintenance headache.
- Safety First: I can't stress this enough—stumps are deceptively sharp.
- Liner Selection: While plastic nursery liners work perfectly, heavy-duty trash bags can be a great free alternative—just make sure they're thick enough to hold soil without tearing.
Frequently asked questions
Got questions about turning a tree stump into a planter? You’re not alone! Here are some of the most common queries—and their simple solutions—to help you create your upcycled garden oasis with confidence.
Can I use any tree stump for a planter?
Not all stumps are created equal! Softwood stumps (like pine or willow) rot faster and may not last long, while hardwoods (oak, maple, or fruit trees) hold up best. Avoid stumps from diseased trees—they might harbor pests or pathogens. Pro tip: If the stump is already decaying, reinforce it with a sturdy liner or container.
How long does it take to prepare a stump for planting?
Prep time varies! Hollowing out the stump (with a drill or chainsaw) takes 1–3 hours depending on size. Adding drainage holes and lining it adds another 30–60 minutes. If you’re impatient, skip the drilling and use a pre-made stump planter kit for a quicker fix.
What plants thrive in a tree stump planter?
Stump planters work best for shade-loving, moisture-retentive plants. Try:
- Ferns or ivy (great for trailing greenery)
- Hostas or astilbes (low-maintenance perennials)
- Moss (for a whimsical, fairy-garden vibe)
- Herbs like mint or parsley (if the stump gets partial sun)
What if my stump planter leaks or drains too fast?
Leaks happen! If water pools at the base, check your drainage holes—they might be clogged with debris. For fast drainage, add a layer of gravel or broken pottery at the bottom before lining. If the stump cracks, seal gaps with waterproof silicone or a flexible liner.
Do I need to cover the stump planter in winter?
It depends on your climate! In freezing temps, wrap the stump with burlap or frost cloth to protect roots. If you’re in a mild zone, a thick layer of mulch around the base will suffice. Pro tip: Empty and store delicate plants (like annuals) in pots until spring to avoid winter damage.
What’s the easiest alternative if I don’t want to drill a stump?
No chainsaw? No problem! Try these low-effort alternatives:
- Pre-made stump planters: Buy a plastic or ceramic liner that fits over the stump (no drilling needed!).
- Hanging planters: Suspend baskets or pots near the stump for a similar aesthetic.
- Stump wrap garden: Drape a fabric planter bag around the stump and fill it with soil.
Wrapping up and next steps
Transforming a leftover tree stump into a vibrant planter is a rewarding way to breathe new life into your garden—and you’ve got all the tools to make it happen! 🌱 Whether you’re a seasoned gardener or a DIY beginner, this project is simple, eco-friendly, and endlessly creative.
With just a few materials and a little patience, you’ll create a stunning focal point that elevates your outdoor space.
Now that you’re inspired, grab your tools and get started! 💪 Ready to turn that stump into a thriving garden oasis? Share your progress or final design with the gardening community—we’d love to see your masterpiece!