
How To
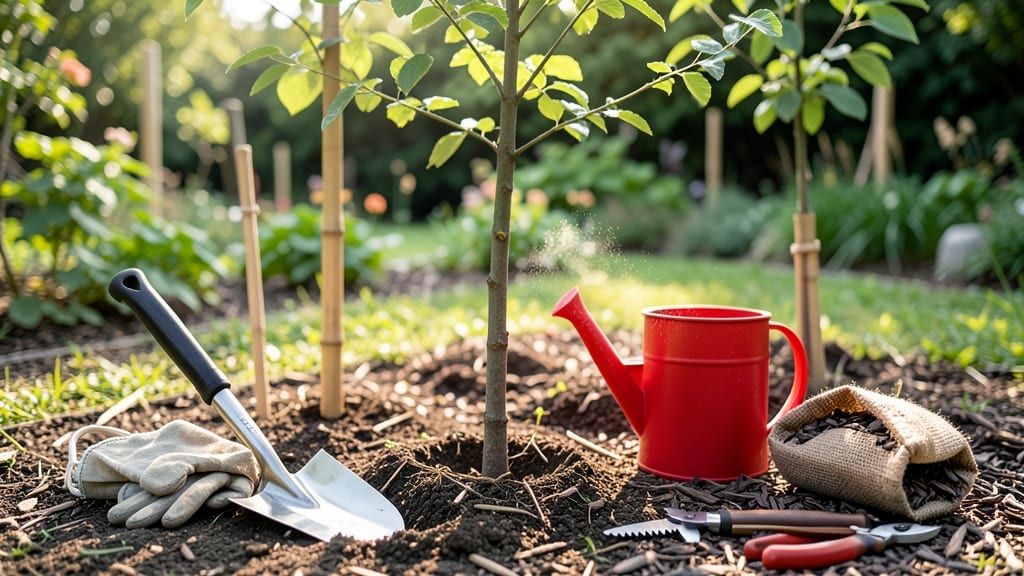
Transplanting tree shoots saves them from root-bound stress and sets them up for decades of growth. 🌳 I’ve moved more young trees than I can count, and the difference between a thriving transplant and a struggling one comes down to three key steps: timing, root care, and aftercare.
The best time to transplant is when trees are dormant—late fall or early spring—so they’re not competing with new growth. Dig carefully to preserve roots, keep the root ball intact, and replant at the same depth as before. Water deeply right after transplanting to eliminate air pockets in the soil.
Aftercare is where most people fail. Mulch around the base (but not touching the trunk) to retain moisture, and water consistently for the first 6-8 weeks. Prune any damaged branches immediately, but avoid heavy pruning—it stresses the tree when it’s already adjusting.
With the right approach, your transplanted tree shoots will establish roots and grow stronger than ever.
📚 In This Guide
- What you need
- Instructions
- Tips and common mistakes
- Wrapping up and next steps
What you need
- ● Sharp garden pruners or shears – 1 pair (sterilized with rubbing alcohol to prevent disease).
- ● Trowel or spade – 1 medium-sized (8-12 inches) for digging roots and planting holes.
- ● Garden fork or root lifter – 1 (helps loosen compacted soil around roots without damaging them).
- ● Watering can or hose with a gentle spray nozzle – 1 (for hydration before, during, and after transplanting).
- ● Compost or well-aged manure – 2-3 gallons (mix with soil to enrich the new planting site).
- ● Mulch (pine straw, wood chips, or shredded leaves) – 1-2 bags (2-3 inches thick to retain moisture and suppress weeds).
- ○ Rooting hormone (optional but recommended) – 1 small bottle (speeds up root establishment).
- ○ Stakes and soft ties (optional) – 2-4 stakes + 4-6 ties (for support if the shoot is tall or top-heavy).
- ● Choose a cloudy day or late afternoon to minimize transplant shock from direct sunlight.
- ● Ensure the new location has well-draining soil and matches the tree’s sunlight/water needs.
- ○ Test the soil pH (optional) – Aim for a range of 6.0-7.0 for most tree shoots.
- ○ Have a helper (optional but handy) to stabilize the shoot while you dig.
Step-by-Step instructions for transplanting tree shoots
Here’s how to rescue root-bound young trees and give them a fresh start—without stressing the roots.
🪴 Step 1: Prepare the New Planting Site
Choose a location with 6+ hours of sunlight daily and soil that drains well. Dig a hole twice as wide as the root ball but only as deep as the container’s height. This prevents burying the trunk too deep, which can cause rot. Loosen the sides of the hole with a shovel to encourage root spread.
Amend the native soil with 2-3 inches of compost mixed into the bottom and sides of the hole. This improves drainage and provides nutrients for the tree’s first critical weeks. Avoid heavy fertilizers—they can burn young roots. Water the hole deeply before planting to settle the soil.
🌱 Step 2: Gently Remove the Tree Shoot from Its Container
Water the tree 24 hours before transplanting to reduce root shock. Turn the container upside down, cradling the base of the stem with one hand while tapping the sides firmly. If the root ball resists, slide a knife around the edges to loosen it. Never pull or twist—this tears delicate roots.
Inspect the roots for circular growth (a sign of root-bound stress). If roots spiral tightly, gently tease them apart with your fingers. This encourages outward growth instead of circling the new hole. Handle the tree by its root ball, not the stem—you’ll avoid damaging the bark.
✂️ Step 3: Plant at the Correct Depth and Stabilize
Place the tree in the hole so the top of the root ball sits level with the surrounding soil line. Fill the hole with native soil, tamping lightly every 2 inches to eliminate air pockets. Burying the trunk too deep suffocates the tree; too shallow exposes roots to drying winds.
Create a watering well around the base by mounding soil slightly higher than the surrounding area. This directs water straight to the roots. Insert 3-4 wooden stakes around the perimeter and loosely tie the tree to one with soft twine. This stabilizes it without restricting growth.
💧 Step 4: Water Deeply and Mulch for Retention
Water the tree slowly but deeply until moisture seeps 6 inches down into the soil. This encourages roots to grow outward instead of staying shallow. Avoid overhead watering—it compresses soil and washes away nutrients. Use a soaker hose or drip irrigation for even moisture.
Spread 2-3 inches of mulch (wood chips or shredded bark) over the soil surface, keeping it 6 inches away from the trunk. Mulch retains moisture and regulates soil temperature, but too much can smother roots. Replenish mulch annually as it decomposes—never let it touch the bark.
☀️ Step 5: Monitor and Adjust for the First Month
Check the soil every 2-3 days—it should feel moist but not soggy to the touch. Young trees wilt quickly if underwatered but suffocate if overwatered. Adjust your schedule based on rainfall; drought stress shows as yellowing leaves or crispy leaf edges.
After 4-6 weeks, remove the stakes if the tree stands upright on its own. Prune any dead or damaged branches with clean shears, cutting at a 45-degree angle just above a leaf node. This promotes healing and directs energy to root growth. Avoid heavy pruning—focus on removing only what’s necessary.
Tips & tricks for transplanting tree shoots successfully
Transplanting young trees doesn't have to be stressful—these key strategies will help you avoid common pitfalls and give your tree the best chance to thrive.
Timing is Everything: The 24-hour pre-watering before transplanting is non-negotiable. This simple step reduces root shock by ensuring the root ball stays hydrated during the delicate removal process. I've seen trees wither within days when skipped—don't make that mistake! After transplanting, maintain this moisture by watering deeply every 2-3 days until new root growth appears.
The Root Ball Rescue: When you notice circular root growth in Step 2, this is your tree's way of telling you it's been root-bound. Gently teasing these roots apart with your fingers (wearing gloves helps) encourages outward growth rather than the suffocating spiral pattern. Think of it like untangling headphones—patience prevents damage. If roots are particularly stubborn, a small hand fork can help loosen them without tearing.
Depth Matters More Than You Think: That subtle detail about keeping the top of the root ball level with the soil line in Step 3 is critical. Burying too deep creates a suffocating environment that promotes rot, while planting too shallow exposes roots to drying winds. I've seen trees planted just 1 inch too high struggle for years—use a small stake as a reference marker if you're unsure of the original soil line from the container.
Mulch Like a Pro: The 2-3 inches of mulch you apply in Step 4 isn't just decorative—it's a moisture regulator and temperature stabilizer. But here's the secret: keep that mulch volcano away from the trunk. That 6-inch clearance prevents rot while still protecting roots. I've seen gardeners accidentally smother trees by piling mulch right against the bark, which can actually kill the tree over time.
Pro Tips for Transplant Tree Shoots
- Transplanting young trees doesn't have to be stressful—these key strategies will help you avoid common pitfalls and g...
- Timing is Everything: The 24-hour pre-watering before transplanting is non-negotiable. This simple step reduces root ...
- The Root Ball Rescue: When you notice circular root growth in Step 2, this is your tree's way of telling you it's bee...
Frequently asked questions
Got questions about transplanting tree shoots? You’re not alone—this process can feel tricky, especially when you’re working with delicate young plants. Below, we’ve rounded up the most common questions to help you feel confident before you dig in!
When is the best time of year to transplant tree shoots?
The ideal window is early spring or fall when temperatures are mild, and the tree is dormant or actively growing but not stressed. Avoid extreme heat or frost—root systems recover best in 50–70°F (10–21°C) conditions. Pro tip: Overcast days reduce transplant shock!
Can I transplant tree shoots in pots instead of planting them directly in the ground?
Container transplanting
is a great option for small shoots, especially if you’re unsure about soil quality or need mobility. Use well-draining pots (at least 12 inches deep) with a mix of potting soil and compost. Just remember to repot into the ground within 1–2 years to avoid root-binding.
How often should I water tree shoots after transplanting?
Water deeply every 2–3 days for the first 2 weeks, then taper to once a week (adjust for climate). Overwatering can suffocate roots, while underwatering stresses them. Check soil moisture 2 inches below the surface—if it’s dry, it’s time to hydrate!
What should I do if my transplanted tree shoot’s leaves turn yellow?
Yellowing leaves often signal transplant shock or root damage. First, ensure proper watering (not too much, not too little). If the issue persists, check for pests (like spider mites) or nutrient deficiencies. A light foliar feed with seaweed extract can help revive stressed plants. Monitor for wilting—this could mean deeper root issues.
Do I need to prune my tree shoot before transplanting?
Light pruning (trimming 1/3 of the foliage) can reduce stress, but avoid heavy cuts. Focus on removing dead or damaged branches and any that overlap. Sterilize your shears with rubbing alcohol to prevent disease. Prune just before transplanting for the best results!
Wrapping up and next steps
Transplanting tree shoots may seem intimidating, but with the right tools, timing, and care, you can give your young trees a thriving new home! 🌱 Remember, patience and preparation are key—whether you’re rescuing root-bound saplings or expanding your garden.
Now that you’re equipped with the know-how, take the next step: pick a sunny day, gather your supplies, and give those shoots the fresh start they deserve. Happy planting!