
Container Gardens
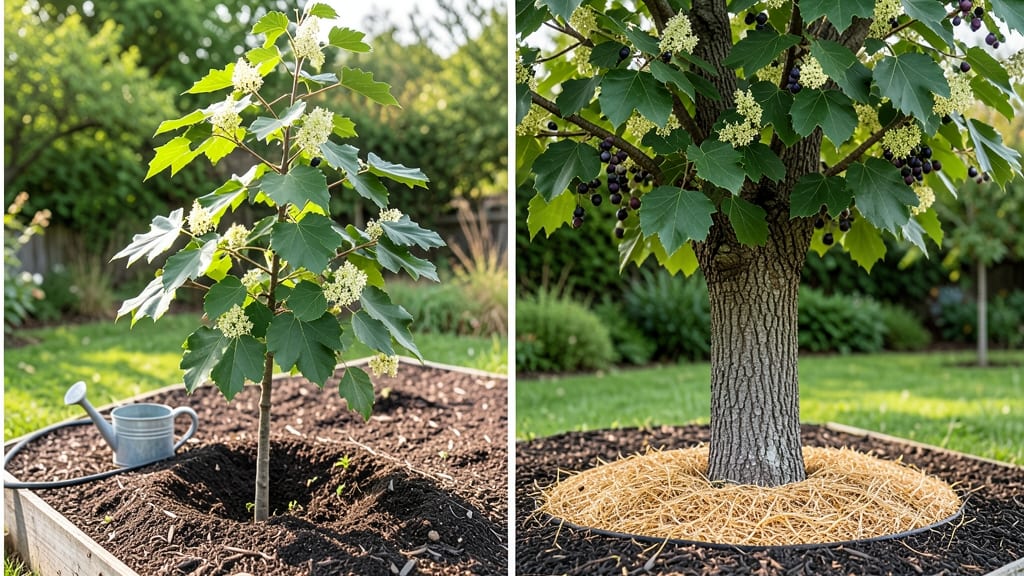
Mastering the mulberry tree growing conditions in containers is all about balancing sunlight, drainage, and space—just like I did with my once-leggy, struggling tree that now bursts with fruit each summer.
The secret lies in mimicking its natural habitat while working with limited space, and I’ll show you exactly how to do it.
Mulberries thrive in full sun (at least 6-8 hours daily) and well-draining soil that mimics their wild, rocky roots. Your container needs drainage holes and a mix of potting soil with perlite or sand to prevent soggy roots—root rot is the #1 killer of potted mulberries.
Choose a container at least 24 inches deep and wide, since these trees have aggressive root systems.
With the right setup, your mulberry will reward you with vibrant green foliage and sweet berries by its second year. The key is consistent watering (keep soil moist but not waterlogged) and occasional pruning to shape the tree.
I’ve seen mine grow 6-8 feet tall in containers with proper care, and the berries are worth every effort.
Whether you’re in Zone 5 or 9, mulberries adapt well—just adjust your container’s winter protection in colder climates. The real magic happens when you watch those first berries form, turning purple in the sun. Let’s get your tree growing strong!
📚 In This Guide
- What you need
- Instructions
- Tips and common mistakes
- Wrapping up and next steps
What you need
- ● Container: A large, sturdy pot (at least 20 gallons) with drainage holes. Pro tip: 💡 Opt for a fiberglass or heavy-duty plastic container to prevent cracking as the tree grows.
- ● Potting Mix: A well-draining blend like 60% garden soil, 30% perlite, and 10% compost (or a commercial cactus/succulent mix for extra drainage).
- ● Mulberry Tree Sapling: Choose a dwarf variety (e.g., Morus alba ‘Illinois Everbearing’) for container-friendly growth.
- ● Fertilizer: A balanced, slow-release 10-10-10 fertilizer or organic options like fish emulsion or worm castings.
- ● Drainage Layer: 2–3 inches of gravel or broken pottery at the bottom of the container.
- ● Watering Can or Hose: With a gentle spray nozzle for even moisture.
- ● Pruning Shears: Sharp, sterilized shears for shaping and maintenance.
- ● Container Stand: Adjustable legs to optimize sunlight exposure.
- ● Self-Watering System: A wicking bed or drip irrigation for consistent moisture.
- ● Tree Support: A small stake or bamboo pole for young saplings.
- ● Mulch: Wood chips or straw to retain soil moisture and regulate temperature.
- ● Soil pH Tester: To ensure your mix stays in the ideal 6.0–7.0 range.
Step-by-step guide to mulberry tree growing conditions in containers
Here’s how to create the perfect environment for container-grown mulberries—sunlight, drainage, and soil all play critical roles.
Select the Right Container and Drainage System
Choose a container that’s at least 18 inches deep and 24 inches wide to accommodate the mulberry’s extensive root system. Mulberries grow aggressively, so opt for a heavy, sturdy pot—these trees can tip over if planted in lightweight containers. Ensure the pot has multiple drainage holes at the bottom to prevent root rot, which is a common killer of container-grown mulberries.
If your container lacks drainage, drill ¼-inch holes along the bottom and cover them with landscape fabric to prevent soil from washing out. Place a 2-inch layer of gravel or broken pottery in the bottom third of the pot to create an air gap and improve drainage. This layer is non-negotiable—mulberries despise soggy roots and will show stress through yellowing leaves if water pools around their roots.
Prepare Well-Draining, Nutrient-Rich Soil
Fill the container with a custom soil mix designed for large trees: blend 60% high-quality potting soil, 30% perlite or coarse sand, and 10% compost. This combination ensures aeration while retaining enough moisture for the mulberry’s deep roots. Avoid garden soil—it compacts in containers and suffocates roots, leading to stunted growth.
Before planting, moisten the soil mix until it’s evenly damp but not saturated. You’ll know it’s ready when a handful compresses slightly but doesn’t drip water. Mulberries thrive in slightly acidic to neutral soil (pH 6.0–7.0), so test your mix with a pH meter if possible. If the soil is too alkaline, amend it with sulfur or peat moss to lower the pH gradually.
Position for Maximum Sunlight and Airflow
Mulberries demand full sun exposure (6–8 hours daily) to produce fruit and maintain vigor. Place your container in a south-facing location where it receives unfiltered sunlight. If you’re in a hot climate, provide partial afternoon shade during peak summer months to prevent leaf scorch, which appears as crispy, brown edges on leaves.
Ensure the container has good airflow on all sides—mulberries are susceptible to fungal diseases like powdery mildew in stagnant air. Space containers at least 3 feet apart and avoid placing them against walls or fences that block circulation. You’ll notice healthier growth and fewer pest issues when the tree isn’t crowded or suffocating.
Water Deeply and Maintain Consistent Moisture
Water mulberries deeply once a week, allowing 1–2 gallons of water to soak through the soil until it drains from the bottom. Check moisture by sticking your finger 2 inches into the soil—if it feels dry, water again. Overwatering is the fastest way to kill a container mulberry, so always let the top 1–2 inches of soil dry out between waterings.
During the first year, mulberries establish roots slowly and may show signs of stress if underwatered—leaves will curl or drop prematurely. In hot weather, you may need to water every 4–5 days, but never let the soil stay soggy. Use a moisture meter for accuracy, especially in plastic containers where water evaporates more slowly than in terra cotta.
Fertilize and Prune for Long-Term Health
Feed your mulberry once in early spring with a balanced, slow-release fertilizer (10-10-10) at ¼ the recommended rate. Too much fertilizer burns roots, causing yellowing leaves and stunted growth. In late summer, switch to a low-nitrogen, high-potassium fertilizer (5-10-10) to encourage fruit production and cold hardiness for winter.
Prune in late winter or early spring before new growth begins. Remove dead, diseased, or crossing branches to improve airflow and sunlight penetration. Mulberries produce fruit on new wood, so avoid heavy pruning—limit cuts to no more than 25% of the canopy per year. Thin out dense growth to prevent fungal issues and ensure the tree’s structure remains strong.
Tips & tricks for thriving container-grown mulberries
A few key insights will help you avoid the most common pitfalls when growing mulberries in containers—especially when it comes to root health and environmental balance.
Container Stability is Non-Negotiable: Mulberries develop substantial weight as they mature, so your container must be heavy enough to prevent tipping. I’ve seen lightweight plastic pots topple after just one season—opt for ceramic or fiberglass containers instead. If you’re using a decorative pot without drainage, nest it inside a sturdy nursery pot with holes, then place a layer of broken pottery between them to prevent soil compaction at the drainage interface.
The Soil Mix Makes or Breaks Root Health: That 60-30-10 soil blend isn’t just arbitrary—mulberries need aeration to prevent root rot while retaining moisture for their deep taproots. If you’re mixing your own, sift the potting soil to remove large clumps that could create air pockets. For the perlite, use the coarse variety (not fine horticultural perlite) to maintain proper structure. I’ve found that adding a handful of worm castings to the compost portion boosts microbial activity without altering the pH significantly.
Sunlight Adjustments for Different Climates: The 6-8 hours of full sun requirement assumes moderate climates. In hot, dry regions, you’ll need to provide that afternoon shade during peak summer months—otherwise, the leaves will crisp along the edges within weeks. I’ve successfully grown container mulberries in Zone 9 by moving them to a shaded patio from 12-4 PM during July and August. In cooler climates, supplement with grow lights for 2-3 hours daily in winter to maintain photosynthesis levels.
Watering Strategy for First-Year Survival: Those first-year roots are incredibly sensitive to moisture fluctuations, so consistency is key. I’ve found that using a drip irrigation system on a timer set for 15 minutes once weekly (delivering about 1 gallon) creates more stable soil moisture than hand-watering. For hand-waterers, focus the stream directly at the base of the tree rather than the soil surface to encourage deep root growth. The 2-inch soil dryness check works, but I’ve seen better results when I let the top 1-1.5 inches dry out instead.
Pro Tips for Mulberry Tree Growing Conditions
- A few key insights will help you avoid the most common pitfalls when growing mulberries in containers—especially when it comes to root health and environmental balance.
- Container Stability is Non-Negotiable: Mulberries develop substantial weight as they mature, so your container must be heavy enough to prevent tipping.
- The Soil Mix Makes or Breaks Root Health: That 60-30-10 soil blend isn’t just arbitrary—mulberries need aeration to prevent root rot while retaining moisture for their deep taproots.
Frequently asked questions
Got questions about growing mulberry trees in containers?
Here are some of the most common ones—plus straightforward answers to help you cultivate a thriving tree!
How much sunlight does a mulberry tree need in a container?
A mulberry tree thrives in full sun (6–8+ hours daily). In containers, place it in the sunniest spot possible—like a south- or west-facing patio or balcony. If sunlight is limited, expect slower growth and fewer berries. Pro tip: Rotate the pot occasionally for even sun exposure!
How often should I water a mulberry tree in a container?
Water when the top 1–2 inches of soil feel dry (usually every 2–3 days in hot weather). Containers dry out faster than ground soil, so check daily during heatwaves. Overwatering can cause root rot—ensure the pot has drainage holes! Bonus: Mulch the soil surface to retain moisture.
Can mulberry trees survive winter in containers?
Mulberry trees are hardy to USDA Zones 5–9, but container-grown trees need extra protection in cold climates. Move pots to a sheltered spot (like a garage or against a south-facing wall) before frost. Wrap the pot in burlap or use a tree blanket for insulation. Warning: Avoid freezing roots—water sparingly in winter.
What’s the best soil mix for a potted mulberry tree?
Use a well-draining mix like:
- 60% potting soil
- 30% perlite or coarse sand
- 10% compost
Why are my mulberry leaves turning yellow or dropping?
Yellow leaves often signal overwatering, nutrient deficiency, or pests. Check for:
- Root rot: Let soil dry out between waterings.
- Nitrogen deficiency: Fertilize with a balanced 10-10-10 formula in spring.
- Spider mites/scale: Spray with neem oil or insecticidal soap.
How big can a mulberry tree grow in a container?
Mulberry trees can reach 15–25 feet tall in the ground, but in containers, growth is limited by pot size. Choose a 15–20 gallon pot for dwarf varieties (like Morus alba ‘Illinois Everbearing’) to keep it manageable. Prune annually to control height and shape. Remember: Larger pots = slower growth but bigger fruit!
Wrapping up and next steps
Growing a mulberry tree in containers is totally doable—just remember: sunlight, well-draining soil, and a little patience are your best friends! 🌱 With the right setup, you’ll enjoy fresh berries (or stunning foliage) year after year.
Now that you’re armed with the know-how, why not plant that first seedling this weekend? Start small, watch it grow, and soon you’ll be reaping the rewards of your green thumb!