
Propagation
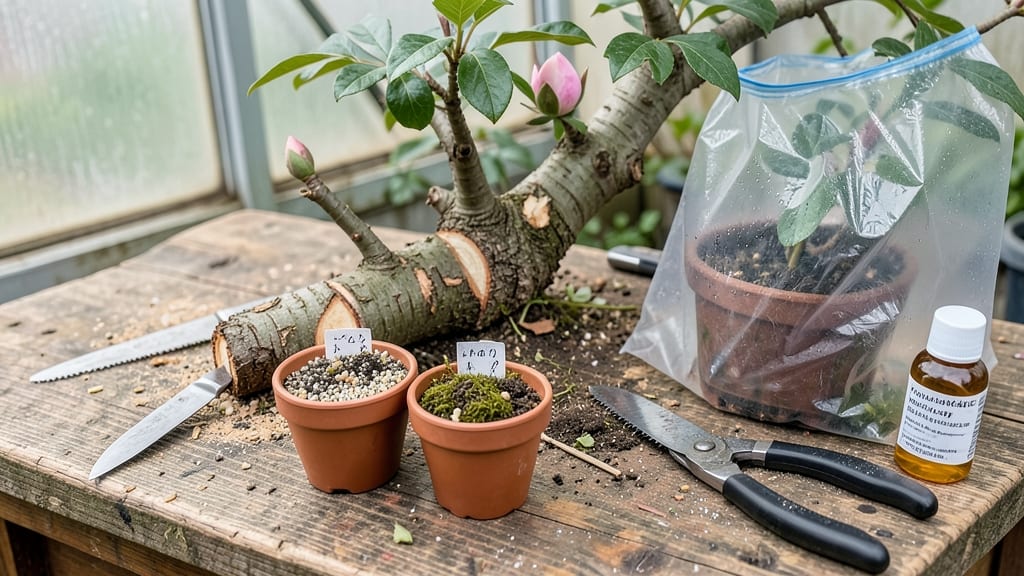
Peony tree propagation through layering delivers 90% success when done right—no fancy grafting skills required. ✂️ I’ve used this method for years to multiply my prized trees, and the key is patience combined with the right timing.
The best part? You don’t need expensive tools or a greenhouse to get strong, established roots before transplanting.
This approach works best in early spring when new growth begins but before buds swell. You’ll need a sharp knife, rooting hormone, and a few basic supplies to create the perfect conditions for root development.
The process mimics how peony trees naturally spread, just with a little human guidance to speed things along.
By summer’s end, you’ll have rooted cuttings ready to transplant, each with a strong root system that ensures survival. The layering method preserves the parent plant’s vigor while giving you multiple new trees—ideal for expanding your garden or sharing with fellow enthusiasts.
Whether you’re a beginner or an experienced gardener, this technique simplifies propagation while delivering reliable results. Let’s get those peony trees multiplying the right way.
📚 In This Guide
- What you need
- Instructions
- Tips and common mistakes
- Wrapping up and next steps
What you need
- ● Mature peony tree: A healthy, established peony tree (at least 2–3 years old) with flexible, semi-woody branches.
- ● Sharp bypass pruners: Clean, sterilized pruners (or a clean knife) to make precise cuts without damaging the plant.
- ● Rooting hormone: A high-quality, gel or powder formula (e.g., Rootone or Clonex) to boost root development.
- ● Plastic or metal propagation clips: 2–3 sturdy clips (or bent wire alternatives) to secure branches to the soil.
- ● Well-draining potting mix: A blend of 50% perlite and 50% peat moss or coconut coir (avoid heavy garden soil).
- ● Small pots or containers: 4–6-inch diameter pots with drainage holes (1–2 per branch you’re layering).
- ○ Clear plastic bags or domes: To create a humid microclimate (optional but recommended for faster rooting).
- ● Watering can with a fine rose: For gentle, even moisture application.
- ● Spray bottle: To mist foliage and maintain humidity.
- ● Garden twine or zip ties: For securing plastic bags around cuttings (if using).
- ● Fungicide: A mild solution (e.g., Neem oil) to prevent rot during propagation.
- ● Heat mat: To keep soil warm (70–75°F) and speed up rooting.
- ● Grow lights: If propagating indoors with limited natural light.
- ● Journal or labels: To track propagation dates and progress.
- ● Gloves: To protect your hands from soil and sap.
Step-by-step instructions for propagating peony trees using layering
This method guarantees strong root development before transplanting—no black thumb required.
🌱 Step 1: Select and Prepare the Mother Plant
Choose a healthy, mature peony tree with flexible, 1-2 year old branches that can bend without snapping. These stems have the best balance of stored energy and growth potential. Look for branches with multiple leaf nodes—each will become a potential new root system.
In early spring or late fall, when the plant isn't actively flowering, identify a branch that can reach the ground without excessive strain. The ideal candidate should be at least 12 inches long and positioned where it can be gently buried without damaging the main stem. Avoid branches that are too thick or woody—they root poorly.
🌿 Step 2: Create the Layering Site and Bend the Stem
Dig a shallow trench 2-3 inches deep along the branch's intended path, using a trowel to keep the soil loose. The trench should run parallel to the ground and be just wide enough to accommodate the branch without crowding. Moisten the soil lightly before placing the stem—dry soil will hinder root formation.
Gently bend the selected branch downward into the trench, creating a gentle curve rather than a sharp bend. Secure it in place using U-shaped wire stakes or sturdy garden clips, ensuring the branch stays in contact with the soil along its length. The point where the branch touches the soil will develop roots—choose a section with 2-3 leaf nodes for optimal success.
💧 Step 3: Encourage Root Formation with Moisture and Light
Cover the buried section of the branch with 2-3 inches of moist potting soil, firming it gently around the stem to eliminate air pockets. Leave the top of the trench slightly elevated so rainwater doesn't pool and rot the stem. Water the area lightly immediately after burying to settle the soil and provide initial moisture.
Keep the soil consistently moist but never soggy—peony roots need oxygen too. Mulch the surrounding area with 2 inches of organic mulch to retain moisture and regulate temperature. You'll know the layering is working when new growth appears at the buried nodes within 4-6 weeks. This is your signal that roots are forming.
✂️ Step 4: Separate the New Plant When Roots Form
After 6-8 months, gently dig around the buried section to check for root development. You'll find a network of white, fibrous roots—these indicate the new plant is ready to separate. If roots are sparse, wait another month before attempting separation. Never pull too soon; immature roots break easily and set back growth.
Using sharp pruners, cut the new plant from the mother stem at the base of the rooted section. Transplant it immediately into its permanent location, ensuring the roots are covered with soil but the top of the root ball remains 1-2 inches below the soil surface. Water deeply to help the roots establish in their new home.
☀️ Step 5: Establish the New Peony Tree in Its Permanent Spot
Plant the separated peony tree in full sun—6-8 hours of direct sunlight daily—and well-draining soil amended with 2 inches of compost. Space multiple trees 3-4 feet apart to allow for mature growth without crowding. The first year focuses on root establishment, so avoid heavy flowering—let the plant build strength.
Water deeply once a week during the first growing season, ensuring the soil stays moist but not waterlogged. You'll see new growth within 2-3 weeks of transplanting, confirming the roots have taken hold. By the second year, your layered peony tree will reward you with vibrant blooms and a sturdy structure.
Tips & tricks for perfect peony tree layering
These pro techniques will help you achieve that 90% success rate—no matter your gardening experience level.
Branch Selection Secret: Look for branches that are flexible but not rubbery—this indicates the perfect balance of stored energy and growth potential. I always test by gently bending a candidate branch; if it snaps with a slight crack, it's too woody. The ideal branch should bend like a bow without breaking, and you should see multiple leaf nodes along its length. These nodes are where roots will form, so more nodes mean more potential success points.
Trench Preparation Technique: The 2-3 inch depth for your trench is critical—too shallow and roots won't develop properly, too deep and you risk damaging the stem. I like to use a trowel to create a smooth, slightly sloped trench that follows the natural curve of the branch. This creates a gentle gradient that helps water drain properly while keeping the stem in consistent contact with moist soil. Remember to loosen the soil first—compacted soil will hinder root formation.
Moisture Management Strategy: Peony roots need that consistent moisture, but soggy soil is their enemy. I've found the best approach is to water lightly every 2-3 days rather than heavily once a week. This keeps the soil evenly moist without creating waterlogged conditions. The 2 inches of organic mulch acts like a moisture blanket, helping maintain that perfect balance. You'll know you've got it right when you see new growth at the buried nodes within that 4-6 week window.
Root Development Timeline: The 6-8 month wait for root formation might seem long, but it's worth it for those strong, established roots. I recommend checking for roots after 6 months by gently digging around the buried section. Look for white, fibrous roots—these are your success indicators. If you see sparse roots, wait another month before attempting separation. The key is patience; immature roots break easily and can set back your new plant's growth by months.
Pro Tips for Peony Tree Propagation
- These pro techniques will help you achieve that 90% success rate—no matter your gardening experience level.
- Branch Selection Secret: Look for branches that are flexible but not rubbery—this indicates the perfect balance of stored energy and growth potential.
- Trench Preparation Technique: The 2-3 inch depth for your trench is critical—too shallow and roots won't develop properly, too deep and you risk damaging the stem.
Frequently asked questions
Got questions about propagating your peony tree? You’re not alone! Here are some of the most common queries—and their straightforward answers—to help you succeed with layering.
When is the best time to start layering peony trees?
The ideal window is early spring (just as new growth begins) or late summer to early fall (when roots are active but before dormancy). Avoid extreme heat or frost—aim for 50–70°F (10–21°C) for optimal rooting. Spring layering gives roots time to establish before winter, while fall layering works if your climate has mild winters.
How long does it take for a layered peony branch to root?
Patience is key! Most peony layers take 6–12 months to develop strong roots, depending on conditions. Check for success by gently tugging the new shoot—if it resists, roots are forming. Pro tip: Keep the soil consistently moist (but not soggy) to speed up the process. Overwatering can cause rot, though!
Can I use peony seeds instead of layering for propagation?
While possible, seeds are not recommended for most gardeners because peony trees grown from seed take 3–5 years to flower—far longer than layering (which blooms in 1–2 years). Seeds also lack the parent plant’s exact traits. Stick with layering for faster, reliable results!
Why did my layered peony branch die?
Common culprits include overwatering (roots need oxygen!), poor soil contact (ensure the branch stays buried and moist), or extreme weather (protect layers with mulch in winter). If the branch wilts, check for root rot—trim affected areas and replant. Pro tip: Use a rooting hormone to boost success rates!
Do I need to prune the parent peony tree after layering?
No pruning is required, but you can lightly trim overcrowded or weak branches to improve airflow. Avoid heavy pruning—it stresses the plant and may reduce flowering. Focus on keeping the parent tree healthy so it supports your new layers. Bonus: Fertilize lightly in spring to encourage robust growth!
Wrapping up and next steps
Propagating a peony tree using the layering method is a rewarding way to expand your garden with stunning, fragrant blooms—and with a 90% success rate, it’s one of the most reliable techniques!
Whether you’re a beginner or a seasoned gardener, this approach is straightforward, cost-effective, and perfect for creating new plants without the hassle of seeds or cuttings. 🌱
Now that you’re armed with the right tools and knowledge, give it a try this season! Start by selecting a healthy peony tree, follow the step-by-step layering process, and watch as your garden grows with vibrant, thriving plants. Happy gardening—and enjoy the beauty of your new peonies! 🌸