
Container Gardens
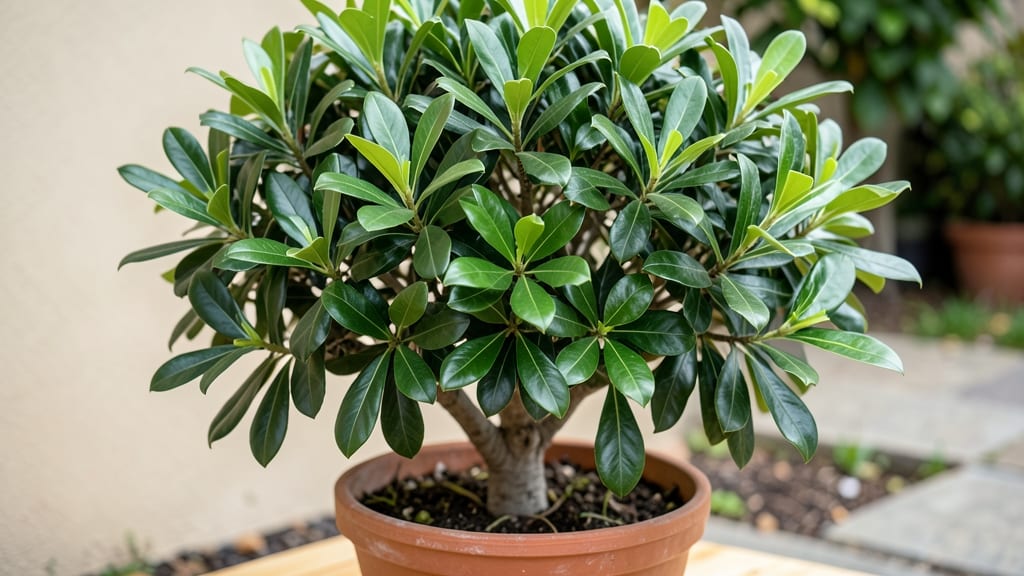
A bay leaf tree potted can transform your kitchen or patio into a fragrant, evergreen corner—if you know the right tricks. 🌿 I’ve wrestled with leggy, sparse plants until I learned the secret: it’s not about fancy containers, but matching light, soil, and pruning to what this Mediterranean native truly craves.
The difference between a bushy, aromatic plant and a sad, sparse one often comes down to these three overlooked details.
Start with a 10-15 gallon pot (minimum) and well-draining soil—think 60% potting mix, 30% perlite, and 10% compost. Place it where it gets 6+ hours of sunlight daily (south-facing windows or full sun outdoors).
Water when the top 2 inches of soil are dry, but never let it sit in soggy soil—root rot is the silent killer of potted bay trees. The real magic happens when you prune back leggy growth in early spring, encouraging that dense, bushy shape you crave.
Within 3-4 months, you’ll smell that familiar bay leaf aroma wafting through your space as new growth emerges. The leaves stay lush and fragrant year-round if you keep it indoors during winter (where temps don’t dip below 50°F).
My potted bay now produces harvestable leaves twice a year, and I’ve never bought fresh bay leaves again—just snip what I need from my own plant.
Works for indoor kitchens, sunny patios, or even balconies—just adjust light and watering for your climate. The key is consistency: too little light means sparse growth, while overwatering leads to yellow leaves.
Master these basics, and you’ll have a perpetual herb source that doubles as living decor. Ready to grow yours?
📚 In This Guide
- What you need
- Instructions
- Tips and common mistakes
- Wrapping up and next steps
What you need
- ● Bay leaf tree (Laurus nobilis) – Opt for a dwarf variety (e.g., 'Angustifolia') or a young sapling (3–5 ft tall) for potted growth.
- ● Pot – A 12–18-inch diameter container with drainage holes (terracotta or ceramic preferred).
- ● High-quality potting mix – A blend of 60% well-draining soil (e.g., cactus/succulent mix) and 40% perlite or coarse sand for aeration.
- ● Slow-release fertilizer – A balanced 10-10-10 or organic option (like worm castings) to kickstart growth.
- ● Drainage layer – 1–2 inches of pebbles or broken pottery at the pot’s base to prevent root rot.
- ● Trowel or small shovel – For planting and soil adjustments.
- ● Watering can or spray bottle – Bay trees prefer moderate moisture (avoid soggy soil!).
- ● Pruning shears – To shape your tree and encourage bushier growth.
- ○ Mulch (optional) – 1 inch of pine bark or wood chips to retain moisture and suppress weeds.
- ○ Support stake (optional) – If your bay tree leans, a bamboo stake or trellis can help.
- ○ Sunlight meter (optional) – To check if your space gets 6+ hours of indirect light daily.
Step-by-step guide to growing a thriving potted bay leaf tree
Here's how to cultivate a lush, aromatic bay leaf tree that fits beautifully in small spaces while thriving for years.
🪴 Step 1: Select the Right Container and Soil Mix
Choose a 12-14 inch diameter pot with drainage holes to accommodate the tree's eventual size. I prefer terracotta because it breathes and helps prevent root rot—a common issue with bay trees. The soil mix should be well-draining yet moisture-retentive, so I blend two parts potting soil, one part perlite, and one part coarse sand. This balance mimics the Mediterranean climate where bay trees thrive naturally.
Fill the pot about two-thirds full with your prepared mix, leaving room for the root ball. Tap the container gently to settle the soil without compacting it. The goal is a loose, airy medium that allows roots to expand freely while preventing waterlogging. If you're repotting an existing plant, choose a container only 2-3 inches larger in diameter than the current one—bay trees prefer being slightly root-bound for optimal growth.
🌱 Step 2: Plant Your Bay Tree with Proper Spacing
Remove the bay tree from its nursery pot and gently loosen the root ball if it appears compacted. Position the tree in the center of your container, ensuring the top of the root ball sits about 1 inch below the pot’s rim. This creates space for mulch and prevents soil from spilling out when watering. Bay trees have a moderate growth rate, so you'll want to leave at least 3-4 inches of space between the plant and the container edges for future expansion.
Backfill around the root ball with your prepared soil mix, pressing lightly to eliminate air pockets. Water thoroughly until moisture runs freely from the drainage holes—this helps settle the soil and removes any air gaps. After planting, I always give the tree a light trim to encourage bushier growth. Simply snip off any leggy stems just above a leaf node, which will prompt new branching.
☀️ Step 3: Position for Optimal Light and Humidity
Bay trees thrive in bright, indirect light but can tolerate 2-3 hours of morning sun daily. Place your potted tree near a south- or east-facing window where it receives plenty of light without harsh afternoon rays that can scorch the leaves. If natural light is insufficient, supplement with a full-spectrum grow light positioned 12-18 inches above the plant for 12-14 hours daily. You’ll notice the leaves darken and grow more vibrant when light conditions are ideal.
Bay trees love humidity—aim for 50-60% relative humidity by misting the leaves 2-3 times weekly or placing the pot on a tray filled with pebbles and water. Avoid letting the pot sit directly in water, as this can lead to root rot. Grouping your bay tree with other houseplants also creates a microclimate that retains moisture. Watch for crispy leaf edges, which signal the air is too dry.
💧 Step 4: Master the Watering Routine for Healthy Growth
Water your bay tree when the top 1-2 inches of soil feel dry to the touch, typically every 5-7 days depending on your home’s humidity and temperature. Stick your finger into the soil—if it’s damp beyond the first knuckle, wait another day or two. Overwatering is the fastest way to kill a bay tree, so always allow excess water to drain completely from the pot’s holes. I use a self-watering pot in my setup to maintain consistent moisture without the risk of soggy roots.
During the growing season (spring and summer), you may need to water more frequently, while winter months will require less frequent watering as the plant enters dormancy. Fertilize monthly from spring to fall with a balanced liquid fertilizer diluted to half-strength. You’ll see new growth and a richer aroma in the leaves when the plant is well-fed and hydrated.
✂️ Step 5: Prune and Maintain for Long-Term Health
Prune your bay tree 2-3 times yearly to maintain its shape and encourage dense foliage. The best time to prune is early spring before new growth begins. Use clean, sharp pruners to make cuts just above a leaf node or bud, which encourages branching. Remove any yellowed, damaged, or crossing branches to improve airflow and reduce disease risk. I also trim back any overly long stems to keep the tree compact and bushy.
Repot your bay tree every 2-3 years or when it becomes root-bound, typically in early spring. Signs it’s time to repot include roots circling the bottom of the pot or soil drying out too quickly after watering. When repotting, choose a container only 2 inches larger in diameter—bay trees prefer being slightly root-bound, which stimulates flowering and leaf production. After repotting, hold off on fertilizing for 4-6 weeks to allow the roots to establish.
Tips & tricks for perfect potted bay leaf tree growth
Here's what nobody tells you about keeping your bay leaf tree thriving in tight spaces—these are the details that make all the difference.
Container Selection: Terracotta pots are ideal for bay trees because they wick away excess moisture, preventing the root rot that plagues many indoor trees. If you must use plastic, choose one with drainage holes and elevate it on pot feet to ensure airflow. The 12-14 inch diameter recommendation isn't arbitrary—this size balances root space with the tree's moderate growth rate, preventing it from becoming root-bound too quickly while still fitting in small spaces. For extra stability, place the pot on a saucer or tray to catch any drainage.
Soil Mix Secrets: That two-part potting soil to one-part perlite and sand ratio isn't just about drainage—it's about mimicking the Mediterranean climate where bay trees evolved. If you're repotting, take this opportunity to refresh the soil completely rather than just adding new mix on top. The loose, airy texture prevents compaction that can strangle roots. Pro tip: Add a handful of worm castings to your mix for natural nutrients and beneficial microbes that boost growth.
Light Optimization: Those 2-3 hours of morning sun are crucial—they provide just enough UV exposure without risking scorching. If your windows don't get direct morning light, supplement with a grow light for 12-14 hours daily, but position it 12-18 inches above the plant to prevent leaf burn. I've found that rotating the pot a quarter turn weekly ensures even growth rather than leaning toward the light source. Watch for leaves that darken and develop a glossy sheen—they're telling you the light conditions are perfect.
Pruning Strategy: The 2-3 times yearly pruning schedule works best when you make clean cuts just above leaf nodes or buds. This isn't just about shaping—it's about encouraging bushier growth. I recommend pruning after the tree has finished flowering in early spring, as this gives it time to recover before summer heat. For a more compact tree, trim back any stems that grow longer than 6 inches, focusing on the lower branches first to maintain that elegant, bushy shape perfect for small spaces.
Pro Tips for Bay Leaf Tree Potted
- Here's what nobody tells you about keeping your bay leaf tree thriving in tight spaces—these are the details that make all the difference.
- Container Selection: Terracotta pots are ideal for bay trees because they wick away excess moisture, preventing the root rot that plagues many indoor trees.
- Soil Mix Secrets: That two-part potting soil to one-part perlite and sand ratio isn't just about drainage—it's about mimicking the Mediterranean climate where bay trees evolved.
Frequently asked questions
Got questions about keeping a bay leaf tree potted thriving in tight spaces? You’re not alone! Here are some of the most common concerns—and their solutions—to help you grow this fragrant beauty with confidence.
How often should I water my potted bay leaf tree?
Water your potted bay leaf tree when the top 1–2 inches of soil feel dry. Overwatering is the #1 killer—stick your finger in the soil to check! In summer, you may water weekly, but reduce to every 2–3 weeks in winter. Drainage is key: Ensure your pot has holes to prevent root rot.
Can a bay leaf tree grow tall in a pot, or will it stay compact?
With proper pruning, a potted bay leaf tree stays manageable (3–6 feet tall). Prune in late winter or early spring to shape it and encourage bushier growth. Use clean shears to trim back overgrown branches by ⅓. No pruning? Expect leggy growth—so grab those shears!
How much sunlight does a potted bay leaf tree need?
Bay leaf trees love sunlight—place yours in a spot with at least 6 hours of direct light daily. A south- or west-facing window or balcony is ideal. Too little light? It’ll grow slowly and lose its aromatic leaves. Pro tip: Rotate the pot occasionally for even growth.
What’s the best soil mix for a potted bay leaf tree?
Use a well-draining mix like 60% potting soil + 30% perlite + 10% sand. Bay trees hate soggy roots! Add a handful of compost for nutrients, but avoid heavy garden soil. Repot every 2–3 years in spring to refresh the mix.
Why are my bay leaves turning yellow or dropping?
Yellow leaves often signal overwatering or pests. Check for:
- Root rot: Let soil dry out between waterings.
- Spider mites/scale: Wipe leaves with soapy water or use neem oil.
- Nutrient deficiency: Feed with a balanced fertilizer (10-10-10) in spring/summer.
Can I grow a bay leaf tree indoors year-round?
Bay trees thrive indoors if you mimic their Mediterranean roots: bright light, moderate humidity, and cool nights (60–70°F). Group pots together to boost humidity, or use a pebble tray. Winter tip: Keep it away from drafty windows or heaters.
Wrapping up and next steps
Growing a bay leaf tree in a pot is a fantastic way to bring fragrant, culinary charm to small spaces—whether you’re a seasoned gardener or a beginner! With the right container, soil, and care, you’ll enjoy lush foliage, aromatic leaves, and even occasional flowers or berries. 🌿✨
Ready to take the next step? Start by selecting your pot and soil mix, then give your bay leaf tree the love it deserves—prune regularly, monitor moisture, and keep it in bright, indirect light.
Before you know it, you’ll have a thriving potted treasure that’s as functional as it is beautiful!