
Planting
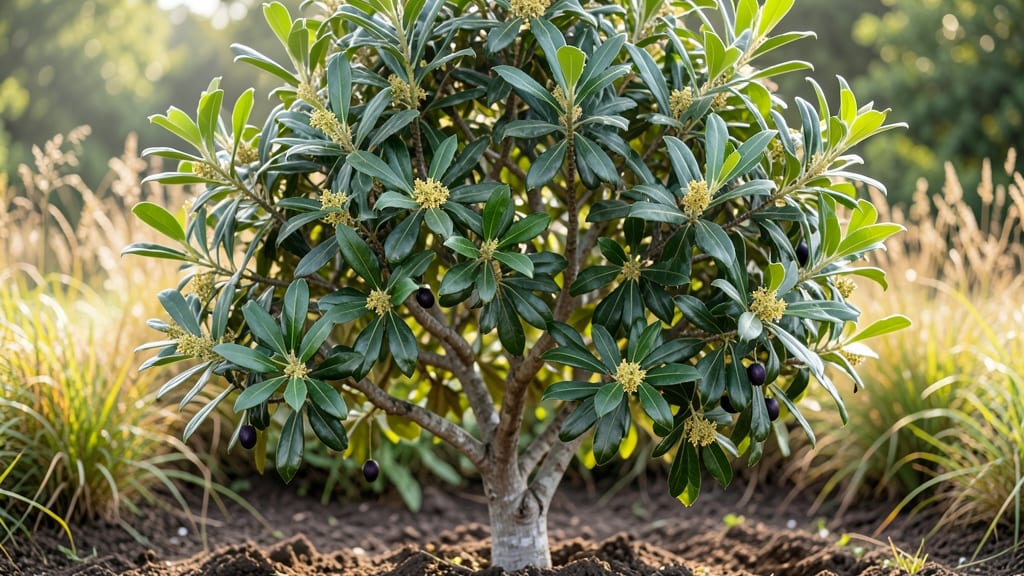
Planting a bay tree means adding a fragrant, evergreen centerpiece that thrives in sunlight and stays lush year-round. 🌿 I’ve grown these resilient plants for years—they’re the backbone of my Mediterranean-style garden, offering both beauty and practical uses in the kitchen.
The key to success is mimicking their native conditions: well-draining soil, full sun exposure (at least 6 hours daily), and protection from harsh winter winds. Bay trees prefer slightly acidic soil, so a mix of garden soil with compost works best.
They’re drought-tolerant once established but appreciate consistent moisture during their first growing season. You’ll love how their glossy leaves release that unmistakable aroma when brushed, and their slow growth means minimal pruning.
The first harvest of leaves for cooking is always a rewarding milestone—just avoid over-pruning, as it can stress the plant. Perfect for borders, containers, or as a standalone specimen. Once planted, they’ll reward you with decades of service and that signature bay scent for years to come.
📚 In This Guide
- What you need
- Instructions
- Tips and common mistakes
- Wrapping up and next steps
What you need
- ● Bay tree plant: Choose between: 1–3 nursery-grown saplings (3–6 feet tall, 1–2 gallons each)
- ● OR bay tree seeds (if starting from scratch—germination can take 30+ days!)
- ● Well-draining soil: 5–10 cubic yards of a mix of: 60% garden soil
- ● 30% compost
- ● 10% perlite or coarse sand
- ● Planting site: Full sun (6+ hours/day) or partial shade (for warmer climates)
- ● Spacious area (bay trees mature 20–40 feet tall/wide!)
- ● Tools: 1 shovel
- ● 1 garden trowel
- ● 1 wheelbarrow (for soil)
- ● 1 watering can or hose (with adjustable nozzle)
- ● Mulch: 2–3 inches of organic mulch (e.g., wood chips or straw)
- ● Slow-release fertilizer (e.g., 10-10-10, 1 lb per tree)
- ● Pruning shears (for shaping young trees)
- ● Tree stakes & ties (if planting in windy areas)
- ● pH testing kit (ideal soil pH: 6.0–7.5)
- ● Drip irrigation system (for consistent moisture)
Step-by-step instructions for planting a bay tree
Here’s how to establish a healthy, sun-loving bay tree that thrives for years.
🌱 Step 1: Choose the Right Location and Prepare the Soil
Bay trees adore full sun—at least 6-8 hours daily—so scout your yard for a spot with minimal shade. I always pick a location with well-draining soil, as soggy roots invite root rot. If your soil is heavy clay, amend it with 2-3 inches of compost mixed into the top 12 inches of soil. Dig a hole twice as wide as the root ball but no deeper—bay trees hate being planted too low.
Loosen the sides of the hole with a shovel to encourage root spread. Here’s where it gets tricky: if your soil is sandy, add a handful of organic matter like peat moss to retain moisture. You’ll know the soil is ready when it crumbles easily between your fingers without clumping.
🪴 Step 2: Plant the Bay Tree at the Correct Depth
Remove the bay tree from its container and gently tease the roots outward if they’re circling. Place it in the hole so the top of the root ball sits 1-2 inches above ground level—this prevents water from pooling around the stem. Fill the hole with soil, pressing lightly to eliminate air pockets, but don’t compact it too firmly.
Water deeply right after planting to settle the soil and encourage root contact. You’ll see the soil sink slightly—top it off with a little more if needed. Mulch around the base with 2-3 inches of organic mulch, keeping it 3-4 inches away from the trunk to prevent rot. This layer helps retain moisture and regulates soil temperature.
☀️ Step 3: Water and Monitor Growth in the First Month
Bay trees are drought-tolerant once established, but newly planted ones need deep watering every 5-7 days until roots spread. Water slowly at the base, avoiding the leaves to prevent fungal diseases. You’ll know it’s time to water again when the top 2-3 inches of soil feel dry—stick your finger in to check.
Watch for new growth in 4-6 weeks. If the leaves yellow or wilt, your tree may need more water or better drainage. A bay tree’s first true leaves should be glossy and dark green—if they’re dull or spotted, trim them off and adjust care. Fertilize lightly with a balanced 10-10-10 formula in early spring to encourage robust growth.
✂️ Step 4: Prune for Shape and Health Yearly
Prune in late winter or early spring before new growth begins. Use clean, sharp pruners to remove any dead, diseased, or crossing branches. Cut just above a leaf node at a 45-degree angle to promote healing. I always shape the tree slightly wider than tall to encourage a bushier form—bay trees can get leggy if left unchecked.
Never prune more than one-third of the foliage in a single year, or you’ll stress the tree. After pruning, apply a slow-release fertilizer to support recovery. You’ll notice fresh, vibrant leaves emerging within 2-3 weeks—that’s your sign the tree is thriving.
Tips & tricks for perfect bay tree planting
Here's what I've learned from planting dozens of bay trees—these details make all the difference between a thriving evergreen and one that struggles.
Location Intelligence: The 6-8 hours of daily sun requirement is non-negotiable, but here's the secret: morning sun is more important than afternoon. I've found that bay trees planted in spots with intense afternoon sun often develop leaf scorch, while those with gentle morning light and afternoon shade thrive. If you're in a hot climate, provide afternoon shade during the hottest months to prevent stress.
Soil Preparation Secret: When amending your soil with 2-3 inches of compost, mix it thoroughly into the top 12 inches—not just on top. I use a garden fork to create channels in the soil where roots can easily penetrate. For sandy soils, I add a handful of peat moss to the bottom of the hole before placing the root ball—this creates a moisture-retaining pocket that's crucial during the first critical weeks.
Planting Depth Caution: That 1-2 inch elevation above ground level is critical, but here's why: bay trees have shallow roots that spread horizontally. Planting too deep suffocates these roots, while planting too shallow exposes them to temperature fluctuations. I always check by placing the root ball in the hole and ensuring the top is just visible above the surrounding soil line.
Watering Wisdom: The 5-7 day watering schedule works best when you water deeply—aim for about 1 gallon per watering session for young trees. I've noticed that bay trees often show stress symptoms not from underwatering, but from inconsistent watering. Use a moisture meter to check the top 2-3 inches of soil before watering again, especially in the first month when roots are establishing.
Pro Tips for Bay Tree Plant
- Here's what I've learned from planting dozens of bay trees—these details make all the difference between a thriving evergreen and one that struggles.
- Location Intelligence: The 6-8 hours of daily sun requirement is non-negotiable, but here's the secret: morning sun is more important than afternoon.
- Soil Preparation Secret: When amending your soil with 2-3 inches of compost, mix it thoroughly into the top 12 inches—not just on top.
Frequently asked questions
How long does it take for a bay tree to grow to a mature size?
A bay tree grows slowly but steadily. In ideal conditions, it can take 5–10 years to reach its full height of 15–20 feet. If you’re growing it in a container, expect it to stay smaller (6–10 feet tall) unless pruned regularly. Patience is key—this evergreen is worth the wait!
Can bay trees survive winter in cold climates?
Bay trees are not frost-tolerant and thrive in USDA zones 8–11. In colder areas, plant them in containers and move them indoors before temperatures drop below 20°F (-6°C). If left outside, they’ll likely suffer frost damage or die. A sunny windowsill or garage works well for winter storage!
What’s the best way to prune a bay tree to encourage bushier growth?
Prune in late winter or early spring before new growth begins. Use clean, sharp shears to trim back leggy branches by ⅓ of their length. Cut just above a leaf node (where leaves meet the stem) to encourage branching. Avoid heavy pruning in fall—it can stress the plant before winter.
Why are my bay tree leaves turning yellow or dropping?
Yellowing leaves usually signal overwatering, underwatering, or nutrient deficiencies. Check the soil—it should stay slightly moist but well-draining. Brown edges? Too dry. Mushy stems? Too wet. Feed with a balanced fertilizer in spring and summer, and repot every 2–3 years if growing in a container.
Can I grow a bay tree from a cutting? If so, how?
Yes! Take a 4–6 inch cutting from a healthy branch in spring or summer. Remove lower leaves, dip the cut end in rooting hormone, and plant in moist potting mix. Keep it in bright, indirect light and mist regularly. Roots should form in 4–8 weeks. Transplant once established!
Are bay tree leaves safe for cooking if grown in my garden?
Only use leaves from mature, pesticide-free plants
(avoid those treated with chemicals). Harvest sparingly—don’t strip the tree bare. Dry leaves in a warm, dark place or freeze them for later use. Fresh leaves add a bold, aromatic flavor to soups, stews, and marinades.
Wrapping up and next steps
Growing a bay tree plant is a rewarding way to add year-round elegance and practicality to your garden or kitchen! 🌿 Whether you're drawn to its fragrant leaves, culinary uses, or evergreen charm, this versatile plant thrives with just a little care.
Now that you’re equipped with the right knowledge—from sunlight needs to pruning tips—it’s time to roll up your sleeves and plant!
Start by choosing a sunny spot, gathering your supplies, and following the steps with confidence. Pro tip: Keep an eye on pests and soil health to ensure your bay tree flourishes for years to come.
Ready to transform your space? Plant your bay tree today and enjoy the benefits of this timeless favorite! 🌱✨