
Size
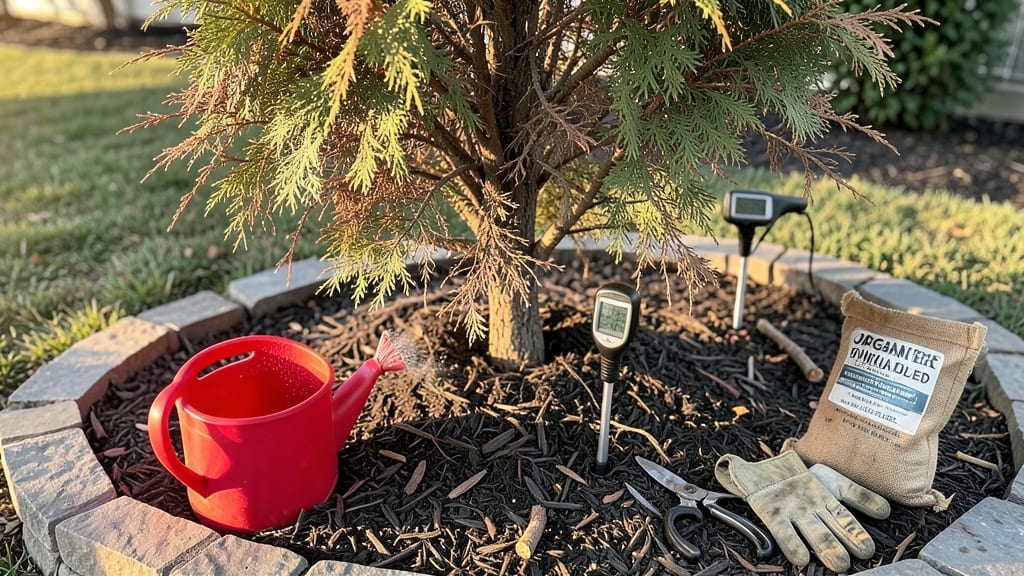
Can you bring a tree back to life? Absolutely—it’s one of the most rewarding gardening challenges you’ll ever tackle. 🌳 I’ve nursed back more trees than I can count, from sad, yellowing oaks to drooping evergreens that looked like they’d given up.
The key lies in diagnosing the real problem first: is it thirsty roots, a fungal infection, or something worse? Most gardeners jump to watering or fertilizing, but those fixes only work if you’ve ruled out pests, compacted soil, or disease.
Start by checking the bark for cracks, the leaves for spots, and the ground for mushrooms—those clues tell you exactly what your tree needs. A simple soil test can reveal if your tree is drowning in its own roots or starving for nutrients.
With the right care, you’ll see new growth within weeks. I’ve watched trees go from skeletal branches to lush canopies in just one growing season—proof that even the most hopeless-looking specimens can bounce back. The secret? Patience and precision in your approach.
This method works for both deciduous and evergreen trees, though evergreens need extra care during drought. If you’re unsure about deep-rooted issues or fungal infections, calling an arborist early can save your tree—and your sanity. Let’s get started diagnosing yours!
📚 In This Guide
- What you need
- Instructions
- Tips and common mistakes
- Wrapping up and next steps
What you need
- ● Pruning shears or handsaw – Sharp, clean tools to trim dead or damaged branches (sterilize with rubbing alcohol first!).
- ● Root stimulator or fungal treatment – Look for mycorrhizal fungi or hydrogen peroxide (3%) to boost root health.
- ● Well-draining potting mix or amended soil – For repotting: 60% topsoil, 30% compost, 10% perlite/sand.
- ● Watering can or hose with a gentle spray nozzle – Avoid overwatering; aim for deep, infrequent soaks.
- ● Mulch (wood chips or straw) – 2–4 inches thick to retain moisture and regulate soil temp.
- ● Garden gloves – Protect your hands from thorns, sap, or soil-borne pathogens.
- ● pH test kit – Ensure soil pH is ideal (most trees prefer 6.0–7.0).
- ● Slow-release fertilizer (balanced NPK, e.g., 10-10-10) – Apply sparingly to avoid burning roots.
- ● Shade cloth or temporary cover – For newly transplanted trees to reduce transplant shock.
- ● Camera or sketchpad – Document the tree’s condition before/after for progress tracking!
Step-by-Step guide to revitalizing a wilted tree
Here's how I've successfully nursed struggling trees back to health—no magic, just smart care.
🌱 Step 1: Assess the Damage and Identify the Problem
Start by examining the tree's leaves, bark, and overall structure. Look for signs like wilting leaves, browning edges, or peeling bark—these clues reveal the root cause. I check for pests like aphids or spider mites by shaking branches over a white sheet. Wilting often signals underwatering, but sudden browning could mean overwatering or root rot.
Run your fingers through the soil surface. If it's bone-dry, the tree needs immediate hydration. If it's soggy, you're dealing with root suffocation. I tap the trunk gently with a small tool—if it sounds hollow, the tree may be beyond saving. Healthy bark should feel firm, not spongy or cracked.
💧 Step 2: Adjust Watering and Soil Conditions
Most wilted trees suffer from inconsistent watering. Dig a hole about 6 inches deep near the dripline (the edge of the tree's canopy) and check soil moisture. If dry, water deeply until it seeps 12 inches down. Use a hose with a gentle spray nozzle to avoid compacting the soil.
For clay-heavy soil, I mix in 2-3 inches of compost around the base to improve drainage. If the tree's in a pot, ensure there are drainage holes—root-bound trees wilt faster. Water only when the top 2 inches of soil feel dry. Overwatering is the #1 killer of struggling trees.
☀️ Step 3: Prune Dead or Damaged Branches
Use clean, sharp pruning shears to remove any branches that are brown, brittle, or dead. Cut just outside the branch collar (the swollen area where the branch meets the trunk). I always sterilize my tools with rubbing alcohol between cuts to prevent spreading disease.
Never remove more than 25% of the tree's foliage at once. This step helps the tree redirect energy to healthy growth. Look for signs of new buds forming—these are your best indicator that the tree is recovering. If you see fresh green leaves emerging, you're on the right track.
✂️ Step 4: Protect and Fertilize Strategically
Shield the tree from harsh afternoon sun with shade cloth if temperatures exceed 85°F. I also apply a 2-3 inch layer of mulch around the base, keeping it 6 inches away from the trunk to prevent rot. Organic mulch like wood chips regulates soil temperature and retains moisture.
Fertilize only if the tree shows signs of nutrient deficiency (yellowing leaves, stunted growth). Use a slow-release, balanced fertilizer (like 10-10-10) in early spring. Avoid heavy-handed feeding—it stresses already weak trees. Water the soil thoroughly after applying fertilizer to help it reach the roots.
⏰ Step 5: Monitor Progress and Adjust Care
Check the tree weekly for new growth. Healthy leaves should be vibrant green, not yellow or brown. If you see fresh shoots or buds, the tree is responding. Keep a journal of watering dates, pruning cuts, and any treatments—patterns emerge that help fine-tune care.
If the tree shows no improvement after 4-6 weeks of consistent care, it may be suffering from a deeper issue like disease or pest infestation. Consult a local arborist for a soil test or professional diagnosis. Sometimes, even the most dedicated efforts can't revive a tree—but you'll know you gave it your best shot.
Tips & tricks for reviving wilted trees
Here's what nobody tells you about bringing trees back from the brink—these are the tricks that actually work.
Visual Diagnosis: When assessing your tree in Step 1, focus on the leaves' undersides first. Pests like spider mites often hide there, and their webbing can look like tiny white threads. I've seen trees with perfect-looking tops but completely defoliated bottoms from aphid infestations—always check both sides of the leaves. The color of wilting leaves also matters: yellowing suggests nutrient issues, while brown edges usually mean underwatering or salt buildup.
Watering Wisdom: In Step 2, the 6-inch deep check is crucial, but don't stop there. After watering, stick a long screwdriver or metal rod into the soil at the dripline—if it comes out clean after 12 inches, you've watered enough. I've made the mistake of assuming my hose provided deep watering when it was just wetting the surface. Clay-heavy soil? Mix in that 2-3 inches of compost and water immediately after—this prevents the soil from repelling water completely.
Pruning Precision: Step 3's 25% foliage limit is non-negotiable, but here's the real trick: prune during the tree's dormant season when it's not actively growing. For most trees, this means late fall or winter. Cutting in spring or summer stresses the tree when it's already working hard to grow. And when you see those fresh green leaves emerging after pruning? That's your reward for doing it right.
Heat Protection: That 85°F threshold in Step 4 isn't just arbitrary—it's when most trees start showing heat stress. I've watched trees go from wilting to crispy in just a few hours when temperatures spike above this. For young trees or newly transplanted ones, consider shade cloth even at slightly lower temperatures. And remember: mulch isn't just for insulation—it also keeps weeds from competing for water and nutrients.
Pro Tips for Can You Bring A Tree Back To Life
- Here's what nobody tells you about bringing trees back from the brink—these are the tricks that actually work.
- Visual Diagnosis: When assessing your tree in Step 1, focus on the leaves' undersides first. Pests like spider mites ...
- Watering Wisdom: In Step 2, the 6-inch deep check is crucial, but don't stop there. After watering, stick a long scre...
Frequently asked questions
about reviving a seemingly dead tree—because even the toughest wood deserves a second chance!Can you revive a tree that’s been dead for years?
Unfortunately, no. If a tree has been completely dead (bark peeling, no buds, hollow trunk) for over a year, it’s unlikely to bounce back. Focus on trees with green shoots, buds, or moist inner bark—these are your best candidates for revival!
How long does it take to see results?
Patience is key! With proper care (watering, pruning, and soil treatment), you might notice new growth in 4–8 weeks. Full recovery can take 1–3 years, depending on the tree’s species, size, and damage. Consistent effort pays off!
What if my tree isn’t responding to water?
If water runs off or sinks in without absorption, the roots may be severely damaged. Try these fixes:
- Soil aeration (use a fork or aerator to break up compacted soil).
- Mulch heavily (3–4 inches) to retain moisture.
- Deep watering (2–3 times per week) at the root zone.
Are there alternatives if my tree can’t be saved?
If revival isn’t possible, consider:
- Removal (safely by a pro) to prevent pests/disease spread.
- Replacement with a native, low-maintenance species suited to your climate.
- Upcycling—turn the wood into furniture, mulch, or art!
Is pruning dead branches harmful if I’m trying to revive the tree?
Not at all—pruning dead/dying branches actually helps! It:
- Reduces stress on the tree.
- Improves airflow and sunlight penetration.
- Prevents pests from infesting weak wood.
Wrapping up and next steps
Reviving a wilted tree isn’t just about hope—it’s about action. Whether you’re pruning, hydrating, or nurturing roots, every step counts toward bringing life back to your green friend. 🌱 Don’t wait for perfection; start small, stay consistent, and watch your efforts grow.
Ready to take the next step? Assess your tree’s health today—check for pests, adjust care routines, or consult a local arborist for expert advice. Your tree (and future garden!) will thank you.