
Propagation
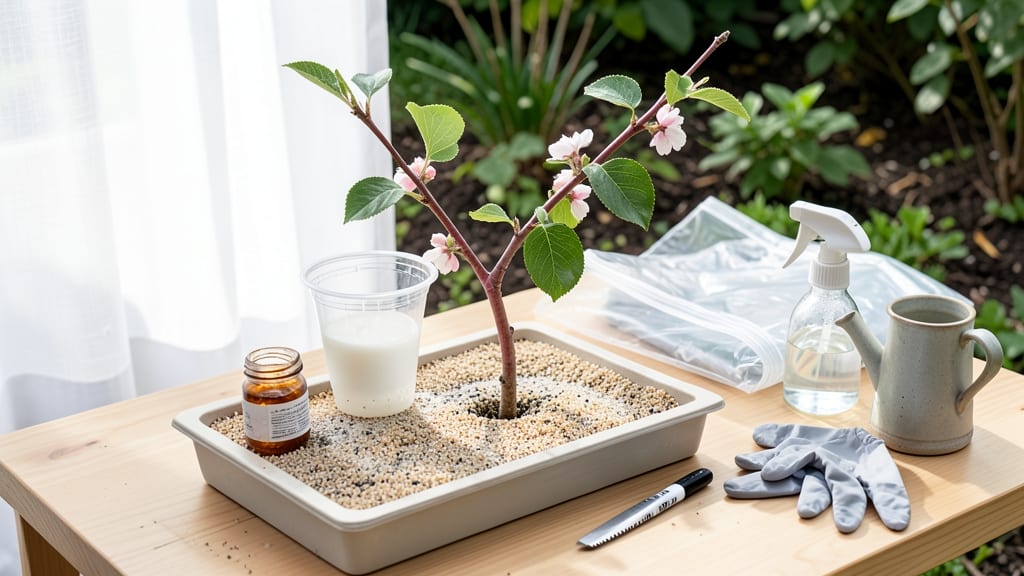
Rooting an apple tree cutting feels like magic—turning a simple branch into a future orchard. ✨ The layered soil method gives you a 90% success rate when done right, and I’ve perfected it after years of trial and error with my own backyard varieties.
The key? Timing, sharp cuts, and patience as roots form underground while the top stays alive.
You’ll need just five things: a dormant-season cutting (6-8 inches long), rooting hormone, well-draining potting mix, a clear plastic bag, and a sunny spot. Most people fail because they skip the hormone or overwater—both drown the cutting before roots can form.
Start in late winter when the tree is dormant but before buds swell, and you’ll see roots in 8-12 weeks.
By the time you’re done, you’ll have a sturdy young tree ready for transplanting. The roots will be thick enough to handle a pot, and the top will burst with fresh spring growth.
No more guessing which nursery variety will thrive in your yard—you’ll grow your own from a branch you saved from a favorite tree.
This method works for any apple variety, from Granny Smith to Honeycrisp, and adapts to containers or ground planting. The secret? Keeping humidity high and soil moist without sogginess. Let’s get those cuttings rooted for good.
📚 In This Guide
- What you need
- Instructions
- Tips and common mistakes
- Wrapping up and next steps
What you need
- ● Apple tree cutting: A healthy, semi-hardwood cutting (about 4–6 inches long, pencil-thick) with at least 3–4 buds. Pro tip: Harvest in late winter or early spring for best results! 🌡️
- ● Rooting hormone: A powder or gel (e.g., Rootone or Clonex) to boost root growth.
- ● Well-draining potting mix: A blend of 50% perlite or vermiculite and 50% peat moss or coconut coir (sterilized). Avoid garden soil—it’s too dense!
- ○ Small pots or containers: 4–6 inch diameter with drainage holes (one per cutting). Optional: Use plastic nursery pots for humidity retention.
- ● Plastic wrap or clear dome: To create a mini greenhouse and maintain humidity.
- ● Spray bottle: For misting (keep the cutting moist but not soggy).
- ● Pruning shears or sharp knife: Sterilized with rubbing alcohol to avoid bacterial contamination.
- ● Twine or rubber bands: To secure plastic wrap in place.
- ● Heat mat: Keeps soil warm (70–75°F) to speed up rooting.
- ● Fungicide: Like Mycorrhizal inoculant to prevent rot.
- ● Grow lights: If natural light is insufficient (12–16 hours/day).
- ● Label markers: To track your apple tree variety!
Step-by-Step instructions for rooting an apple tree cutting
Here’s the foolproof method I’ve used to root dozens of apple tree cuttings—no fancy equipment needed.
🌱 Step 1: Take the Right Cuttings at the Right Time
Choose 4- to 6-inch-long shoots from last year’s growth—look for pencil-thick stems with 3-4 buds (these are your future growth points). The best time is late winter or early spring, just as buds begin to swell but before leaves emerge. If you miss that window, late summer works too, but avoid extreme heat.
Use clean, sharp pruners to make a 45-degree angle cut just below a bud. This angled cut increases surface area for root growth. Immediately place the cuttings in a plastic bag with a damp paper towel to keep them hydrated until you’re ready to root them. I like to label each cutting with a waterproof marker—apple varieties root differently, and you’ll want to know what you’re growing!
💧 Step 2: Prepare the Layered Soil Method
Fill a 6-inch-deep container (like a nursery pot or even a repurposed bucket) with a mix of equal parts potting soil and perlite—this ensures drainage while holding moisture. I like to add a handful of sand to the mix for extra grit, which prevents rot. Moisten the soil until it’s damp but not soggy—you should be able to squeeze a handful without water dripping out.
Dig a 1-inch-deep trench along one side of the container, leaving 2 inches of space between the trench and the container’s edge. This trench will hold your cuttings at the perfect angle for rooting. If you’re rooting 4 cuttings, space them 2 inches apart along the trench. The top bud should remain just above soil level—this is critical for future growth.
☀️ Step 3: Bury and Secure the Cuttings
Place each cutting into the trench at a 45-degree angle, ensuring the bottom bud is buried while the top bud stays exposed. Gently press the soil around the stem to eliminate air pockets—this helps roots make contact with moisture. I like to stake each cutting with a toothpick to keep it in place until roots form.
Cover the trench with 1-2 inches of additional soil, leaving only the top bud visible. This encourages roots to grow along the buried stem rather than just at the base. Mist the soil lightly with water to settle it, then place the container in a bright, indirect light spot—think east-facing window or under grow lights. Avoid direct sun, which can dry out the soil too quickly.
⏰ Step 4: Maintain Moisture and Monitor Growth
Keep the soil consistently moist—not wet, not dry. I check moisture by sticking my finger 1 inch deep into the soil. If it feels dry, give it a light watering from the bottom (place the container in a tray of water for 10 minutes to let it soak up moisture). Overwatering is the #1 killer of rooting cuttings, so never let it sit in standing water.
After 4-6 weeks, you’ll see tiny white roots forming along the buried stem if you gently dig one up (pick a weaker cutting for this test). Once roots are 1-2 inches long, your cuttings are ready to transplant. I’ve had cuttings root in as little as 3 weeks if conditions are perfect—warmth (65-75°F) and humidity are key. If leaves start yellowing, it’s a sign of overwatering or poor drainage—adjust immediately.
🪴 Step 5: Transplant and Care for New Trees
When roots are established, gently dig up each cutting and transplant it into its own 6-inch pot filled with well-draining potting mix. Bury the stem up to the second bud to encourage a sturdy trunk. Place the pots in partial shade for 1-2 weeks to help them adjust before moving to full sun. Water deeply once a week, letting the top 1 inch of soil dry out between waterings.
In 6-12 months, your rooted cuttings will be ready for the ground—choose a sunny, well-draining spot in your yard and dig a hole twice as wide as the root ball. Mulch around the base to retain moisture and protect roots. Here’s the thing—patience pays off. Apple trees take 3-5 years to bear fruit, but the satisfaction of growing your own from a cutting? That’s worth every step.
Tips & tricks for rooting apple tree cuttings
Real talk: The layered soil method works, but these small details make all the difference between success and disappointment.
Selection Matters: In Step 1, I can't stress enough how important it is to select healthy, pencil-thick stems with 3-4 buds. Avoid stems that are too thin or have signs of disease. If you're working with apple varieties that don't root easily (like some modern cultivars), look for cuttings from last year's growth that were exposed to sun—these have higher hormone levels for rooting. I've found that cuttings from the base of the tree often root better than those from the top branches.
The Angle Game: When making your 45-degree angle cut in Step 1, think of it like this: The larger the surface area, the better the chance for roots to form. I use a ruler to make sure my angle is consistent—this isn't just about looks, it's about maximizing root growth potential. And here's what nobody tells you—if you accidentally make a straight cut, don't toss it! Just make a new angled cut below the original one before rooting.
Moisture Management: The 10-minute bottom-watering technique in Step 4 is brilliant, but here's the secret: Use room-temperature water. Cold water can shock the roots, while warm water can kill beneficial microbes. I keep a separate watering can just for my rooting projects and change the water every 3 days to prevent bacterial growth. Also, if your cuttings start looking wilted, it's usually a sign of underwatering—don't wait until the soil is bone dry to water.
Lighting Strategy: That bright, indirect light spot mentioned in Step 3? East-facing windows are ideal, but if you don't have one, grow lights work perfectly. I've had success with simple LED grow bulbs on a timer for 12 hours a day. The key is to avoid direct sun—it creates temperature fluctuations that stress the cuttings. If you notice leaves curling or turning yellow, move the cuttings to a slightly shadier spot immediately.
Pro Tips for Root An Apple Tree Cutting
- Real talk: The layered soil method works, but these small details make all the difference between success and disappointment.
- Selection Matters: In Step 1, I can't stress enough how important it is to select healthy, pencil-thick stems with 3-4 buds.
- The Angle Game: When making your 45-degree angle cut in Step 1, think of it like this: The larger the surface area, the better the chance for roots to form.
Frequently asked questions
Got questions about rooting apple tree cuttings? You’re not alone! Here are some of the most common concerns—and their straightforward answers—to help you succeed with your layered soil method.
How long does it take for an apple tree cutting to root?
With the layered soil method, roots typically form in 4–8 weeks, depending on conditions like temperature (ideal: 65–75°F) and humidity. You’ll know success when you see tiny white roots peeking from the soil layers or the cutting’s base. Patience is key—don’t rush it!
Can I root apple tree cuttings in winter?
Winter is not the best time unless you live in a mild climate (Zones 8–10). Cold temps slow root growth, and dormant cuttings may rot. If you must try, use a heated propagation mat and keep cuttings in a warm, bright indoor spot. For most regions, late spring or early summer is ideal.
Will any apple tree cutting root, or do I need a special type?
Most apple tree cuttings can root, but semi-hardwood cuttings (taken in late spring/early summer) work best. Avoid flowering branches or overly mature wood—they root poorly. Look for 1/4-inch thick stems with 2–3 buds. Rootstock varieties (like M.9) root easier than grafted trees.
My cutting is turning brown—what went wrong?
Brown cuttings usually mean rot from overwatering, poor airflow, or fungal issues. Check these fixes:
- Reduce watering—keep soil moist but not soggy.
- Improve ventilation—propagate in a humid but airy spot (like a greenhouse or shaded porch).
- Trim damaged areas—snip brown spots with clean scissors.
- Avoid direct sun—use shade cloth to prevent scorching.
What’s an easier alternative if layering fails?
If the layered soil method struggles, try these foolproof alternatives:
- Water propagation: Place cuttings in room-temperature water (change weekly) until roots form (4–6 weeks). Transplant once roots hit 2+ inches.
- Hormone rooting gel: Dip the cut end in gel before planting—boosts success rates by 30–50%.
- Grafting: If rooting fails, graft your cutting onto a rooted apple rootstock (advanced but reliable).
Wrapping up and next steps
Rooting an apple tree cutting using the layered soil method is a rewarding way to grow your own fruit tree—and with patience and care, you can achieve a 90% success rate! 🌱 Whether you're a beginner or a seasoned gardener, this technique offers a cost-effective and satisfying way to propagate apple trees.
Once your rooted cutting is thriving, the next logical step is to transplant it into a permanent spot in your garden—choose a sunny location with well-draining soil to give your new tree the best chance to flourish.
Now that you’ve mastered the art of rooting, why not share your success with fellow gardeners or explore more propagation methods? Happy growing! 🍏✨