
Propagation
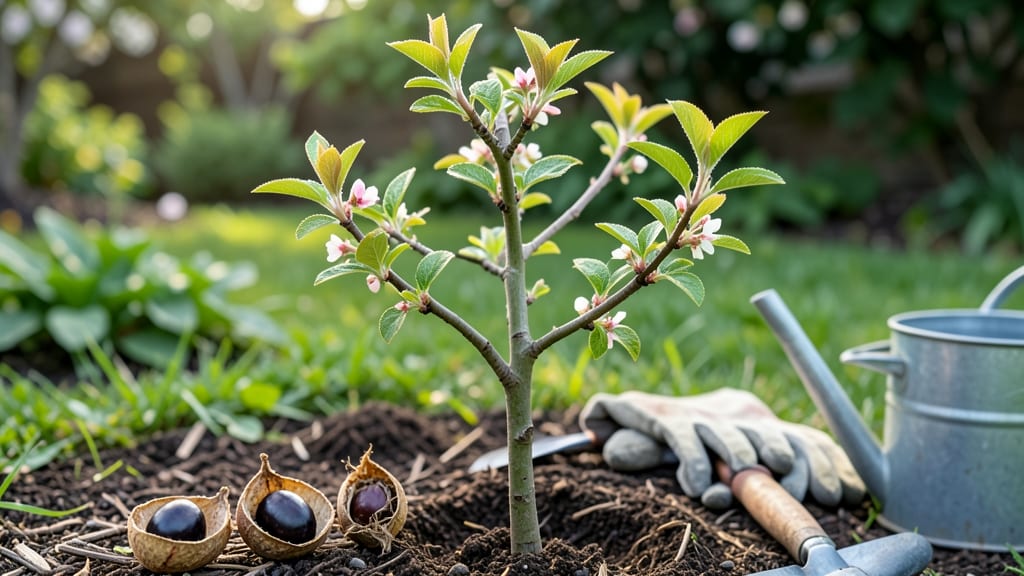
Growing a Japanese plum tree from seed is the ultimate patience test that rewards you with a backyard orchard. 🌱 The seeds from that perfect summer plum you savored can sprout into a tree with delicate pink blooms and tart-sweet fruit—but it takes years.
I’ve started three from store-bought plums, and only one made it past the seedling stage. The key? Understanding that this isn’t about instant fruit; it’s about nurturing a legacy tree that might one day bear edible (though not necessarily true-to-parent) plums.
The process starts with scarification—nick the seed coat to trick it into thinking winter’s passed. Then comes the waiting: some seeds germinate in weeks, others take months. My fastest sprouter emerged in 6 weeks with a stubborn little shoot, while another sulked in damp paper towels for 12.
Once sprouted, keep them in bright, indirect light and moist (not soggy) soil. They’re delicate at first but toughen up as they grow.
By year two, you’ll have a small sapling with real leaves and a stubborn root system. This is where the real work begins: staking, pruning to encourage a strong structure, and protecting it from late frosts.
The first blooms might not produce fruit worth eating—Japanese plums grown from seed often revert to wild types—but the tree itself becomes a stunning ornamental feature. Imagine pink spring blossoms followed by clusters of tiny plums, even if they’re more for jellies than fresh snacking.
Here’s the secret: treat it like a bonsai at first. Small pots, gentle watering, and a sunny windowsill or greenhouse spot keep early seedlings alive. Transplant outdoors only after the last frost, and expect 5-10 years before you might see fruit.
The payoff? A tree that’s uniquely yours, with roots in the plums you’ve eaten and a story to tell your grandkids about the day you grew it from a single seed.
📚 In This Guide
- What you need
- Instructions
- Tips and common mistakes
- Wrapping up and next steps
What you need
- ● Japanese plum seeds: 3–5 fresh, plump seeds (harvested from ripe fruit; store-bought seeds may not germinate as reliably).
- ● Small pots or seed trays: 4–6 (3–4 inches deep) with drainage holes. Tip: Use biodegradable pots for easy transplanting!
- ● Well-draining potting mix: 2–3 bags (sterile, seed-starting mix or a blend of 50% peat moss + 50% perlite/vermiculite).
- ● Plastic wrap or humidity dome: To create a mini greenhouse effect.
- ● Spray bottle: For gentle watering (avoid soaking the soil).
- ● Grow lights or sunny windowsill: A south-facing window or LED grow lights (12–16 hours/day).
- ○ Heat mat (optional but helpful): 1 (70–85°F range) to speed up germination.
- ● Fertilizer: Balanced, water-soluble fertilizer (e.g., 10-10-10) for seedlings.
- ● Pruning shears: Small, sharp pair for future seedling care.
- ● Seed stratification kit: If seeds need cold treatment (check plum variety requirements).
- ● Soil moisture meter: To monitor seedling hydration levels.
- ● Label markers: To track seedling progress (variety + date!).
- ● Compost or worm castings: For nutrient-rich soil amendments.
- ● Garden journal: To log growth milestones and notes.
Step-by-Step instructions for growing a Japanese plum tree from seed
Here's how to nurture a seed into a thriving tree with proper timing and care.
🌱 Step 1: Harvest and Stratify Seeds Properly
Collect ripe Japanese plum seeds in late summer or fall when the fruit is fully colored. Remove the pit and let it dry for a few days at room temperature. This prevents mold from developing during cold treatment. The key is stratification—mimicking winter's chilling period to break seed dormancy.
Place the seeds in a sealed plastic bag with slightly damp sand or peat moss. Store them in your refrigerator's crisper drawer for 8-12 weeks at 35-45°F. Check monthly to ensure the mix stays moist but not soggy. You'll know stratification worked when the seed coat softens and small roots begin to form.
💧 Step 2: Plant Seeds in a Controlled Environment
Fill a small pot with sterile seed-starting mix and plant the stratified seeds about ½ inch deep, spacing them 2 inches apart. Use a pencil to make holes—this prevents crushing the seeds. Water gently until moisture reaches the bottom, but avoid oversaturating the soil.
Place the pot in a warm, bright location with indirect light (like a north-facing window). Maintain soil moisture by watering when the top ½ inch feels dry. Germination typically takes 4-8 weeks, but be patient—some seeds may take longer. Cover the pot with plastic wrap if humidity drops below 50% to create a greenhouse effect.
☀️ Step 3: Transplant Seedlings to Individual Pots
Once seedlings develop 2-3 true leaves (not just the initial seed leaves), carefully transplant them into 4-inch pots with fresh potting mix. Use a small spoon to loosen roots and avoid breaking them. Water thoroughly after transplanting to help the soil settle around the roots.
Move the pots to a sunny spot with 6+ hours of direct light daily, like a south-facing window or under grow lights. Rotate the pots weekly so seedlings grow straight rather than leaning toward the light. Fertilize lightly with a balanced 10-10-10 fertilizer diluted to half strength every 4 weeks to encourage strong root development.
🪴 Step 4: Gradually Acclimate to Outdoor Conditions
After 6-8 months, when seedlings reach 12-18 inches tall, begin hardening them off. Start by placing them outside in a shaded area for 1-2 hours the first day. Gradually increase exposure over 2 weeks, moving them to morning sun first before full sun. This prevents sunburn and shock.
Choose a permanent planting spot with full sun and well-draining soil. Dig a hole twice as wide as the root ball but no deeper. Water the seedling deeply before transplanting to reduce stress. Mulch around the base with 2-3 inches of organic mulch to retain moisture and regulate soil temperature.
⏰ Step 5: Prune and Care for Long-Term Growth
In the first year, prune any dead, crossing, or weak branches to encourage a strong structure. Use sterilized pruning shears to make clean cuts just above a bud. Avoid heavy pruning—Japanese plum trees develop slowly, and aggressive cuts can stunt growth.
Water deeply once a week during dry spells, ensuring the soil stays moist but not waterlogged. Fertilize annually in early spring with a fruit-tree-specific fertilizer to support flowering and fruiting. Be patient—it may take 5-10 years before your tree produces plums, but the reward is worth the wait.
Tips & tricks for growing a Japanese plum tree from seed
Growing a Japanese plum tree from seed rewards patience with a stunning, fruit-bearing tree. Here's what I've learned to maximize success.
Stratification Success: The 8-12 week cold treatment in Step 1 is non-negotiable for breaking seed dormancy. I've found that placing a small moisture meter in the bag during stratification helps track moisture levels perfectly—aim for dampness like a wrung-out sponge. If the mix feels too wet, mold can develop; if too dry, the seeds won't germinate.
Germination Environment: In Step 2, don't be tempted to speed up germination with heat lamps. Japanese plum seeds need consistent warmth (around 70°F) and indirect light. I've had the best results using a simple LED grow light on a timer for 12 hours daily—this prevents leggy seedlings while maintaining warmth. The plastic wrap trick works wonders for humidity, especially in dry climates.
Transplanting Technique: When moving seedlings to individual pots in Step 3, focus on root integrity. I use a small plastic knife to gently separate roots rather than pulling—this prevents shock. The 4-inch pots give enough room for root development while keeping the seedlings manageable. Water thoroughly after transplanting to help settle the soil around delicate roots.
Hardening Off Strategy: The gradual 2-week acclimation in Step 4 is where most failures happen. Start with just 1-2 hours of shade on day one, then increase exposure slowly. I've seen seedlings get sunburned when moved too quickly—look for slight reddening on leaves as a warning sign. Morning sun first helps prevent stress while still giving them light exposure.
Pro Tips for Japanese Plum Tree From Seed
- Growing a Japanese plum tree from seed rewards patience with a stunning, fruit-bearing tree.
- Stratification Success: The 8-12 week cold treatment in Step 1 is non-negotiable for breaking seed dormancy.
- Germination Environment: In Step 2, don't be tempted to speed up germination with heat lamps.
Frequently asked questions
Got questions about growing a Japanese plum tree from seed? You’re not alone—this process takes time, patience, and a few tricks! Here are some of the most common questions (and answers) to help you succeed.
How long does it take for a Japanese plum seed to germinate?
A Japanese plum seed typically takes 4–8 weeks to germinate, depending on temperature and moisture. Cold stratification (chilling) is key—plant seeds in fall or soak them in water for 24 hours before sowing in well-draining soil. Patience is your friend here!
Will my seed-grown plum tree bear fruit?
Probably not for 5–10 years—and even then, it may not match store-bought varieties. Japanese plums grown from seed often produce wild-type fruit with different flavors, sizes, or ripening times. For consistent fruit, graft a known cultivar onto your seedling later.
What’s the best climate for growing a Japanese plum from seed?
Japanese plums thrive in USDA Zones 5–8, with mild winters and warm summers. They need 6–8 hours of sunlight daily and well-draining soil. If you’re in a hot climate (Zone 9+), choose a cooler microclimate or opt for dwarf varieties.
Why isn’t my seedling growing? Troubleshooting tips.
Slow growth? Check for:
- Overwatering (plum seeds rot easily—keep soil moist but not soggy).
- Poor drainage (use a mix of potting soil and perlite).
- Nutrient deficiency (fertilize lightly with balanced 10-10-10 once leaves appear).
- Pests (inspect for aphids or spider mites early).
If the seedling yellows, it may need more light or less water.
Can I grow a Japanese plum indoors?
Not reliably! Plum trees need outdoor conditions to thrive—full sun, seasonal temperature shifts, and space to grow. However, you can start seeds indoors in spring, then transplant seedlings outside after the last frost. A sunny windowsill won’t cut it long-term!
Wrapping up and next steps
Growing a Japanese plum tree from seed is a rewarding journey that blends patience with the joy of nurturing life.
While it may take years to bear fruit, the process itself is a beautiful lesson in resilience and connection to nature. Start small, stay consistent, and soon you’ll have a thriving tree that offers shade, beauty, and—eventually—delicious plums!
Ready to take the next step? Gather your seeds, prepare your soil, and begin your gardening adventure today! 🌱 Whether you’re a beginner or a seasoned grower, every seed planted is a promise of future harvests. Happy growing!