
Pruning
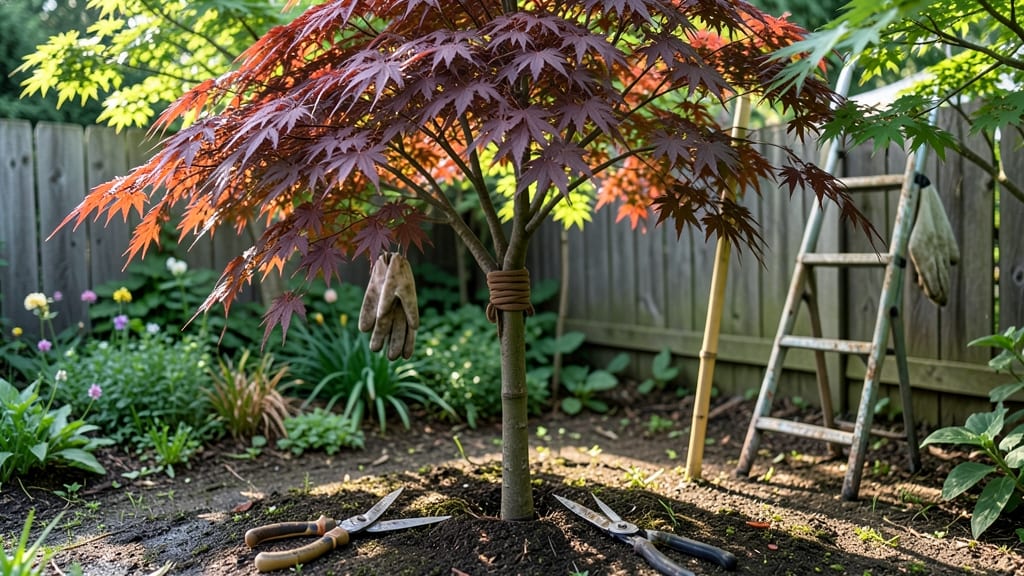
Japanese tree shaping transforms ordinary trees into living art. ✨ The ancient practice of niwaki and morikuri turns maples, pines, and junipers into sculpted masterpieces with deliberate curves and balanced branches—something I first tried after watching a bonsai artist patiently shape a young maple in my neighbor’s yard.
You’ll need sharp bypass pruners, a sturdy ladder, and a clear vision of your tree’s final form. The best time to start is late winter, when the tree is dormant, but maintenance pruning happens throughout the year.
Begin with small cuts to avoid stressing the tree, and always make clean cuts just above a bud or branch collar.
Within a season, you’ll see new growth responding to your pruning, filling in gaps and refining the shape. The result is a tree that looks intentional—like it’s been growing that way for decades—rather than something you’ve carefully pruned. Junipers develop dense, cloud-like forms, while maples take on elegant, cascading silhouettes.
Even small mistakes can be corrected over time, so don’t stress about perfection. The key is consistency—pruning a little at a time, observing how the tree reacts, and adjusting your approach as it grows. Once you master the basics, you can experiment with more advanced techniques like wiring or carving.
📚 In This Guide
- What you need
- Instructions
- Tips and common mistakes
- Wrapping up and next steps
What you need
- ● Pruning Shears: Sharp, bypass-style shears (5–7 inches) for clean cuts on small branches.
- ● Loppers: 8–12-inch loppers for thicker branches (up to 2 inches in diameter).
- ● Pruning Saw: Curved-tooth saw for branches over 2 inches thick.
- ● Rope or Twine: ¼-inch thick, natural fiber rope (10–20 feet) for guiding growth.
- ● Wire or Copper Tape: 18–20-gauge wire (for structural support) or flexible copper tape (for binding cuts).
- ○ Pruning Sealant: Optional but recommended (e.g., Tanglefoot Tree Wound Pruning Sealer) to protect large cuts.
- ● Gloves: Heavy-duty gardening gloves (cut-resistant for safety).
- ● Measuring Tape: 10–15 feet for precise branch spacing.
- ● Spray Bottle: With water to clean tools between cuts.
- ● Tree Growth Regulator: Hormonal paste (e.g., Dormant Oil) to encourage thickening at cut points.
- ● Stakes & Strap: For young trees needing temporary support.
- ● Disinfectant: 70% isopropyl alcohol to sterilize tools between trees (prevents disease spread).
- ● Sketch Pad & Pencil: To plan your design before making cuts!
Step-by-Step guide to Japanese tree shaping techniques
Transform your trees into living art with these time-tested methods for elegant, balanced growth.
🌿 Step 1: Select the Right Tree for Shaping
Japanese tree shaping works best on young, flexible trees like willows, dogwoods, or Japanese maples. Mature trees with rigid branches resist shaping and may snap under pressure. Look for trees with a strong central leader—the main upward-growing stem—that will serve as your foundation. I always start with a tree that’s at least 3-5 years old; younger saplings lack the structural integrity to support intricate shapes.
Examine the branch structure closely. You’ll want branches that grow at natural angles—30-60 degrees from the trunk—to create graceful curves. Avoid trees with branches growing directly upward or outward at sharp angles; these won’t respond well to shaping. If you’re working with an established tree, begin by removing any dead, crossing, or diseased branches first. This clears the canvas for your design.
✂️ Step 2: Plan Your Design with Pruning Cuts
Before making any cuts, sketch your vision on paper. Japanese tree shaping often mimics natural forms like waves, spirals, or clouds, so study reference images for inspiration. Mark the branches you’ll shape by tying them loosely with soft twine or cloth strips—this prevents accidental cuts and helps you visualize the final form. I like to use a 1/4-inch wide strip of fabric to avoid damaging the bark.
Focus on three key principles: balance, proportion, and flow. For example, if you’re creating a wave shape, the highest point should be no more than 1/3 of the tree’s height** from the base. Use pruning shears to make your first cuts at a 45-degree angle, just above a bud or branch collar. This encourages new growth in the direction you want. Avoid cutting flush with the trunk—it leaves unsightly wounds that heal poorly.
🌱 Step 3: Bend and Secure Branches for Growth
Once you’ve made your initial cuts, gently bend the selected branches into your desired shape. Young, flexible branches can be guided with your hands, but for thicker branches, use a tree-shaping fork or a sturdy, padded hook to apply gradual pressure. Never force a branch abruptly—this can cause it to snap. Instead, bend it slowly over 2-3 days, checking daily to ensure it holds the new position without resistance.
Secure the branch in place with a soft cloth or rubber strap tied loosely around the branch and trunk. The goal is to restrict movement without cutting off circulation. I use old T-shirts or burlap strips because they’re breathable and won’t girdle the branch as wire or plastic might. Leave the strap on for 4-6 weeks, or until the branch has set in its new position and calloused over. Remove it gradually to avoid shocking the tree.
☀️ Step 4: Maintain Shape with Seasonal Pruning
Japanese tree shaping isn’t a one-time task—it requires ongoing care to refine the form. In early spring, before new growth begins, prune any branches that grew in unintended directions. Use sharp, clean shears to make cuts at the same 45-degree angle you used initially. This keeps the tree’s energy focused on the shapes you’ve created. Avoid heavy pruning in late summer or fall, as this can stimulate weak, late-season growth that won’t harden off before winter.
Throughout the growing season, monitor the tree for signs of stress, like yellowing leaves or wilting branches. If you notice a branch struggling to maintain its shape, it may need additional support or a slight adjustment. Water deeply during dry spells—1-2 inches per week—to help the tree recover from shaping. Fertilize lightly in early spring with a balanced, slow-release fertilizer to encourage strong, flexible growth. Over-fertilizing can lead to rapid, weak growth that’s prone to breaking.
⏰ Step 5: Refine and Preserve Over Time
After the first year, your tree’s shape will be more defined, but it won’t be permanent. Continue refining the design annually, focusing on the finer details like branch thickness and leaf density. If a branch grows too thick to bend easily, you may need to remove it and replace it with a younger, more pliable one. This is where patience pays off—some of the most stunning Japanese trees take 5-10 years to reach their full potential.
In winter, inspect the tree for any branches that have died back or lost their shape. Prune these out completely to maintain the tree’s health and aesthetic. As the tree matures, you can experiment with more intricate designs, like weaving branches or creating layered canopies. The key is to work with the tree’s natural growth patterns rather than against them. With time, your tree will develop a harmonious, artistic form that reflects both your vision and nature’s grace.
Tips & tricks for mastering Japanese tree shaping
Here’s what nobody tells you about transforming trees into living art—lessons I learned after years of trial and error.
Branch Angle Intelligence: In Step 1, when selecting branches, pay special attention to those growing at 30-60 degrees from the trunk. These natural angles create the most graceful curves when shaped. I’ve found that branches growing at exactly 45 degrees respond best to bending—this is the "golden angle" for most Japanese designs. If you’re unsure, take a photo and overlay a protractor app to measure angles before committing to cuts.
The 45-Degree Cut Secret: When making pruning cuts in Step 2, that 45-degree angle isn’t just arbitrary—it’s about directing growth. The cut should be just above the branch collar (the swollen area where the branch meets the trunk). I’ve ruined too many trees by cutting too close to the trunk, which creates ugly wounds that never heal properly. Use a small mirror to check your angle if needed—precision here makes all the difference.
Gradual Pressure Strategy: In Step 3, bending branches over 2-3 days might seem tedious, but rushing this process is how I broke my first three trees. The key is to apply just enough pressure each day to encourage the branch to slowly adapt. Think of it like stretching a muscle—you wouldn’t expect to touch your toes after one attempt, right? Use a tree-shaping fork with a wide, padded hook to distribute pressure evenly. Never bend a branch more than 20 degrees in a single day.
Strap Removal Technique: After leaving straps on for 4-6 weeks, don’t just yank them off! In Step 3, I learned this the hard way—removing straps too quickly can shock the tree and cause branches to revert to their original shape. Instead, loosen the strap gradually over 2-3 days, checking daily to see if the branch maintains its new position. If it springs back, you’ll need to reapply the strap for another 2 weeks.
Pro Tips for Japanese Tree Shaping
- Here’s what nobody tells you about transforming trees into living art—lessons I learned after years of trial and error.
- Branch Angle Intelligence: In Step 1, when selecting branches, pay special attention to those growing at 30-60 degree...
- The 45-Degree Cut Secret: When making pruning cuts in Step 2, that 45-degree angle isn’t just arbitrary—it’s about di...
Frequently asked questions
Got questions about transforming your trees into living works of art with Japanese tree shaping? You’re not alone! Here are some of the most common queries—plus straightforward answers to help you get started (or troubleshoot) like a pro.
How long does it take to see noticeable results from Japanese tree shaping?
Patience is key! With regular pruning (seasonal adjustments every 3–6 months), you’ll start seeing subtle changes in 1–2 years. Dramatic transformations—like intricate niwaki or juniper topiary—can take 3–5 years or longer, depending on the tree’s growth rate and your design goals. Think of it as sculpting: slow, deliberate, and rewarding.
Can I shape any tree, or are there specific types that work best?
While Japanese tree shaping is versatile, some trees thrive better than others. Evergreens (like junipers, pines, and yews) are ideal for formal designs due to their dense foliage. Deciduous trees (e.g., maples, hornbeams) work for seasonal interest but require more frequent pruning to maintain shape. Avoid delicate or fast-growing species—they won’t hold intricate cuts well. Pro tip: Start with a healthy, slow-growing tree for the best results!
When is the best time of year to prune for Japanese tree shaping?
Timing matters! For evergreens, prune in late winter or early spring (before new growth) to minimize stress. Deciduous trees can be shaped in late winter/early spring (dormant season) or summer (after flowering). Avoid pruning in extreme heat or cold—mornings on mild days are perfect. Light trims can happen year-round, but major shaping should align with the tree’s natural growth cycles.
What’s the easiest beginner-friendly Japanese tree shape to try?
Start with a cloud prune or informal upright shape—both are forgiving and create natural, flowing lines. For evergreens, try a rounded mound or sloping hedge (like a niwaki windbreak). Deciduous trees? A weeping form (like a cascade maple) is stunning and achievable with basic pruning. Bonus: Use branch weight (heavier cuts at the bottom) to encourage upward growth naturally!
My tree’s leaves are turning brown after pruning—what went wrong?
Don’t panic! Brown leaves can signal over-pruning or stress, but it’s often temporary. If >30% of the foliage is affected, you may have cut too aggressively. Fix it:
- Water deeply and mulch to retain moisture.
- Avoid fertilizing for 4–6 weeks—let the tree recover.
- Next time, prune in stages (wait 2–4 weeks between sessions).
Can I mix Japanese tree shaping with other pruning styles (e.g., topiary or bonsai)?
Japanese shaping often blends with topiary (geometric cuts) or bonsai (miniature art). For example:
- Niwaki: Formal, layered hedges (like a living wall).
- Bonsai-inspired: Prune a small tree with wiring and gradual reduction for a miniature look.
- Topiary fusion: Combine Japanese curves with European boxwood shapes.
Wrapping up and next steps
Japanese tree shaping is more than just pruning—it’s an art form that transforms your garden into a serene, living masterpiece. 🌿 Whether you’re crafting a bonsai, sculpting a topiary, or refining a traditional niwaki, the key lies in patience, precision, and passion.
Start small, practice regularly, and watch your trees flourish with year-round elegance.
Ready to dive in? Grab your tools, sketch your vision, and begin shaping today! 🌱✨ Your garden’s next chapter starts with a single cut—what will your tree’s story be?