
Pruning
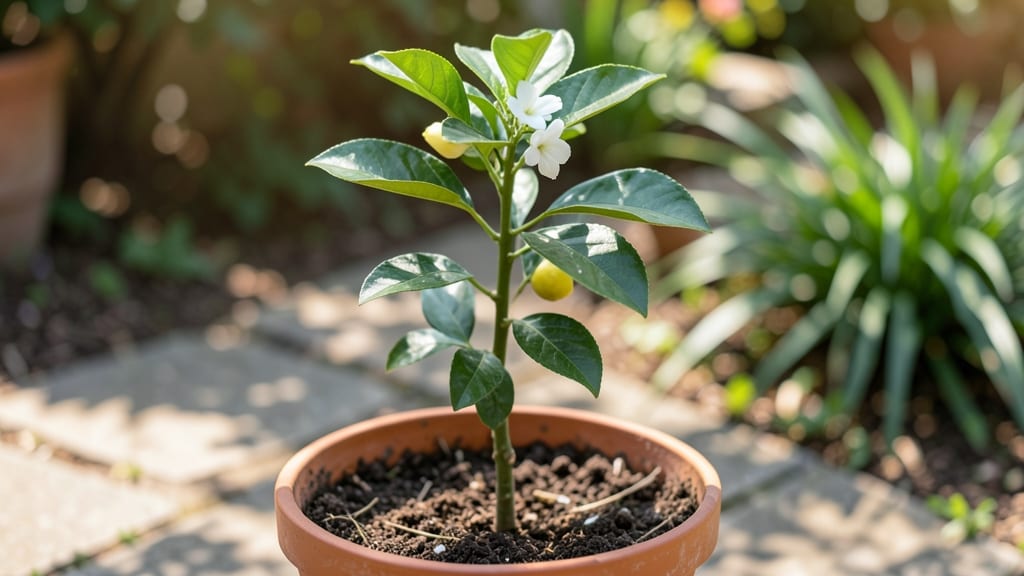
Starting a lemon tree from a starter means fast germination and a citrus harvest in just a few years—if you avoid the rookie mistakes I made. 🌱 My first attempt took six months to show real growth because I ignored the light and soil needs.
Now I know the exact tricks to get your seedling off to a running start, whether you're using a cutting, nursery plant, or seed. You'll need a 6-inch pot with drainage holes, well-draining potting mix, and a sunny spot (at least 6 hours of light daily).
Most starters fail because people treat them like houseplants—too much water, not enough sun. The secret is balancing moisture without soggy roots while keeping leaves bright green, not yellow.
Within 4-6 weeks, you'll see new growth if you follow these steps: water when the top inch of soil dries, rotate the pot weekly for even sunlight, and pinch back leggy stems. Prune carefully—this isn't just about size, it's about encouraging a sturdy structure that can handle fruit later.
Works year-round in warm climates, but if you're in cooler zones, start indoors near a south-facing window. Here's how to set it up right from day one—no more waiting years for that first lemon!
📚 In This Guide
- What you need
- Instructions
- Tips and common mistakes
- Wrapping up and next steps
What you need
- ● Lemon tree seeds: 3–5 fresh, plump seeds (from organic lemons for best results).
- ● Seed-starting mix: 1 small bag (1–2 quarts) of sterile, well-draining potting soil (e.g., Miracle-Gro Seed Starting Potting Mix).
- ● Containers: 3–5 small pots (3–4 inches wide) with drainage holes or a seed tray with individual cells.
- ● Watering can or spray bottle: With a fine mist nozzle for gentle hydration.
- ● Clear plastic wrap or dome: To create a mini greenhouse effect (e.g., a plastic bag or seedling heat mat cover).
- ● Grow lights or sunny windowsill: A south-facing window (6+ hours of sunlight) or a 12–16" LED grow light for 12–14 hours/day.
- ○ Humidity tray (optional but helpful): A shallow tray with pebbles + water to boost moisture.
- ● Tweezers or toothpick: For delicate seed placement.
- ● Fertilizer: A balanced liquid fertilizer (5-5-5 NPK ratio) diluted to half-strength for seedlings.
- ● Pruning shears: Small, sharp scissors for trimming (once your tree grows!).
- ● pH test kit: To check soil acidity (ideal range: 6.0–7.0).
- ○ Heat mat (optional): For faster germination (70–80°F).
Step-by-step instructions for growing a lemon tree from seed
Here’s how to get those first sprouts in just 7-10 days—no waiting months for germination.
🌱 Step 1: Select and Prepare the Lemon Seeds
Pick the freshest, plumpest seeds from a ripe lemon—older seeds germinate poorly. Rinse them gently to remove any pulp residue, then soak in warm water for 24 hours. This softens the tough outer coating and speeds up sprouting. I like to use a small bowl of water and stir occasionally to keep them submerged.
After soaking, drain the water and let the seeds air-dry for 10-15 minutes on a paper towel. This prevents mold while keeping them moist enough to plant. Here’s the thing—don’t skip the drying step. Wet seeds planted directly will rot before they sprout.
🪴 Step 2: Choose Containers and Fill with Moisture-Retentive Mix
Use small seedling pots (2-3 inches deep) with drainage holes—lemon seeds hate soggy roots. Fill each pot with a mix of 50% potting soil and 50% perlite (or coconut coir) to ensure good drainage while retaining moisture. Tap the pot gently to settle the mix, then moisten it until damp but not dripping.
Plant one seed per pot, about ½ inch deep—deeper planting slows germination. Press the soil lightly around the seed to secure it without compacting. I tap the pot on the table once to help the seed settle into place. Label each pot with the date to track germination progress.
☀️ Step 3: Provide Warmth and Humidity for Fast Sprouting
Lemon seeds need warmth (75-85°F) to germinate quickly. Place the pots in a seedling heat mat or on top of your fridge (where it’s warm). Cover each pot with a clear plastic dome or plastic wrap to trap humidity—this mimics tropical conditions and speeds up sprouting.
Check daily for condensation on the dome. If it’s dry, mist the soil lightly with a spray bottle. You’ll see the first sprouts in 7-10 days—watch for tiny green shoots pushing through the soil. Once they appear, remove the dome immediately to prevent mold.
💧 Step 4: Move to Bright, Indirect Light
When seedlings emerge, place them under bright, indirect light (like a south-facing window with sheer curtains). Direct sun at this stage burns delicate leaves. If your home is dim, use a grow light 4-6 inches above the plants for 12-14 hours daily. You’ll know they’re getting enough light when the leaves stay deep green and compact—not stretched or pale.
Water gently once a week, letting the top inch of soil dry out between waterings. Overwatering is the #1 killer of young lemon trees. Stick your finger in the soil—if it’s damp below the first inch, wait another day.
✂️ Step 5: Transplant and Train for Strong Growth
After 4-6 weeks, when seedlings have 2-3 sets of true leaves, transplant them into 5-inch pots with fresh potting mix. Lemon trees grow fast, so give them room—crowded roots stunt growth. Handle the seedlings carefully to avoid damaging the stems.
Here’s the trick: Pinch off the top set of leaves when the plant reaches 6-8 inches tall. This encourages bushier growth instead of a single tall stem. Keep the soil consistently moist (but not soggy) and rotate the pot weekly so the tree grows straight toward the light.
Tips & tricks for perfect lemon tree starter
Let me save you the trial-and-error I went through—these tricks will help you bypass the common pitfalls and get those first sprouts in record time.
Seed Selection and Prep: The 24-hour soak is non-negotiable—it softens the seed coat and kickstarts germination. I’ve found that using seeds from organic lemons (when available) gives slightly better results, possibly due to fewer chemical residues. After soaking, the 10-15 minute drying period is crucial—this prevents mold while keeping the seeds viable. Pro tip: Place your paper towel on a clean microwave-safe plate before drying—it makes cleanup a breeze when you’re ready to plant.
Container and Soil Strategy: While the instructions call for 2-3 inch pots, I’ve had success with even shallower containers (like 1.5 inch nursery pots) when planting just one seed per pot. The key is ensuring proper drainage—if you don’t have pots with holes, create your own by drilling small holes in the bottom. For the soil mix, I like to add a pinch of cinnamon to the potting soil before planting—it’s a natural antifungal that prevents mold without harming the seeds.
Warmth and Humidity: The 75-85°F range is ideal, but if you don’t have a heat mat, try placing your pots on top of your refrigerator (the coils create warm air circulation). For humidity, I’ve found that using a clear plastic bag with holes punched in it (instead of a dome) works just as well and gives better airflow. Check for condensation daily—if you see water droplets, it’s time to mist again. The moment you spot those first green shoots, remove the humidity cover immediately to prevent mold from forming on the delicate seedlings.
Light Transition: When moving your seedlings to bright, indirect light, I recommend doing this gradually over 3-4 days. Start with just 2 hours of light exposure on day one, then increase by 1-2 hours each subsequent day. This hardening-off period helps prevent leaf burn. For grow lights, I prefer LED grow bulbs—they’re energy-efficient and produce less heat than traditional bulbs, which is crucial for young seedlings.
Pro Tips for Lemon Tree Starter
- Let me save you the trial-and-error I went through—these tricks will help you bypass the common pitfalls and get those first sprouts in record time.
- Seed Selection and Prep: The 24-hour soak is non-negotiable—it softens the seed coat and kickstarts germination.
- Container and Soil Strategy: While the instructions call for 2-3 inch pots, I’ve had success with even shallower containers (like 1.5 inch nursery pots) when planting just one seed per pot.
Frequently asked questions
Got questions about kickstarting your lemon tree? You’re not alone! Here are answers to the most common queries—from impatient growers to seasoned gardeners looking for a shortcut.
How long does it take for a lemon tree starter to germinate?
A lemon tree starter (like a seedling or grafted cutting) typically shows signs of life in 2–4 weeks if using seeds, but grafted starters or cuttings can sprout roots in just 1–2 weeks with proper care. Patience is key—keep soil moist but not soggy, and place in warm, indirect light. Pro tip: Use a heat mat to speed up germination by 30–50%!
Can I plant a lemon tree starter outdoors in winter?
Not unless you live in a USDA Zone 9–11 or similar tropical climate. Lemon trees are sensitive to frost—temperatures below 25°F (-4°C) can kill them. If you’re in a colder zone, start indoors and wait until spring (after last frost) to transplant. For winter protection, move potted starters indoors near a sunny window or under grow lights.
What’s the difference between a lemon tree starter and a seed?
A lemon tree starter is a pre-grown seedling (often grafted for faster fruit production), while a seed is raw and must germinate from scratch—taking months to years to bear fruit. Starters skip the waiting game: they’re hardier, disease-resistant, and fruit-ready in 2–5 years vs. 10+ years with seeds. Pro tip: Buy starters from reputable nurseries for consistent quality!
Why is my lemon tree starter not growing? (Troubleshooting)
Slow growth usually stems from overwatering, poor drainage, or lack of light. Check for:
- Yellow leaves = Overwatering or root rot (let soil dry slightly between waterings).
- Leggy stems = Not enough light (move to a brighter spot or add grow lights).
- Wilting = Underwatering or heat stress (water deeply and mist leaves).
Are there faster alternatives to growing a lemon tree from a starter?
Yes! For instant gratification, consider:
- Grafted trees: Bypass the seedling stage and get a mature tree in a pot.
- Air-layering: Propagate a branch from an existing lemon tree in 4–6 weeks.
- Dwarf varieties: Like ‘Meyer’ lemons—faster to fruit and easier to manage indoors.
Wrapping up and next steps
Growing your own lemon tree from a starter is an incredibly rewarding journey—one that brings fresh, fragrant lemons straight to your kitchen! With the right fast-germination tricks, proper care, and a little patience, you’ll soon be enjoying year-round growth and sweet citrus rewards. 🌱
Now that you’re armed with the knowledge, it’s time to take action! Start by selecting your lemon tree starter, following the steps above, and keep an eye on your plant’s progress.
Before you know it, you’ll be pruning, harvesting, and maybe even sharing lemons with friends. Happy growing—your future lemon tree is waiting for you! 🍋✨