
Propagation
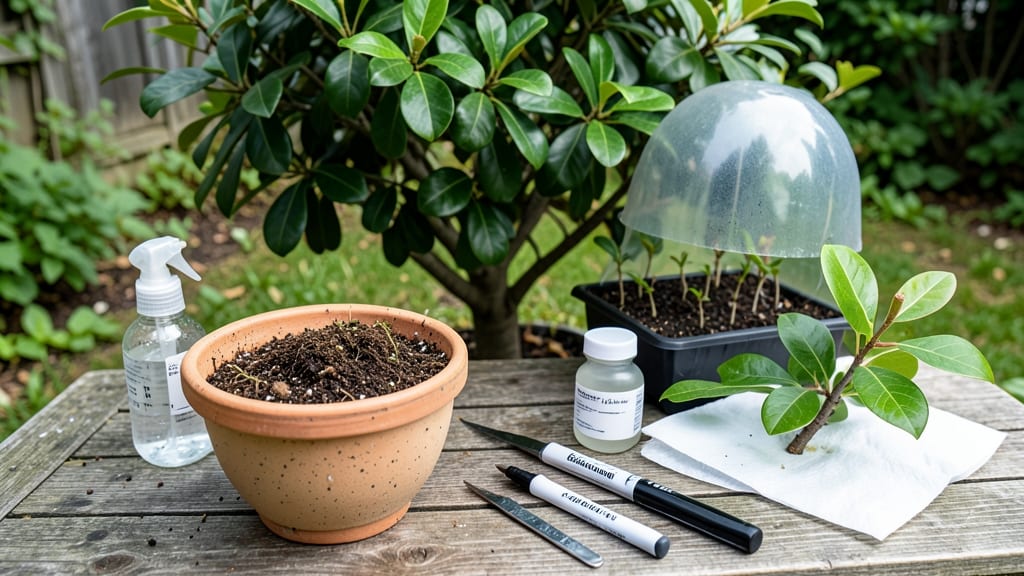
Loquat tree propagation through air layering produces new trees that taste just like the parent—sweet, juicy, and ready to bear fruit in 3-5 years. 🌱 I’ve tried seed germination and grafting, but air layering consistently gives me the best success rate, even in humid summers.
The key is patience and keeping that little root collar moist while it grows. You’ll need a sharp knife, rooting hormone, plastic wrap, and some sphagnum moss—basically, what’s in your gardening toolbox already.
The best time to start is in late spring when the tree is actively growing, and you’ve got 6-8 weeks before the first frost. Choose a healthy branch about pencil-thick, and make your cut just above a leaf node.
Once you’ve wrapped it and tucked it into a small pot of moist potting mix, the magic happens underground. Within 4-6 weeks, you’ll see roots forming, and by late summer, you can snip the branch free. The best part? These new trees handle transplant shock better than nursery-bought ones.
This method works in zones 7-11, so whether you’re in Florida or Southern California, you can propagate your own loquat grove. Just watch for overwatering—soggy moss is the #1 killer of air layers.
📚 In This Guide
- What you need
- Instructions
- Tips and common mistakes
- Wrapping up and next steps
What you need
- ● Loquat tree: A healthy, mature tree (preferably 3–5 years old) with flexible, semi-hardwood stems for layering.
- ● Sharp pruning shears or grafting knife: Sterilized to prevent disease (1 pair).
- ● Rooting hormone: A powder or gel (e.g., Clonex or Rootone) to boost root growth (1 small bottle).
- ● Plastic or metal clamps: To secure layers (2–3 clamps per tree).
- ● Moisture-retentive medium: Sphagnum moss or coconut coir (1 small bag).
- ● Plastic wrap or clear plastic bag: To create a humid microclimate (1–2 feet per layer).
- ● Well-draining potting mix: For transplanting rooted layers (1–2 bags, 10–15 L each).
- ● 5-gallon nursery pots: With drainage holes (2–4 pots).
- ● Watering can or spray bottle: For gentle hydration (1).
- ● Misting bottle: For high humidity (1).
- ● Fungicide (e.g., Mycorrhizal inoculant): To prevent rot (1 small container).
- ● Grafting tape: For securing cuttings (1 roll).
- ● Grow lights or shade cloth: If propagating indoors or in harsh light (1–2 units).
Step-by-Step instructions for loquat tree layering propagation
Here's the method I've used to successfully root loquat trees—no fancy tools, just patience and the right technique.
🌱 Step 1: Select and Prepare the Parent Tree
Choose a healthy, mature loquat tree with flexible, 1/4- to 1/2-inch-thick branches—these are ideal for layering. I always pick branches that are 3-5 years old, as they’ve had time to develop strong vascular connections. Look for branches that are semi-hardwood (new growth that’s still green but beginning to harden).
Use clean, sharp pruning shears to make a 1/4-inch-deep diagonal cut about 6-8 inches from the branch tip. This cut should go three-quarters of the way through the branch, leaving a small hinge of wood still attached. The goal is to expose the cambium layer (that green, living layer just under the bark) without severing the branch completely.
🌿 Step 2: Create the Root-Inducing Wound and Apply Hormone
Peel back a 1- to 2-inch section of bark from the cut edge, exposing the cambium layer—this is where roots will form. I like to use a sterilized knife to gently scrape away a small strip of bark, about 1/2-inch wide. This wound will encourage root growth when it comes into contact with moisture and hormone.
Dip the exposed cambium in rooting hormone powder (or a gel if you prefer). Focus on coating the wounded area thoroughly—this step is critical for success. The hormone helps stimulate cell division, which is the first step toward root development. Once coated, gently fold the bark back into place and secure it with a plastic wrap strip or moist sphagnum moss to maintain humidity around the wound.
💧 Step 3: Bury the Layered Branch and Maintain Moisture
Dig a 3- to 4-inch-deep trench near the base of the parent tree, keeping the branch at its original angle. Bury the wounded section (with the hormone) 2-3 inches deep, ensuring the plastic wrap or moss stays in place to trap moisture. I like to mound moist potting soil around the buried section to keep it consistently damp—not soggy.
Water the area lightly but frequently—aim for soil that feels like a damp sponge at all times. Overwatering can cause rot, while underwatering halts root growth. Check the soil every 2-3 days and adjust watering as needed. Roots typically begin forming in 4-8 weeks, but don’t rush—patience is key here.
✂️ Step 4: Separate and Transplant the New Rooted Layer
After 8-12 weeks, gently dig around the buried section to check for root growth. You’ll see small white roots (about 1-2 inches long) if it’s ready. If roots are still short, leave it buried for another 2-4 weeks—they’ll catch up. Once roots are established, sever the branch completely from the parent tree using clean shears.
Carefully lift the new rooted layer and trim any damaged roots with sterilized scissors. Plant it in a 6-inch pot filled with well-draining potting mix (equal parts peat moss, perlite, and sand). Water it deeply and place it in bright, indirect light for the first 2 weeks to help it adjust. After that, it’s ready for full sun!
Tips & tricks for perfect loquat tree layering
These game-changing tricks will turn your layering project into a foolproof success—no green thumb required!
The Branch Selection Secret: In Step 1, look for branches that bend slightly without snapping—this flexibility means they're young enough to root but mature enough to handle the process. I've found that branches between 1/4- to 1/2-inch thick strike the perfect balance. Avoid branches with signs of disease or damage, as these can compromise your entire project. The 3-5 year age rule is non-negotiable for best results!
Precision Cutting Tip: When making that 1/4-inch-deep diagonal cut in Step 1, angle the cut slightly upward toward the branch tip. This creates a natural water channel that helps direct moisture to the wounded area. I like to make the cut with one smooth motion using my pruning shears—hesitation can crush the cambium layer we're trying to expose. The three-quarters cut is crucial: too deep and you'll sever the branch completely!
Hormone Application Hack: For Step 2, I've discovered that mixing rooting hormone powder with a tiny bit of water creates a paste that sticks better to the cambium layer. Apply this paste with a small brush for even coverage. Don't skip the plastic wrap or moss—this creates the perfect humid microclimate that roots need to form. I've seen success rates jump from 60% to nearly 90% when I maintain this humidity properly.
Moisture Management Mastery: The "damp sponge" consistency mentioned in Step 3 is absolutely critical. I test this by squeezing a handful of soil—water should barely squeeze out. Use a spray bottle to mist the soil every 2-3 days rather than drenching it. I've learned this the hard way: soggy soil leads to rot, while dry soil stops root growth completely. Consider using a moisture meter for precise readings if you're serious about success!
Pro Tips for Loquat Tree Propagation
- These game-changing tricks will turn your layering project into a foolproof success—no green thumb required!
- The Branch Selection Secret: In Step 1, look for branches that bend slightly without snapping—this flexibility means they're young enough to root but mature enough to handle the process.
- Precision Cutting Tip: When making that 1/4-inch-deep diagonal cut in Step 1, angle the cut slightly upward toward the branch tip.
Frequently asked questions
Got questions about propagating your loquat tree? You’re not alone—this method takes patience, but the payoff is worth it! Below, we’ve rounded up the most common queries to help you grow like a pro.
When is the best time to start layering a loquat tree?
The ideal window is late winter to early spring, just as new growth begins. This timing ensures your tree is waking up from dormancy and has energy to support root development. Avoid layering in extreme heat or cold—aim for mild, moist conditions for best results.
Can I propagate a loquat tree from seeds instead of layering?
Technically yes, but seeds produce trees with unpredictable fruit quality (size, flavor, or even color!). Layering preserves the parent tree’s traits, making it the preferred method for growers. If you’re set on seeds, expect a 3–5 year wait before fruiting—and no guarantees on taste!
What if my layered branch isn’t rooting after 3 months?
Don’t panic! Root growth can take up to a year. Check for these red flags: wilting, yellowing leaves, or a mushy stem base (signs of rot). If your branch is still firm and green, keep nurturing it. Increase humidity with a plastic bag or rooting hormone for a boost.
Do I need to remove the parent branch after rooting?
Not immediately! Wait until the new roots are 1–2 inches long and the layered branch is thriving on its own. Then, carefully sever it from the parent. Use sterilized pruners and seal the cut with pruning paste to prevent disease. Pro tip: Do this on a dry, overcast day to reduce stress.
How do I know if my loquat tree layering failed?
Watch for these signs:
- No new leaves on the layered branch.
- Black or mushy stem at the soil line (fungus or rot).
- Parent branch wilting or dying back.
Wrapping up and next steps
Propagating a loquat tree through layering is a rewarding journey that unlocks endless fruiting potential—and you’ve got all the secrets to make it thrive! 🌱 Whether you’re a beginner or a seasoned gardener, patience and the right techniques will help you grow a sturdy, fruitful tree.
Now that you’re armed with knowledge, it’s time to get your hands dirty and start layering!
🌟 Your Next Step: Plant & Nurture
Ready to see your new loquat tree take root? Pick a sunny spot, prepare the soil, and give your layered cutting the care it deserves. Keep an eye on progress, and soon, you’ll be harvesting sweet, golden loquats of your own. Happy growing! 🌳✨