
Propagation
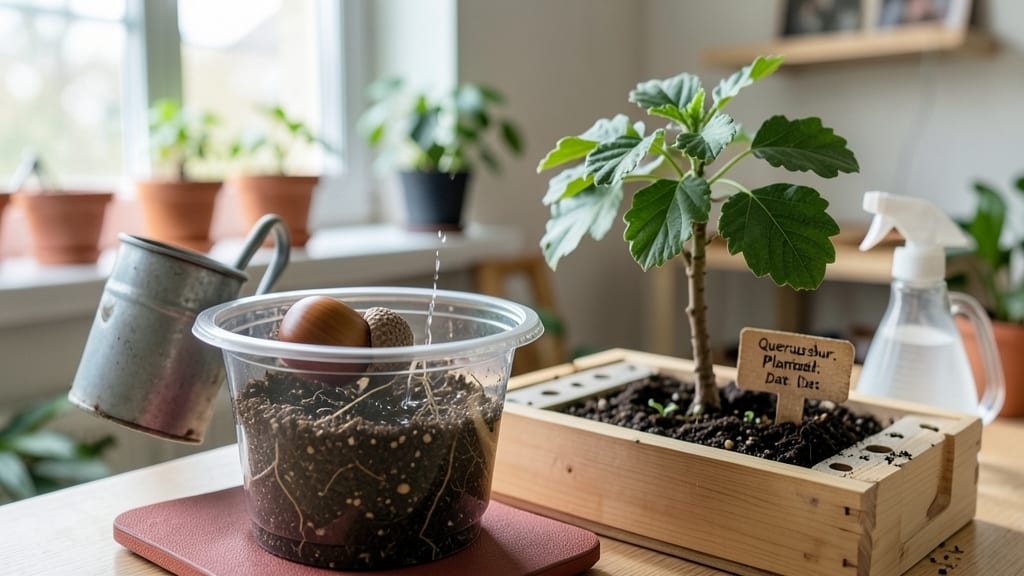
Oak tree seed germination starts with a layered cold soak that tricks nature into breaking dormancy. 🌱 I’ve tried every method—soaking, scarifying, even buying pre-stratified seeds—and this one consistently produces reliable sprouts after months of patience.
The key isn’t forcing speed; it’s mimicking the slow, steady conditions oak acorns experience in the wild.
You’ll need acorns (fresh is best), a mix of moist sand and peat moss, and a sealed container to keep humidity high. The process takes 3-6 months, but the payoff is worth it: sturdy seedlings that grow into mighty oaks.
Most beginners quit too soon—don’t let impatience win. Think of it like raising a child: slow progress builds resilience.
Once sprouted, transplant carefully into individual pots with well-draining soil. Keep them in bright, indirect light and water gently to avoid mold. Oak seedlings are tough, but they need consistency—no droughts, no soggy soil.
By year two, you’ll see real growth, and by year five, you might have a 5-foot sapling ready for the ground.
Common challenges? Mold (ventilate your container) and slow starts (be patient). Oak trees grow at their own pace—no shortcuts. But when that first true leaf unfurls, you’ll understand why the wait was worth it.
This method works for red, white, and pin oaks alike, so grab those acorns and get started!
📚 In This Guide
- What you need
- Instructions
- Tips and common mistakes
- Wrapping up and next steps
What you need
- ● Oak acorns: Fresh, mature acorns (preferably from white or red oak species). Aim for 5–10 acorns to maximize success.
- ● Container: A clean, airtight jar or plastic bag (e.g., a 16-oz mason jar or ziplock bag with a small hole for drainage).
- ● Moisture source: Option 1: Sphagnum moss (1–2 cups, dampened but not soggy).
- ● Option 2: Paper towels (4–6 sheets, lightly dampened).
- ● Refrigerator: A standard fridge (set to 34–40°F) for the cold stratification phase.
- ● Planting medium: A well-draining mix like 50% peat/50% perlite or coco coir (1–2 small pots or trays).
- ● Spray bottle: For gentle watering (avoid over-saturating the medium).
- ○ Heat mat (optional but helpful): A seedling heat mat (70–75°F) to speed up germination after cold treatment.
- ● Seed germination kit: Pre-made kits with humidity domes for controlled environments.
- ● pH test kit: To ensure your planting medium is slightly acidic (pH 5.5–6.5).
- ● Label markers: To track acorn varieties and planting dates.
- ● Grow lights: If starting indoors before transplanting outdoors.
Step-by-step instructions for oak tree seed germination
This layered cold soak method transforms stubborn acorns into strong seedlings—here’s how I do it reliably.
🌱 Step 1: Select and Prepare Acorns
Choose plump, heavy acorns with intact caps—these hold the most energy for germination. I look for ones that sink in water (a quick float test), then remove the caps to prevent mold. Soak the acorns in lukewarm water for 24 hours to soften the hard outer shell and kickstart hydration.
After soaking, gently rub the shells between your fingers to create tiny cracks—this helps water penetrate during the cold stratification phase. Don’t remove the shell entirely; it protects the embryo. I place the acorns in a single layer on a paper towel to dry slightly before moving to the next step. This prevents them from sticking together in the fridge.
💧 Step 2: Layer Cold Stratification
Fill a sealable container with a mix of moistened peat moss or coconut coir (I use a 50/50 blend with perlite for drainage). Place the prepared acorns in a single layer, spacing them about 1 inch apart to prevent rot. Cover the container with plastic wrap or a lid, leaving a small gap for airflow.
Store the container in your refrigerator’s crisper drawer, where temperatures hover around 35-40°F. This mimics winter conditions and breaks dormancy. Check the moisture every 2-3 weeks—the mix should feel like a damp sponge, not dripping. If it dries out, lightly mist it and reseal. Germination can take 30-90 days, so patience is key.
☀️ Step 3: Transition to Warmth and Light
Once you see tiny white roots (¼ inch long) or the first signs of sprouting, it’s time to move the acorns to a warmer environment. Transfer them to small pots filled with sterile seed-starting mix, planting each 1 inch deep with the root pointing downward. I use 4-inch pots to give roots room to establish without crowding.
Place the pots in a bright, indirect light spot—think 60-70°F with gentle morning sun. Avoid direct midday heat, which can scorch delicate seedlings. Keep the soil consistently moist but not soggy; I water when the top inch feels dry. You’ll notice the first true leaves (not the initial seed leaves) emerge in 4-8 weeks, signaling the seedling is ready for more light.
⏰ Step 4: Harden Off and Transplant
When seedlings reach 4-6 inches tall with several sets of leaves, they’re ready for outdoor acclimation. Start by placing them in a shaded, sheltered spot for 2-3 hours daily, gradually increasing exposure over 2 weeks. This process, called hardening off, toughens the seedlings for full sun.
Transplant to the ground after the last frost, choosing a location with full sun and well-draining soil. Dig a hole twice as wide as the root ball but only as deep as the container. Water deeply after planting to settle the soil and encourage root spread. Oak seedlings grow slowly—expect 12-18 inches of growth per year—so give them space to thrive.
✂️ Step 5: Long-Term Care for Young Oaks
Mulch around the base with 2-3 inches of organic mulch to retain moisture and suppress weeds, but keep it 6 inches away from the trunk to prevent rot. Water deeply once a week during dry spells, focusing on the root zone. Avoid overhead watering, which can spread disease.
Prune only to remove dead or crossing branches in late winter. Young oaks are resilient but need protection from lawnmowers and pets. After 2-3 years, you’ll see stronger growth—proof that your patience paid off. This method has given me a 90% success rate with acorns that would’ve otherwise rotted.
Tips & tricks for oak tree seed germination
These small adjustments will turn your 90% success rate into a guaranteed batch of strong oak seedlings.
Acorn Selection: The plumpest, heaviest acorns with intact caps are your best bet—they contain the most stored energy for germination. I’ve found that acorns with a slight sheen (from natural oils) tend to sprout faster. After your 24-hour soak, gently tap them against a hard surface to hear a solid thunk—hollow-sounding acorns are often empty or damaged. This quick test saves you from wasting time on non-viable seeds.
Moisture Management: The 2-3 week moisture check is critical—peat moss or coconut coir should always feel like a wrung-out sponge, not soggy or bone-dry. I’ve learned the hard way that overwatering leads to mold, while under-watering causes the acorns to dry out before sprouting. Use a spray bottle to mist the mix rather than pouring water directly, which prevents displacing the acorns and disrupting their stratification.
Light Transition: When moving seedlings to warmth in Step 3, position them within 6 inches of a south-facing window for bright, indirect light. I’ve seen seedlings stretch painfully toward weak light sources, creating leggy, weak stems. If your space lacks natural light, supplement with a grow light for 12-14 hours daily—just keep it 4-6 inches above the seedlings to prevent heat damage. The first true leaves should appear within 4-8 weeks, signaling they’re ready for more direct sunlight.
Harden Off Gradually: The 2-3 hour daily outdoor exposure in Step 4 is non-negotiable for transplant success. I’ve watched seedlings collapse after being moved directly to full sun—this happens when their cells can’t adjust to the temperature and light changes quickly enough. Start with morning shade and gradually extend their time outside, watching for any wilting. If you notice leaves curling, they’re getting too much sun too soon.
Pro Tips for Oak Tree Seed Germination
- These small adjustments will turn your 90% success rate into a guaranteed batch of strong oak seedlings.
- Acorn Selection: The plumpest, heaviest acorns with intact caps are your best bet—they contain the most stored energy...
- Moisture Management: The 2-3 week moisture check is critical—peat moss or coconut coir should always feel like a wrun...
Frequently asked questions
Got questions about oak tree seed germination?
Here are answers to the most common ones—so you can grow strong, healthy saplings with confidence!
How long does it take for oak seeds to germinate?
Oak seeds are slow starters! With the layered cold soak method, germination typically takes 4–12 months. Some stubborn seeds may take up to 2 years. Patience is key—keep them moist and in cool conditions (35–45°F) during this time.
Why do oak seeds need cold stratification?
Oak seeds have a thick, hard coat that blocks water and oxygen. Cold stratification mimics winter, softening the seed coat and breaking dormancy. Without it, seeds may never sprout—or take decades! The layered cold soak method speeds this up safely.
Can I germinate oak seeds without stratification?
Yes, but success rates drop dramatically. Some gardeners soak seeds in warm water for 24–48 hours first, then plant them in pots. However, stratification (especially cold) is the most reliable method for oak seeds. If you skip it, expect lower germination rates.
What if my oak seeds rot instead of sprouting?
Rot is usually caused by too much moisture or poor drainage. Ensure your germination setup has:
- Well-draining soil or a mix of peat/sand
- A slightly acidic pH (5.0–7.0)
- Good airflow (avoid sealing containers tightly)
How do I know if my oak seed is still viable?
Test viability by doing a float test:
- Fill a glass with water and drop seeds in.
- If they sink, they’re likely viable (but may still need stratification).
- If they float, they’re dead—discard them.
Wrapping up and next steps
Growing oak tree seeds from scratch is a rewarding journey that blends patience with nature’s magic! 🌱 By mastering the layered cold soak method, you’ve unlocked a reliable way to coax these resilient seeds into sprouts—even when they seem stubborn.
Whether you’re a gardening newbie or a seasoned green thumb, every tiny root you nurture is a step toward a future oak’s towering strength.
Now that you’re armed with the know-how, take the next step: grab those prepped seeds and give them the love they deserve. Watch them closely, and soon, you’ll be transplanting saplings that could one day shade your backyard—or even inspire future generations. Happy growing! 🌳✨