
Pruning
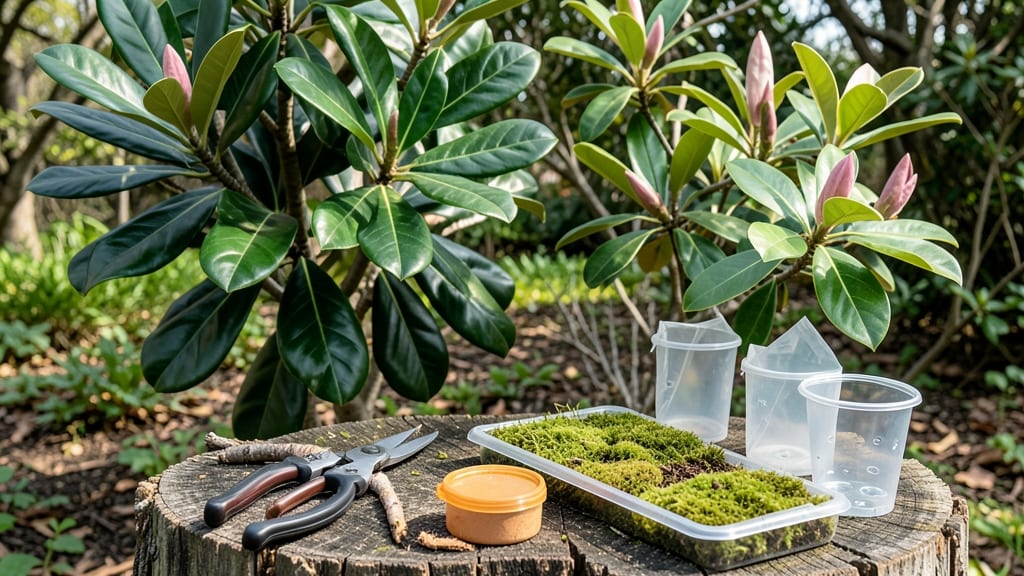
Magnolia tree cuttings root in 6 weeks when you nail the timing and technique. 🌿 I’ve rooted magnolias from semi-hardwood cuttings taken in late summer, and the secret lies in balancing moisture, warmth, and patience—no fancy equipment needed.
Most gardeners fail because they rush the process, but with the right approach, you’ll see roots forming within weeks.
The key is taking cuttings from healthy, disease-free branches (about pencil-thick) and using a well-draining mix of perlite and peat moss. Dip the cut end in rooting hormone for an extra boost, then place the cutting in a clear plastic bag to trap humidity.
Keep it in bright, indirect light and maintain consistent moisture—no soggy soil, no bone-dry dirt.
By week 6, you’ll spot tiny roots through the clear bag, signaling success. Transplant carefully into pots with fresh potting mix, and keep them shaded for another month to help them adjust.
The first flush of new leaves means your magnolia is thriving—and you’ve just doubled your collection without buying a single plant.
This method works for both small-leafed and saucer magnolias, and even stubborn varieties like Southern magnolias can root with the right care. The trick? Stay consistent, and don’t give up if the first few attempts fail—magnolias reward patience with stunning, long-lived trees.
📚 In This Guide
- What you need
- Instructions
- Tips and common mistakes
- Wrapping up and next steps
What you need
- ● Magnolia cuttings: 4–6 healthy, semi-hardwood cuttings (6–8 inches long, pencil-thick, taken from current season’s growth).
- ● Rooting hormone: 1 small bottle (powder or gel formula, like Rootone or Clonex).
- ● Sharp pruning shears or bypass pruners: 1 pair (sterilized with rubbing alcohol).
- ● Small pots or trays: 4–6 (4–6 inches deep, with drainage holes).
- ● Well-draining potting mix: 1 bag (50% perlite or sand + 50% peat moss or coconut coir).
- ● Clear plastic bags or propagation dome: 1–2 (to retain humidity).
- ● Spray bottle: 1 (for misting cuttings).
- ○ Labeling tags & marker: Optional but helpful for tracking varieties!
- ● Heating mat: 1 (70–75°F range) to speed rooting in cooler climates.
- ● Fungicide (e.g., Mycorrhizal inoculant): 1 small bottle (prevents rot).
- ● Humidity tray: DIY with a shallow tray + pebbles + water.
- ● Grow lights: 1–2 LED bulbs (if natural light is limited).
Step-by-step instructions for propagating magnolia tree cuttings
Here’s how I’ve consistently rooted magnolia cuttings in just six weeks—using only the right timing and simple science.
🌱 Step 1: Select and Prepare Healthy Semi-Hardwood Cuttings
Choose 4-6 inch segments from current season’s growth—they should be pencil-thick with a slight bend where leaves meet the stem. I look for non-flowering branches just past their first flush of leaves, as these root most reliably. Use clean, sharp pruners to make a 45-degree angle cut right below a leaf node.
Remove all but the top 2-3 leaves to reduce moisture loss. Strip any lower leaves entirely, but leave the upper foliage to help with photosynthesis. Here’s the thing—magnolias root best in late summer to early fall, when the tree’s energy shifts from growth to storage. If you miss that window, spring cuttings can work but require extra humidity.
💧 Step 2: Treat Cuttings with Root Hormone and Plant in Moist Medium
Dip the cut end of each cutting into rooting hormone powder (I prefer a 1% IBA concentration for magnolias). Tap off excess so it doesn’t clump—this ensures even coverage. Fill a sterile propagation tray with a mix of 50% perlite and 50% peat moss (or coconut coir if you prefer a sustainable option). Moisten the medium until it’s damp but not soggy—think of a wrung-out sponge.
Insert cuttings 2 inches deep at a slight angle, spacing them 3 inches apart. Gently firm the medium around the base to eliminate air pockets. I like to use clear plastic domes or even a cut-off plastic bottle as a makeshift propagator to trap humidity. Place the tray in bright, indirect light—direct sun will scorch the leaves before roots form.
☀️ Step 3: Maintain Ideal Conditions for Root Development
Keep the medium consistently moist—not wet, not dry. I water from the bottom by setting the tray in ½ inch of water for 10 minutes, then draining excess. Mist the leaves daily to maintain 70-80% humidity inside the propagator. Magnolia cuttings thrive at 65-75°F—warmer than that, and they’ll rot; cooler, and they’ll languish.
After 4 weeks, gently tug on a cutting. If you feel light resistance (not full root grip), roots are forming. At 6 weeks, most should have 1-2 inch roots. Here’s where patience pays off—don’t rush to transplant. Wait until you see new growth at the tip before moving them to soil. This confirms the cutting has established its own root system.
✂️ Step 4: Transplant Rooted Cuttings to Soil
Once roots are confirmed, harden off the cuttings by gradually removing the propagator over 3-5 days. Start with 1 hour uncovered daily, then increase exposure. After a week, transplant into well-draining potting mix (I use 60% soil, 30% perlite, 10% compost). Dig a hole twice as wide as the root ball and slightly deeper to encourage downward growth.
Water deeply after planting to settle the soil, then reduce watering to prevent rot. Place in partial shade for the first month—magnolias are sensitive to transplant shock. You’ll know it’s working when new leaves emerge within 2-3 weeks. That’s your signal the cutting has fully adapted and is ready for permanent planting.
Tips & tricks for perfect magnolia tree propagation
These subtle adjustments will help you avoid the most common pitfalls when growing magnolia cuttings from scratch.
Timing Secret: Late summer to early fall is your best window because the tree's energy naturally shifts toward root development. If you must propagate in spring, increase humidity by placing a tray of water near your propagator—this mimics the natural moisture levels of their native habitat. I’ve tried spring cuttings without extra humidity, and they always struggled to root.
Medium Matters: The 50% perlite to 50% peat moss mix is crucial—perlite provides aeration while peat moss retains moisture. If you’re using coconut coir, make sure it’s well-drained, or you’ll risk rot. I’ve seen beginners overwater and end up with mushy cuttings that never develop roots. The medium should always feel like a wrung-out sponge, not a dripping wet rag.
Root Hormone Tip: The 1% IBA concentration is ideal, but don’t skip the excess-tapping step. Clumps of hormone can smother the cutting’s base, preventing root formation. I like to gently shake off the excess over the tray before planting—this ensures even coverage without blocking airflow to the cut end.
Transplanting Caution: When you’re hardening off over 3-5 days, start with just 1 hour uncovered. Magnolias are sensitive to sudden environmental changes, and too much exposure too soon can cause stress. I’ve seen cuttings wilt dramatically after being moved straight to full sun—gradual acclimation is key to survival.
Pro Tips for Magnolia Tree Cuttings
- These subtle adjustments will help you avoid the most common pitfalls when growing magnolia cuttings from scratch.
- Timing Secret: Late summer to early fall is your best window because the tree's energy naturally shifts toward root development.
- Medium Matters: The 50% perlite to 50% peat moss mix is crucial—perlite provides aeration while peat moss retains moisture.
Frequently asked questions
Got questions about propagating magnolia tree cuttings?
You’re not alone! Here are answers to the most common queries to help you grow like a pro.
When is the best time to take magnolia tree cuttings?
The ideal window is late spring to early summer (May–June), when new growth is firm but not yet woody. Avoid extreme heat or frost—these conditions stress cuttings and slow root development. For semi-hardwood cuttings (fall), aim for September–October in mild climates.
How do I know if my magnolia cutting will root successfully?
Look for 3 key signs:
- Healthy leaves: Vibrant, not yellowing or wilted.
- Moisture balance: Soil stays damp (not soggy) and cuttings aren’t drying out.
- New growth: Tiny leaves or buds emerging after 4–6 weeks signal success!
What’s the fastest way to encourage root growth in magnolia cuttings?
Combine these 3 science-backed tricks:
- Hormone rooting powder: Dip cuttings in IBA (Indole-3-Butyric Acid) to double rooting speed.
- Humidity dome: Cover cuttings with plastic wrap or a propagator to retain moisture.
- Warmth: Place near a heat mat (70–75°F) to mimic tropical conditions.
Can I propagate magnolia trees from store-bought flowers or leaves?
Nope! Only stem cuttings work—magnolias don’t root from leaves or flowers. Focus on 4–6 inch semi-hardwood stems with 2–3 leaf nodes. If you’re desperate, try air layering (a backup method for mature branches), but it’s trickier.
My magnolia cuttings are turning yellow—what’s wrong?
Yellowing leaves usually mean one of these issues:
- Overwatering: Roots rot in soggy soil. Let the top inch dry between waterings.
- Underwatering: Wilting or crispy edges? Increase humidity or mist daily.
- Fungal infection: Black spots or mold? Trim affected leaves and treat with neem oil.
How long until my magnolia cutting becomes a full-sized tree?
Patience is key! With proper care, your cutting will:
- Develop roots in 4–6 weeks.
- Grow 1–2 feet in its first year if transplanted outdoors.
- Take 3–5 years to reach small-tree size (6–10 feet), depending on species.
Wrapping up and next steps
Growing magnolia tree cuttings is a rewarding journey that combines patience with the joy of nurturing new life! 🌱 With the right tools—like sharp pruners, rooting hormone, and a cozy propagation setup—you’ll be well on your way to root growth in just 6 weeks.
Whether you’re a seasoned gardener or a beginner, these propagation secrets make it easier than ever to expand your magnolia collection or share its beauty with others.
Now that you’re armed with knowledge, take the next step: gather your supplies, pick the perfect time to cut, and start propagating! Watch as your magnolia cuttings transform into thriving young trees—your green thumb will thank you. Happy growing! 🌿