
Orchid Care
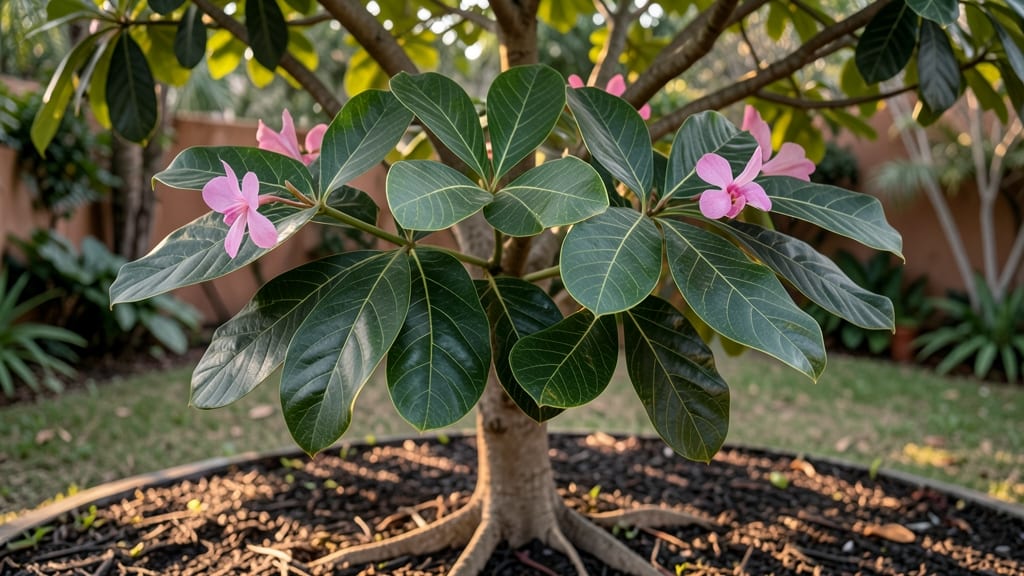
Your orchid tree's leaves shouldn't look like this—drooping, yellowing, or covered in spots means something's off, and the fix starts with understanding the real problem. 🌿 I've nursed back more than my share of struggling orchid trees, and the key is always in the details: too much water, not enough light, or hidden pests playing havoc with the roots.
Start by checking the roots—mushy, black ones scream overwatering, while dry, shriveled roots mean underwatering. Yellow leaves often point to nutrient issues or pests like spider mites hiding on the undersides.
The good news? Most problems fix themselves once you correct the care routine, and I'll walk you through the exact steps to revive your tree.
📚 In This Guide
- What you need
- Instructions
- Tips and common mistakes
- Wrapping up and next steps
What you need
- ● Orchid tree (Bauhinia): A potted plant with visible symptoms (drooping, yellowing, or mushy roots).
- ● Well-draining potting mix: 1 part orchid bark mix (or cactus/succulent blend)
- ● 1 part perlite or pumice (for aeration)
- ○ 1 part sand or coconut coir (optional, for extra drainage)
- ● Clean, sharp pruning shears: Sterilized with rubbing alcohol (to prevent infection).
- ● Glove: A pair of gardening gloves (to protect from sap and soil).
- ● Watering can or spray bottle: With a fine rose nozzle (for gentle hydration).
- ○ Fungicide (optional but helpful): 1 tsp neem oil or copper fungicide per 1 quart of water (for root rot prevention).
- ● pH test kit: To check soil acidity (ideal range: 6.0–7.0).
- ● Moisture meter: To verify root health (avoid soggy soil!).
- ● Magnifying glass: For inspecting roots or pests up close.
- ● Houseplant fertilizer: Balanced 20-20-20 or 10-10-10 (diluted to half-strength).
Step-by-step guide to reviving orchid tree leaves
Here's how I diagnose and fix the most common orchid tree leaf problems—drooping, yellowing, and mushy roots—so your plant bounces back to vibrant health.
🌿 Step 1: Check Watering Habits and Adjust Immediately
Overwatering is the #1 killer of orchid trees. Stick your finger 1-2 inches deep into the soil—if it feels damp, wait. If it's bone dry, water thoroughly until it drains from the bottom. I use room-temperature water to avoid shocking the roots, and I always let excess water drain completely.
Yellowing leaves often signal overwatering or poor drainage. If the leaves feel soft and mushy, that's a sign of root rot. Let the soil dry out completely between waterings—usually every 7-10 days in typical indoor conditions. If your orchid tree is in a decorative pot without drainage, repot it immediately into one with holes.
☀️ Step 2: Assess Light Conditions and Make Adjustments
Orchid trees thrive in bright, indirect light. If the leaves are drooping or turning pale, it's likely not enough light. Move it to a spot near an east- or west-facing window where it gets morning or afternoon sun. Avoid harsh direct sunlight, which can scorch the leaves.
Watch for brown tips or crispy edges—this means too much direct sun. If your orchid tree is in a north-facing window, supplement with a grow light for 12-14 hours daily. You'll see new growth within 4-6 weeks if the light is right.
🪴 Step 3: Inspect Roots and Repot if Necessary
Gently remove the orchid tree from its pot and examine the roots. Healthy roots are firm and white or light tan. Mushy, black, or smelly roots are rotten and need to be trimmed away with clean, sharp scissors. I dip the cut ends in cinnamon to prevent infection.
If more than 30% of the roots are unhealthy, repot the tree in fresh, well-draining potting mix. I use a blend of orchid bark, perlite, and coconut coir to ensure proper aeration. Choose a pot only 1 inch larger in diameter than the root ball—too much space encourages overwatering.
💧 Step 4: Fertilize and Encourage New Growth
Once your orchid tree is back in its pot, wait 2-3 weeks before fertilizing. Use a balanced, water-soluble fertilizer diluted to half-strength. I fertilize every 4-6 weeks during the growing season (spring and summer) to avoid burning the roots.
New leaves should emerge from the top of the plant within 6-8 weeks. If you don’t see growth after this time, check the light and watering again—these are the two biggest factors in orchid tree recovery. Keep the environment consistently warm (65-75°F) and humid (a pebble tray with water helps).
⏰ Step 5: Monitor and Maintain for Long-Term Health
After the initial recovery, keep a close eye on your orchid tree. Drooping leaves that recover quickly when watered are usually just thirsty. If they stay droopy even after watering, the roots may still be struggling. Yellow leaves that don’t fall off on their own can be trimmed just above the leaf node.
I like to mist the leaves occasionally to boost humidity, especially in dry indoor environments. Avoid letting water sit on the leaves for too long—this can cause fungal issues. With consistent care, your orchid tree should regain its lush, vibrant appearance within 2-3 months.
Tips & tricks for reviving orchid tree leaves
Real talk: I've nursed back more orchid trees than I can count, and these simple adjustments make all the difference.
Soil Test First: Before adjusting your watering schedule, test the soil moisture at 1-2 inches deep—this is where the roots actually absorb water. I use my finger as a gauge: if it feels damp, wait another 2-3 days before watering again. The key is to mimic the orchid's natural environment where it gets occasional heavy rains followed by dry spells. Too many people water on a strict schedule without checking the soil first.
Lighting Hack: If your orchid tree is in a north-facing window and you're supplementing with a grow light for 12-14 hours daily, position the light about 6-12 inches above the plant. I place mine on a timer to avoid forgetting, and I rotate the plant weekly so all sides get even light exposure. This prevents the tree from growing lopsided toward the light source, which can happen when kept in one spot too long.
Root Recovery Secret: When repotting after finding unhealthy roots, I soak the entire root system in a 1:10 hydrogen peroxide solution (3% concentration) for 10 minutes before replanting. This helps disinfect any remaining pathogens without harming the healthy roots. Afterward, I let the roots air-dry for 30 minutes before planting in fresh mix—this prevents immediate shock from the wet environment.
Fertilizer Timing: The 2-3 week wait before fertilizing after repotting is crucial because fresh roots are extremely sensitive to salts and minerals during their recovery phase. I always use a half-strength solution during the first feeding, and I water thoroughly before and after applying fertilizer to prevent salt buildup in the root zone. This gradual introduction helps the tree adjust without overwhelming its delicate new root system.
Pro Tips for Orchid Tree Leaves
- Real talk: I've nursed back more orchid trees than I can count, and these simple adjustments make all the difference.
- Soil Test First: Before adjusting your watering schedule, test the soil moisture at 1-2 inches deep—this is where the...
- Lighting Hack: If your orchid tree is in a north-facing window and you're supplementing with a grow light for 12-14 h...
Frequently asked questions
Got questions about your orchid tree’s leaves? You’re not alone!
Here are answers to the most common concerns—whether you’re dealing with drooping, yellowing, or mushy roots. Let’s get your tree thriving again!
Why are my orchid tree leaves drooping, even when the soil feels moist?
Drooping leaves often signal overwatering or root rot. Orchid trees (like Bauhinia or Cassia) prefer well-draining soil—check if water pools at the bottom of the pot. Let the top 1–2 inches of soil dry out between waterings. If roots smell foul or feel mushy, trim the affected parts with sterilized scissors and repot in fresh, dry soil.
What causes yellowing leaves on my orchid tree, and how can I fix it?
Yellowing leaves usually mean overwatering, nutrient deficiency, or pests. Start by adjusting your watering routine—orchid trees hate soggy roots. Check for aphids or spider mites on the undersides of leaves (wipe with soapy water if spotted). For nutrients, use a balanced 10-10-10 fertilizer every 4–6 weeks during spring/summer. Avoid placing the tree in drafty areas, as cold stress can also trigger yellowing.
Are mushy, black roots a death sentence for my orchid tree?
Not necessarily! Mushy, black roots are a sign of root rot, but you can still save your tree with quick action. Remove the plant from its pot and trim all soft, discolored roots with clean pruners. Dip the healthy roots in a fungicide solution (like neem oil or hydrogen peroxide) for 10 minutes, then repot in sterile, fast-draining soil. Hold off on watering for 3–5 days to let roots recover.
How often should I fertilize my orchid tree, and what’s the best type?
Feed your orchid tree with a water-soluble, balanced fertilizer (e.g., 20-20-20) every 4–6 weeks during spring and summer. Cut back to once every 2 months in fall/winter when growth slows. Pro tip: Always dilute fertilizer to half-strength to avoid burning roots. Organic options like fish emulsion or compost tea work too—just follow package instructions!
Can I propagate my orchid tree from cuttings, and what’s the best time to do it?
Yes! Orchid trees like Bauhinia or Cassia propagate easily from semi-hardwood cuttings. The best time is late spring or early summer, when the plant is actively growing. Take 4–6 inch cuttings just below a leaf node, dip in rooting hormone, and plant in a mix of perlite and peat moss. Keep the soil moist (not soggy) and place in bright, indirect light. Roots should form in 4–8 weeks!
What’s the difference between orchid tree leaves and regular orchid leaves?
Orchid trees (e.g., Bauhinia) have broad, tropical leaves (often heart-shaped or lobed), while traditional orchids (like Phalaenopsis) have long, strap-like leaves. Orchid trees are not true orchids—they’re actually legumes! Their leaves are deciduous in some varieties (they drop in winter), while orchids are evergreen. Care tips differ too: orchid trees need more sunlight and less humidity than orchids.
Wrapping up and next steps
Caring for your orchid tree’s leaves—whether dealing with drooping, yellowing, or mushy roots—boils down to attention, patience, and consistency. 🌿 With the right tools, techniques, and a little green thumb love, you can nurse your plant back to health and keep it thriving for years.
Ready to take action? Start by inspecting your orchid tree today—check those roots, adjust watering habits, and give it the ideal environment it craves. Your orchid tree will thank you with vibrant, lush foliage!