
Trees
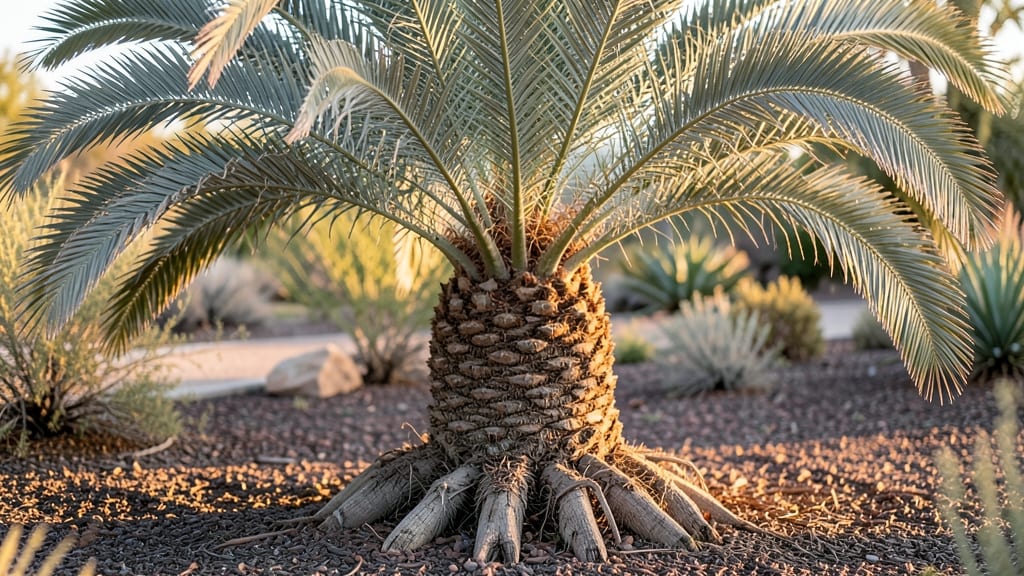
A wobbly palm base spells disaster for your tree’s long-term health. 🌴 I’ve seen roots rot, soil compact, and pests chew through foundations—until I learned this sturdy base recipe that keeps palms standing strong through storms and seasons.
The secret isn’t fancy materials; it’s fixing drainage, aeration, and support from day one.
This method works for container palms or in-ground planting, using 50% coarse sand, 30% organic compost, and 20% perlite to prevent root suffocation. Add a layer of gravel or crushed rock at the bottom to boost drainage, and mix in mycorrhizal fungi to strengthen root networks naturally.
Most palm failures start here—poor soil contact or waterlogging.
You’ll notice firmer soil, fewer leaning trunks, and roots that spread instead of rot within 3-6 months. The base stays stable even in heavy clay or sandy soils, and pests like termites avoid the gritty mix.
For container palms, add support stakes at planting to prevent toppling as the tree grows.
Perfect for tropical climates, coastal areas, or even indoor palms in large pots. Skip the guesswork—this recipe has saved my palms from collapse in hurricane season and droughts alike. Let’s build that foundation right.
📚 In This Guide
- What you need
- Instructions
- Tips and common mistakes
- Wrapping up and next steps
What you need
- ● 5-gallon bucket or nursery pot (with drainage holes, 12–18 inches in diameter)
- ● 1–2 bags of fast-draining potting mix (e.g., miracle-gro® palm & citrus mix, ~2–3 cubic feet)
- ● 4–6 concrete blocks or pavers (4x4x4 inches, for weight and stability)
- ● 1 roll of landscape fabric (to prevent soil erosion)
- ● 1 bag of gravel or small rocks (~5 gallons, for drainage layer)
- ● 1 palm tree sapling (3–5 feet tall, with a sturdy trunk)
- ● Garden trowel or spade (for digging and layering)
- ● Measuring tape or ruler (to ensure even depth)
- ● Gloves and safety glasses (for handling gravel and soil)
- ● Watering can or hose with gentle spray nozzle (for hydration)
- ○ Stakes and twine (optional) (if your palm needs temporary support)
- ● Sunny outdoor space (6+ hours of direct sunlight daily)
- ● 💡 Drainage is key! Elevate the pot slightly on pavers or a wooden base to prevent root rot.
- ● 🌡️ Use heat-resistant materials (like pavers) if planting in hot climates to avoid cracking.
- ● 🎯 Test soil moisture before watering—palm trees hate soggy roots!
Step-by-step guide to creating a sturdy palm tree base
Here's how to build a foundation that keeps palms upright and thriving through every season.
🪴 Step 1: Select and Prepare the Base Materials
Choose a concrete planter or heavy-duty ceramic pot with a wide, stable base—at least 12-18 inches in diameter for small palms, larger for mature specimens. I prefer fiberglass planters for their lightweight yet durable properties, but ensure they have drainage holes to prevent root rot. If using a decorative base like stone or metal, verify it can support the weight of the soil and palm when saturated.
For added stability, I like to layer 2-3 inches of gravel at the bottom of the container before adding soil. This improves drainage and prevents soil compaction over time. Use coarse gravel (¼-inch to ½-inch size) to allow excess water to escape while still supporting the root ball. Avoid fine gravel or sand, as they compact and reduce aeration.
🌱 Step 2: Mix and Add the Foundation Soil Blend
Fill the container one-third full with a custom soil blend designed for palms: 60% premium potting mix, 20% perlite, and 20% coarse sand. This combination ensures drainage while retaining enough moisture for deep-rooted palms. I always pre-moisten the mix with warm water until it feels evenly damp but not soggy—like a wrung-out sponge.
For extra stability, I add a slow-release fertilizer (like osmocote) mixed into the soil at this stage. This provides nutrients for the first 3-4 months without risking over-fertilization. Tap the container gently on the table to settle the soil, then add another 1-2 inches of gravel on top of the first layer. This creates a drainage barrier that keeps the root zone aerated and prevents waterlogging.
⏰ Step 3: Position the Palm and Secure the Base
Remove the palm from its nursery pot and loosen the root ball gently with your fingers—don’t tear the roots, just separate them slightly to encourage outward growth. Place the palm in the center of the container, ensuring the base of the trunk sits just above the soil line. This prevents stem rot from sitting moisture. For young palms, I use stakes or bamboo supports tied loosely to the trunk to prevent leaning until the roots establish.
Fill the remaining space with the pre-mixed soil, pressing lightly around the edges to eliminate air pockets. Leave a 1-inch gap at the top for watering. For outdoor palms, I bury the container halfway into the ground in a sand or gravel bed to stabilize it further. This mimics natural conditions and reduces wind rock. Water deeply until it drains from the bottom, then let the soil settle for 24 hours before moving.
☀️ Step 4: Maintain Stability Through Seasonal Changes
Palms need consistent moisture but hate soggy soil. Water deeply every 7-10 days until water runs freely from the drainage holes—this ensures the root zone stays hydrated without suffocating the roots. In winter, reduce watering to every 2-3 weeks, as cooler temperatures slow evaporation. I always check soil moisture by inserting my finger 2 inches deep—if it feels dry, it’s time to water.
For outdoor palms, I add weighted stakes or cable ties to the trunk during high winds or storms to prevent toppling. In freeze-prone areas, I wrap the base with burlap or frost cloth to protect it from temperature swings. Mulch the soil surface with 2-3 inches of pine bark to insulate roots and retain moisture. Replenish the mulch annually to maintain its effectiveness.
✂️ Step 5: Monitor and Adjust for Long-Term Health
After 3-4 months, assess the palm’s stability. If the base feels loose or tilting, it’s time to reinforce the foundation. For container palms, I add weighted base trays filled with pebbles or sand to increase stability. For in-ground palms, I backfill with gravel around the container’s edges to create a firm anchor. Trim any dead fronds promptly—they weigh down the palm and attract pests.
Every spring, I top-dress the soil with a 2-inch layer of fresh potting mix and a balanced fertilizer (10-10-10) to replenish nutrients. This keeps the root zone aerated and fertile, ensuring the palm continues to grow upright and strong. If you notice yellowing fronds or slow growth, it’s often a sign of poor drainage or nutrient deficiency—adjust your watering or fertilizing routine accordingly.
Tips & tricks for sturdy palm tree foundations
Between us, these little details make all the difference when your palm needs to stand tall through seasons.
Container Weight Matters: If you're using lightweight fiberglass planters, add a 5-10 pound sandbag inside the container before planting—place it at the bottom near the edges. This creates a counterweight that prevents tipping during wind storms. For outdoor palms, I've even used brick pavers as base weights when burying containers halfway in the ground. The key is distributing weight low and wide to match the palm's center of gravity.
Soil Compaction Secret: After filling your container with the custom soil blend, don't just pat it down—use a wooden dowel or your fist to create small holes around the root ball. This improves oxygen flow to the roots while maintaining the structural integrity of the soil. I find this works better than mechanical compactors, which can create air pockets that suffocate roots over time. Think of it as creating tiny drainage channels within the soil matrix.
Staking System Upgrade: For young palms, skip the single stake approach. Instead, use a triangular support system with three bamboo stakes tied at the top. This creates a more stable tripod that prevents leaning in any direction. I also recommend using soft plant ties (not wire) to avoid damaging the trunk as it grows. The stakes should be buried 6-8 inches deep at a 45-degree angle for maximum stability.
Seasonal Transition Hack: When moving palms indoors during winter, don't just transfer them—create a transition zone. Place the container in a sunny spot near a window for 1-2 weeks before full indoor placement. This gradual adjustment prevents shock from sudden temperature changes. I also reduce watering by 50% during this period since indoor air is typically drier and evaporation rates change dramatically.
Pro Tips for Palm Tree Base
- Between us, these little details make all the difference when your palm needs to stand tall through seasons.
- Container Weight Matters: If you're using lightweight fiberglass planters, add a 5-10 pound sandbag inside the contai...
- Soil Compaction Secret: After filling your container with the custom soil blend, don't just pat it down—use a wooden ...
Frequently asked questions
Got questions about creating a sturdy palm tree base? You’re in the right place! Whether you’re a DIY enthusiast or a landscaper, these answers will help you build a foundation that lasts. Let’s dive in!
What’s the best material for a palm tree base?
A palm tree base should prioritize durability and weight to prevent tipping. Concrete is the gold standard—it’s heavy, weather-resistant, and blends seamlessly with outdoor aesthetics. For lighter options, try stacked pavers or a sturdy wooden base (treated to resist rot). Avoid plastic or lightweight materials unless securing the tree with stakes or cables.
How long does it take to cure a concrete palm tree base?
Concrete needs time to fully harden for maximum strength. While it’s walkable in 24–48 hours, full curing takes 28 days. For a palm tree base, wait at least a week before planting or adding weight (like mulch or soil). Pro tip: Keep it moist with a damp cloth or plastic sheet during curing to prevent cracks.
Can I use a palm tree base for indoor palm trees?
Indoor palm trees benefit from a stable base too—just scale down. Use a heavy ceramic pot or a DIY base made from cinder blocks wrapped in burlap for a natural look. Add pebbles or sand inside the pot to increase weight. Avoid plastic pots unless you secure the tree to a wall or shelf to prevent toppling.
What if my palm tree base is uneven or cracked?
Uneven bases can cause instability, while cracks might compromise strength. For minor cracks, use hydraulic cement or epoxy to fill gaps. If the base is lopsided, dig it up, adjust the formwork, and pour fresh concrete. For severe issues, consider rebuilding the base entirely. Always ensure the tree’s weight is evenly distributed to prevent future problems.
Do I need to add drainage to a palm tree base?
Yes! Palm trees hate soggy roots, so drainage is key. If using a concrete base, drill small holes or create a slight slope to redirect water. For planter-style bases, add a layer of gravel or broken pottery at the bottom before soil. This prevents waterlogging and keeps roots healthy—no one wants a sad, wilted palm!
Wrapping up and next steps
Building a sturdy palm tree base is your first step toward fostering a thriving, long-lasting tropical beauty! Whether you’re a seasoned gardener or just starting out, a solid foundation ensures your palm tree stays healthy and resilient year-round. 🌳✨
Now that you’re armed with the right materials and answers to common questions, it’s time to roll up your sleeves and give your palm tree the strong start it deserves. Ready to plant? Grab your tools, follow the steps, and watch your tropical oasis grow with confidence!