
Lawn
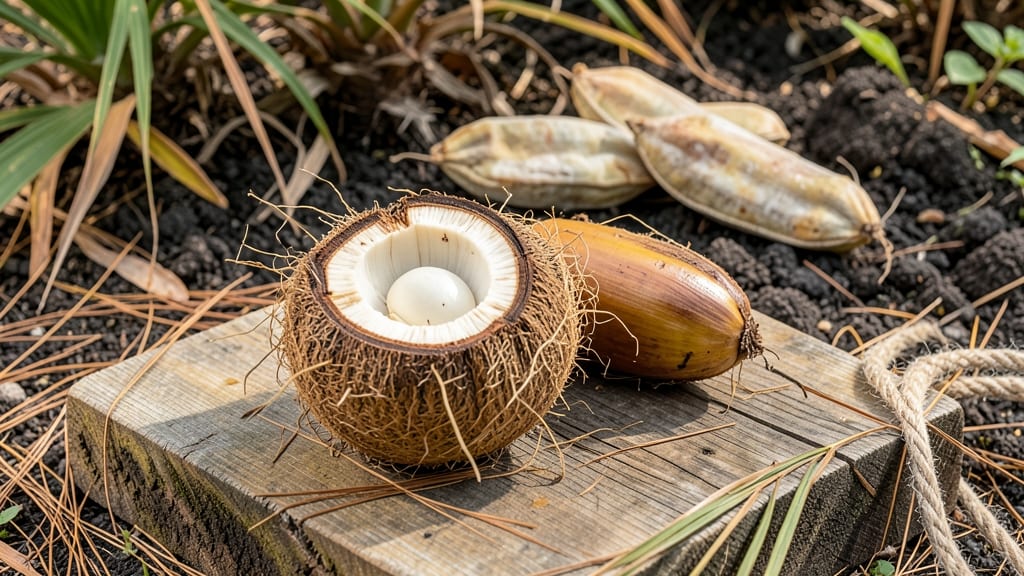
Transforming palm tree seed pods into garden art turns discarded nature into stunning, textured sculptures that elevate any outdoor space. 🌿 I’ve turned these fibrous, organic shapes into everything from rustic planters to whimsical wind chimes—each piece tells a story while blending seamlessly with your landscape.
The beauty of this project lies in its simplicity: no special tools or skills required. You’ll need just a few seed pods, some natural adhesives like twine or hot glue, and a vision for how they’ll fit into your garden’s aesthetic. The results? One-of-a-kind decor that feels organic yet intentional.
Imagine seed pods woven into a hanging planter for trailing vines or stacked into a vertical garden feature. Their natural texture adds depth to any design, whether you’re going for boho-chic or modern minimalism. The best part? You’re upcycling what would otherwise be waste.
Perfect for gardeners who love sustainable decor or those looking to add a unique, handcrafted touch. Let’s bring these natural treasures to life in your outdoor space!
📚 In This Guide
- What you need
- Instructions
- Tips and common mistakes
- Wrapping up and next steps
What you need
- ● Palm tree seed pods: 5–10 (fresh or dried, depending on the size of your project). Look for Cocos nucifera (coconut) or Sabal palmetto pods for texture.
- ● Wire or vine: 1–2 yards of thin, flexible wire (18–22 gauge) or dried vines for structural support.
- ● Adhesive: A small bottle of hot glue or E6000 craft glue for securing pods.
- ● Base material: A wooden plank (12"x12"), driftwood, or a decorative tray for mounting.
- ○ Sandpaper: Medium-grit (120–150) to smooth rough edges (optional but helpful).
- ● Acrylic paint: Small bottles of earthy tones (sage, terracotta, or gold) for a pop of color.
- ● Natural dyes: Turmeric or coffee for staining pods (eco-friendly!).
- ● Twine or jute rope: For wrapping and adding rustic texture.
- ● Sealant spray: Clear polyurethane to protect finished pieces from weather.
Step-by-Step instructions for crafting palm tree seed pod art
Transforming palm seed pods into garden art is simpler than it looks—just follow these steps for striking, textured sculptures.
🌿 Step 1: Gather and Clean the Seed Pods
Collect dried palm seed pods from your garden or a trusted supplier. Look for pods that are fully mature, with a hard, dry exterior and no visible cracks or insect damage. Rinse them gently with water to remove dirt and debris, then let them air-dry completely in a shaded area. This ensures a clean base for your design while preventing mold or rot.
If the pods are still slightly damp, place them in a single layer on a wire rack for 24-48 hours. You’ll know they’re ready when the outer husk feels crisp to the touch and no moisture remains. Handle them carefully—they’re brittle once dry, and overhandling can cause them to split.
✂️ Step 2: Design and Prep the Base Structure
Sketch a simple design on paper first. Palm pod art often works best with symmetrical shapes—think fans, spirals, or layered clusters. For a 4-pod arrangement, group them in a circular or linear pattern, leaving 1-2 inches between each pod to allow for natural gaps and texture.
Use a utility knife or sandpaper to lightly rough up the edges of each pod where they’ll touch. This creates a better grip for adhesives later. If you’re working with larger pods, you can also carve shallow grooves to guide the placement of smaller decorative elements like twine, beads, or dried flowers.
🪴 Step 3: Assemble the Pods with Natural Adhesives
Apply a thin layer of white glue or a natural adhesive like hide glue to the roughened edges of one pod. Press it firmly against the center of another pod, holding for 30-60 seconds to ensure a strong bond. Work quickly—natural adhesives dry fast, and misalignment is harder to fix once set.
Repeat this process, building outward from the center. For added texture, wrap thin strips of jute twine or raffia around the joints between pods. This not only reinforces the structure but also adds visual interest. Let the assembly dry in a warm, dry place for 24 hours before handling.
☀️ Step 4: Seal and Weatherproof the Artwork
Once fully dry, seal the pods with a matte or satin outdoor varnish to protect them from moisture and UV damage. Apply two thin coats, allowing 4-6 hours of drying time between each. Test the finish by lightly touching the surface—it should feel smooth but not sticky.
For an organic look, skip the varnish and instead brush on a mix of beeswax and linseed oil (1:1 ratio). This provides a subtle sheen while keeping the natural texture intact. Place your finished piece in a shaded garden spot to prevent fading, or mount it on a wooden base for stability if needed.
💧 Step 5: Incorporate into Garden Design
Position your palm pod art in areas where its texture can contrast with other materials—pair it with smooth stone, metal, or glass for a modern look, or nestle it among plants with similar earthy tones like ferns or succulents. Elevate it on a pedestal or hang it from a pergola to draw the eye upward.
Over time, the pods may darken slightly from exposure, but this only enhances their natural beauty. If you notice any loosening of the adhesive, reinforce with a dab of glue and a fresh coat of sealant. With proper care, your palm pod art will remain a striking garden feature for years.
Tips & tricks for perfect palm tree seed pod sculptures
Turning simple seed pods into garden art requires patience and precision—here's how to avoid common pitfalls and elevate your design.
Pod Selection Matters: Look for pods with a consistent shape and size for your arrangement. Uneven pods can create visual imbalance, so sort them before starting. I always test the hardness by gently tapping two pods together—they should make a crisp, hollow sound, not a dull thud. This ensures they're properly dried and ready for assembly.
Adhesive Application Technique: When using white glue or hide glue in Step 3, apply it sparingly to the roughened edges only—too much adhesive can seep through and create unsightly streaks. I find using a small paintbrush helps control the amount. For extra strength, mix a tiny bit of wood glue with your adhesive (it dries crystal clear). Hold the pods together for the full 30-60 seconds, then use a rubber band to clamp them while they dry.
Drying Strategy: The 24-hour drying time in Step 3 is non-negotiable, but you can speed up the process slightly by placing your assembly in a warm, dry spot away from direct sunlight. A closed cabinet with a small fan circulating air will prevent warping while maintaining structural integrity. Just avoid using heat sources like hair dryers—this can cause the adhesive to set too quickly and weaken the bond.
Sealing Secrets: For the outdoor varnish in Step 4, I recommend using a brush with stiff bristles to apply those two thin coats. This helps prevent drips and ensures even coverage. The 4-6 hour drying time between coats is critical—rushing can lead to a sticky finish. If you're using the beeswax-linseed oil mixture, apply it in thin layers too, letting each layer absorb completely before adding the next.
Pro Tips for Palm Tree Seed Pod Art
- Turning simple seed pods into garden art requires patience and precision—here's how to avoid common pitfalls and elev...
- Pod Selection Matters: Look for pods with a consistent shape and size for your arrangement. Uneven pods can create vi...
- Adhesive Application Technique: When using white glue or hide glue in Step 3, apply it sparingly to the roughened edg...
Frequently asked questions
Got questions about crafting stunning palm tree seed pod art? You’re in the right place! Here are answers to the most common queries to help you create beautiful, textured garden sculptures with ease.
What types of palm tree seed pods work best for art projects?
The best pods are durable, lightweight, and naturally textured. Look for coconut husks (from mature coconuts), palmyra palm pods, or date palm seed pods. Avoid soft or moldy pods—they won’t hold glue or paint well. Collect from fallen trees or buy from craft stores for consistency.
How long does it take for palm pod art to dry and cure?
Drying times vary by glue and finish. A waterproof epoxy or Mod Podge typically sets in 4–6 hours, but full curing takes 24–48 hours. If painting, apply thin layers to avoid cracking. For outdoor pieces, wait at least 72 hours before placing in direct sunlight or rain to ensure durability.
Can I paint palm pod art for a polished look, or should I leave it natural?
Both work! For a natural look, seal with clear polyurethane to preserve textures. For color, use acrylic paint (thinned with water) and a sealant like Mod Podge Outdoor. Pro tip: Test paint on a small pod first—some dyes may fade in sunlight. Metallic or matte finishes add extra elegance!
What’s the best way to attach pods to a base (like wood or wire) without them falling off?
Use a strong, flexible adhesive like E6000 glue or hot glue for quick fixes. For heavy pods, reinforce with zip ties or wire wrapped around the base. If using wire, bend it into a cage shape first for stability. Let the glue dry 24 hours before handling to prevent shifting.
How do I protect palm pod art from weather damage?
Outdoor art needs extra protection. After painting, apply two coats of outdoor varnish or polyurethane (waterproof). Store pieces in a dry place during rainstorms, and avoid placing them in full sun for long periods—UV rays can fade colors. For extra durability, add a clear silicone sealant to edges.
What are some creative alternatives if I can’t find palm seed pods?
No problem! Try these textured natural materials:
- Pinecones (smaller but great for details)
- Dried citrus peels (for organic curves)
- Seed pods from lotus or hibiscus (unique shapes)
- Bamboo slices (for sleek, modern designs)
Wrapping up and next steps
Transforming palm tree seed pods into stunning garden art is a rewarding way to blend creativity with natural beauty. 🌿 Whether you're crafting intricate sculptures or simple decorative pieces, these textured treasures add an organic, tropical touch to any outdoor space.
Don’t let the process intimidate you—start small, experiment with shapes, and let your imagination run wild!
Ready to elevate your garden? Gather your materials, follow your vision, and create something truly unique! Share your masterpiece with fellow gardeners or even sell your designs—your art could inspire others to embrace the magic of upcycled nature. 🌟