
Trees
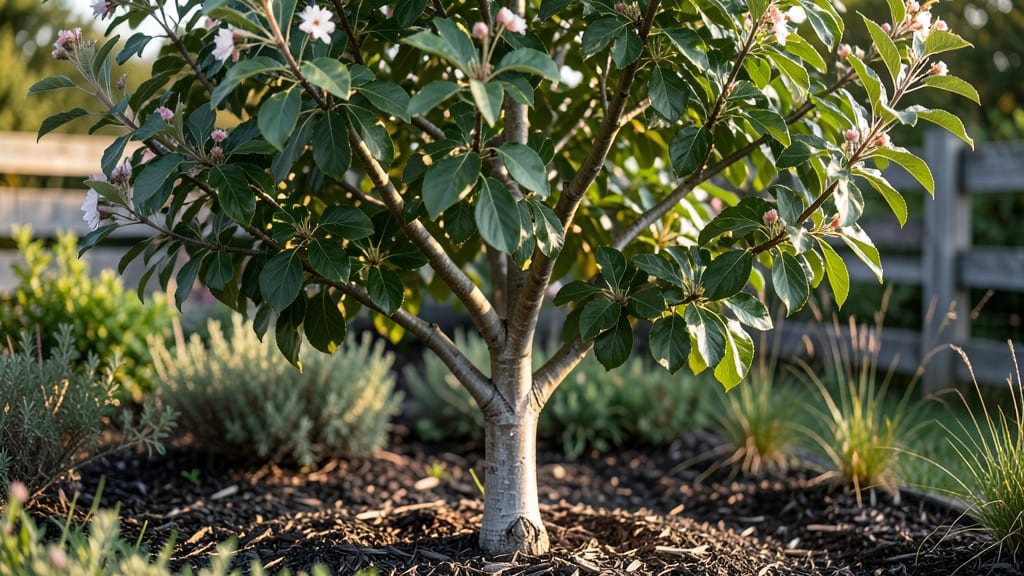
Santa Rosa plum tree leaves turn into a mess when pests and diseases take over—here’s how to save them. 🌿 I’ve watched aphids and brown rot turn my tree’s lush foliage into a sad, spotted sight, but with the right pruning and care, you can bring those leaves back to vibrant green.
The key is acting fast: prune out infected branches before the problem spreads, and keep an eye out for tiny aphids or that telltale brown rot fungus.
A strong spray of neem oil or insecticidal soap can stop pests in their tracks, while proper watering (deep but not soggy) keeps the roots healthy. By mid-summer, your tree should be thriving with glossy leaves and a bumper crop of plums. The secret?
Regular checks, quick action, and never skipping that early spring pruning to improve airflow.
📚 In This Guide
- What you need
- Instructions
- Tips and common mistakes
- Wrapping up and next steps
What you need
- ● Pruning shears – Sharp, bypass-style shears (4-6" blade) for clean cuts.
- ● Loppers – For thicker branches (8-10" cutting capacity).
- ● Pruning saw – Heavy-duty saw for large limbs (if needed).
- ● Gloves – Cut-resistant gloves (gardening or pruning-specific) to protect your hands.
- ● Disposable pruning bags – 2-3 large bags (10-15 gallon capacity) to collect leaves/debris.
- ● Neem oil or horticultural oil – 1 quart (for pest control; follow label instructions).
- ○ Insecticidal soap – 16 oz spray bottle (optional, for targeted pests like aphids).
- ● Ladder or step stool – Sturdy and tall enough to reach the tree’s canopy safely.
- ● Rake or leaf blower – To clear fallen leaves/debris post-pruning.
- ● Safety goggles – Protects eyes from debris (especially when sawing).
- ● Work boots or closed-toe shoes – For stability on uneven ground.
- ○ Tree wound dressing – Optional for large cuts (e.g., Tanglefoot or pruning sealant).
- ● Spray bottle with water – For rinsing tools between cuts (prevents disease spread).
- ● Notebook & pen – To sketch pruning plans or track pest issues.
How to prune and harvest Santa Rosa plum leaves for pest control
Here’s how I time leaf harvesting and pruning to keep your tree healthy and pests at bay.
🌿 Step 1: Identify the Right Leaves for Harvesting
Focus on mature leaves—young, tender ones are too delicate and won’t withstand handling. Look for 3-4 inch long leaves with a deep green color and no yellowing or spots. These are prime for pest control infusions or mulch.
Harvest leaves in the late morning when dew has dried but before the heat peaks. Avoid leaves near fruit clusters, as they may carry residual pesticide residue if your tree has been treated. I always work from the bottom up, starting with the lowest branches first.
✂️ Step 2: Prune for Airflow and Pest Prevention
Use clean, sharp pruners to remove 10-15% of the tree’s total foliage during late winter or early spring before buds swell. Cut just above a leaf node or outward-facing bud to encourage new growth. This opens up the canopy, letting sunlight and air circulate—critical for preventing fungal diseases like brown rot.
Look for crossing branches or dead wood first. These create entry points for pests like aphids and scale insects. I always sanitize my pruners with rubbing alcohol between cuts to avoid spreading disease. Remove any suckers (shoots growing from the base) immediately—they drain energy from your main tree.
💧 Step 3: Harvest Leaves for Pest Control Uses
For pest control, harvest leaves in small batches and dry them in a shaded, well-ventilated area. Spread them on a screen or mesh tray to prevent mold. Once fully dried (1-2 weeks depending on humidity), crush them into a coarse powder. This can be sprinkled around the base of the tree or mixed into compost to deter pests naturally.
If you’re using leaves as mulch, chop them into 1-2 inch pieces first. Fresh leaves can mat down too tightly, smothering roots. I like to layer them 2-3 inches deep around the tree’s drip line, keeping them 6 inches away from the trunk to prevent rot.
☀️ Step 4: Monitor for Pest Activity After Pruning
Check the tree every 7-10 days for signs of pests like aphids, mites, or scale. New growth is especially vulnerable. Look for sticky residue (honeydew) on leaves or white webbing—common signs of infestation. If you spot pests, repeat the leaf harvest process and increase airflow with additional pruning if needed.
Water the base of the tree deeply after pruning to help it recover. Avoid overhead watering, which can spread fungal spores. I always water in the early morning so leaves have time to dry before evening, reducing disease risk.
Tips & tricks for Santa Rosa plum leaf harvesting
Working with Santa Rosa plum leaves is all about timing and technique—here's how to make the most of your harvest without stressing the tree.
Leaf Selection Matters: Those 3-4 inch mature leaves are your goldmine for pest control. I've learned the hard way that smaller leaves bruise easily when handled, so focus on the sturdiest ones. Pro tip: Gently shake branches first—often the best leaves drop right into your bucket without climbing.
Pruning Precision: When removing that 10-15% of foliage in Step 2, make every cut count. Always cut just above a leaf node or outward-facing bud—this encourages new growth that's better positioned for sunlight. I mark my pruners with a permanent marker to remember which side goes where, especially when working quickly. The goal is to open up the canopy without creating gaps where pests can hide.
Drying Strategy: The 1-2 week drying time in Step 3 can vary wildly based on humidity. In my experience, a small fan on low speed cuts drying time by nearly half while preventing mold. Spread leaves in a single layer on mesh screens—this allows airflow on all sides. If you're in a damp climate, consider using a food dehydrator set to 95°F for more consistent results.
Pest Monitoring: That 7-10 day check interval in Step 4 is your early warning system. I keep a small magnifying glass handy to inspect new growth closely—aphids and mites often start on the undersides of leaves. If you spot honeydew, act immediately by increasing airflow with more pruning or applying the dried leaf powder as a natural deterrent around the base.
Pro Tips for Santa Rosa Plum Tree Leaves
- Working with Santa Rosa plum leaves is all about timing and technique—here's how to make the most of your harvest wit...
- Leaf Selection Matters: Those 3-4 inch mature leaves are your goldmine for pest control. I've learned the hard way th...
- Pruning Precision: When removing that 10-15% of foliage in Step 2, make every cut count. Always cut just above a leaf...
Frequently asked questions
Got questions about your Santa Rosa plum tree leaves?
You’re not alone! Here are answers to the most common queries—from pruning tips to pest troubleshooting.
When is the best time to harvest Santa Rosa plum leaves for tea or pest control?
The ideal time to harvest leaves is spring or early summer (May–June), when they’re young, tender, and most aromatic. Avoid harvesting after heavy rain or pesticide applications. For pest control, focus on new growth—it’s richest in natural compounds like plum leaf extract.
Can I use Santa Rosa plum leaves for anything other than pest control?
Beyond repelling pests, these leaves are prized for:
- Herbal tea: Dried leaves make a caffeine-free, antioxidant-rich infusion (steep 1–2 tsp in hot water for 5–10 mins).
- Compost accelerator: Chop fresh leaves and mix into compost to boost nitrogen levels.
- Natural dye: Boil leaves for a subtle yellow-green hue (great for fabric or Easter eggs!).
What pests do Santa Rosa plum leaves repel, and how do I apply them?
Leaves deter aphids, spider mites, and Japanese beetles. Crush fresh leaves and rub them onto stems, or steep dried leaves in water (1:10 ratio) to spray foliage. Reapply every 7–10 days or after rain. Pro tip: Place leaf bundles near infested areas for a slow-release effect.
How often should I prune my Santa Rosa plum tree to encourage healthy leaf growth?
Prune once a year in late winter or early spring (before buds swell) to remove dead wood and shape the tree. For leaf-heavy growth, focus on thinning out crowded branches—this improves airflow and sunlight penetration. Avoid heavy pruning in fall, as it can stress the tree.
Why are my Santa Rosa plum leaves turning yellow or brown? What’s wrong?
Yellowing leaves often signal overwatering, nutrient deficiency, or fungal issues. Check for:
- Yellow edges: Likely underwatering or chlorosis (iron deficiency).
- Brown spots: Fungal disease (e.g., leaf spot). Remove affected leaves and apply neem oil.
- Curling leaves: Could be pests (mites) or heat stress. Mulch the base and water deeply.
Need more help?
Snap a photo and compare it to this troubleshooting guide.
Wrapping up and next steps
Harvesting Santa Rosa plum tree leaves for pruning and pest control is a rewarding way to keep your tree healthy and thriving!
By following the right techniques—like timing your pruning, using proper tools, and monitoring for pests—you’ll ensure your tree stays strong and productive. Now’s the perfect time to put your newfound knowledge into action!
Ready to take the next step? Grab your pruners, schedule your maintenance, and give your Santa Rosa plum tree the care it deserves. Your efforts will pay off with a flourishing tree and delicious fruit for years to come! 🌿✨