
Pruning
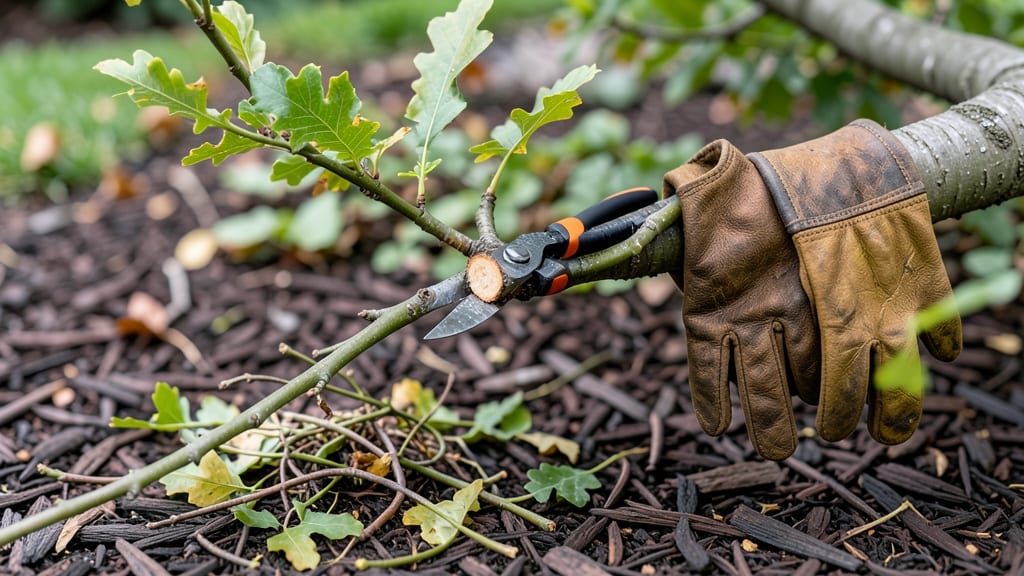
When you cut out a tree branch wrong, you’re not just removing growth—you’re creating a wound that could invite rot or disease for years. ✂️ I’ve seen too many trees suffer from jagged cuts or stubs that never heal properly, so I’m sharing the exact technique that keeps trees strong and healthy after pruning.
The key isn’t just making the cut—it’s how you shape the wound so the tree can seal itself naturally.
You’ll need sharp pruning shears or a saw (for thicker branches), rubbing alcohol to sterilize tools between cuts, and a clean rag for wiping sap.
The right timing matters too—late winter or early spring, when the tree is dormant but about to wake up, gives it the best chance to recover. And don’t forget: never remove more than 25% of the tree’s canopy at once, or you’ll shock it into decline.
What you’ll end up with is a clean, smooth cut that looks like a natural taper—no jagged edges, no stubs, and no exposed bark. The tree will seal the wound with callus tissue within a season, and new growth will fill in without gaps.
Over time, your pruning will actually make the tree stronger, not weaker.
This method works for fruit trees, shade trees, and even young saplings—just adjust the tool size to the branch thickness. If a branch is thicker than your arm, though, it’s time to call a pro.
Safety first: always look up before you cut, and wear gloves to avoid sap burns. Let’s get those branches off right.
📚 In This Guide
- What you need
- Instructions
- Tips and common mistakes
- Wrapping up and next steps
What you need
- ● Pruning Shears (Bypass or Anvil Type): 1 pair (5-8 inches long) for small branches (up to ½ inch thick).
- ● Pro tip: Bypass shears offer cleaner cuts—ideal for precision work! 💡
- ● Lopping Shears: 1 pair (10-14 inches long) for medium branches (½ to 1½ inches thick).
- ● Pruning Saw: 1 (8-10 inches) for thick branches (1½+ inches thick).
- ● Gloves: 1 pair (cut-resistant, like leather or heavy-duty work gloves).
- ● Ladder or Stump: 1 (if branches are high up). Ensure it’s stable and rated for your weight!
- ● Disinfectant (70% Isopropyl Alcohol or Bleach Solution): Small bottle (for sterilizing tools between cuts to prevent disease spread).
- ● Heavy-Duty Trash Bags: 2-3 (for collecting debris and pruned branches).
- ● Safety Gear: Safety glasses (1 pair) and ear protection (if using a chainsaw).
- ● Chainsaw: For large branches (2+ inches thick)—rent or borrow if needed!
- ● Rope or Tarps: To lower heavy branches safely.
- ● Marking Twine or Paint: To tag branches for future reference.
- ● First-Aid Kit: Just in case of minor cuts or scrapes.
- ● Tree Wound Dressing (Pruning Sealant): Controversial! Most experts say it’s unnecessary, but some swear by it for extra protection. 🌡️
Instructions for making precision tree branch cuts
Here's the method I trust to promote strong regrowth and keep your tree thriving.
✂️ Step 1: Identify the Right Cut Location
Start by locating the branch collar—the swollen area where the branch meets the trunk. This is your guidepost. Never cut flush with the trunk; you'll see a slight ridge or bump here that marks where new growth will emerge. Use your thumb to feel the collar—it's often raised slightly above the trunk surface.
Look for the branch bark ridge, a textured line that runs around the trunk at the base of the branch. This ridge is nature's way of telling you where to make your cut. If you cut above it, you'll leave a permanent wound that can invite disease. If you cut below, you'll sever the collar and stunt future growth.
✂️ Step 2: Make the First Cut (Undercut)
Position your pruning saw or lopper about 6-12 inches out on the branch from the trunk. Make a horizontal cut that's roughly one-third of the way through the branch's diameter. This undercut prevents the branch from tearing when you remove it. Angle the cut slightly upward to create a flat surface that won't collect water.
I like to use a sharp pruning saw for branches over 2 inches in diameter—dull blades crush the wood and create jagged edges. For smaller branches, clean pruning shears work perfectly. The goal is a smooth cut that won't tear when you complete the removal.
✂️ Step 3: Make the Second Cut (Top Cut)
Now move to the opposite side of the branch and make a second horizontal cut, this time about 1-2 inches beyond the first cut. This creates a small notch that will help guide the branch's natural fall. The cut should be slightly higher than the first one to prevent the branch from tearing as you remove it.
Watch as the branch begins to separate naturally—it should fall away cleanly without resistance. If it doesn't, you've likely cut too close to the trunk. This is where the undercut comes into play, making the final removal effortless. Never force a stubborn branch—adjust your cuts and try again.
✂️ Step 4: Make the Final Cut (Flush with the Branch Collar)
Now return to the branch collar and make a clean cut just outside the branch bark ridge. This final cut should be at a 45-degree angle sloping away from the trunk. The angle helps rainwater shed quickly, preventing rot. Keep your saw or shears sharp—dull tools will tear the wood and leave ragged edges.
Step back and admire your work. The cut should look smooth and precise, with no jagged edges. You'll see the branch collar intact, ready to seal the wound naturally. This is the moment that matters: a proper cut promotes faster healing and stronger regrowth.
🌿 Step 5: Clean Up and Promote Healing
Remove any stubs or torn wood immediately—these are entry points for pests and diseases. Use your pruners to clean up any rough edges left behind. For larger wounds, consider applying wound dressing (like tree sealant) only if the cut is over 2 inches wide—smaller wounds heal better when left open to air.
Water the base of the tree deeply after pruning to reduce stress. You'll notice new growth emerging from the branch collar within 2-4 weeks in spring or early summer. This is your signal that the tree is healing properly. Avoid heavy pruning during late summer or fall, as new growth won't have time to harden off before winter.
Tips & tricks for perfect tree branch cuts
Mastering these precision cuts makes all the difference for your tree's long-term health.
Tool Selection: A sharp pruning saw is non-negotiable for branches over 2 inches in diameter. I've ruined too many cuts with dull blades that crush wood instead of making clean slices. For smaller branches, clean pruning shears work perfectly—just make sure they're sharp enough to cut cleanly through the branch without tearing. The smoother the cut, the faster the tree heals.
Visual Cues for Step 1: In Step 1, when locating the branch collar, run your thumb along the trunk. You'll feel a slight ridge where the branch meets the trunk—this is your guidepost. The branch bark ridge looks like a textured line running around the trunk. If you're unsure, look for the swollen area where new growth emerges. This visual and tactile check prevents cutting too high or too low, which can harm your tree's health.
Timing Tip for Step 5: The 2-4 week window for new growth in spring or early summer is your best time for pruning. Avoid late summer or fall—new growth won't have time to harden off before winter, making it vulnerable to cold damage. If you must prune in late fall, do it early in the season before the first frost. Watering deeply after pruning helps reduce stress on the tree and promotes faster healing.
Wound Dressing Wisdom: Only use wound dressing for cuts over 2 inches wide—smaller wounds heal better when left open to air. I've seen many gardeners overuse sealants, thinking they're helping, when in fact they can trap moisture and create ideal conditions for rot. For larger wounds, apply a thin layer only to the edges, not the entire wound surface. This approach mimics nature's own healing process while protecting against pests and disease.
Pro Tips for Tree Branch Cut Out
- Mastering these precision cuts makes all the difference for your tree's long-term health.
- Tool Selection: A sharp pruning saw is non-negotiable for branches over 2 inches in diameter. I've ruined too many cu...
- Visual Cues for Step 1: In Step 1, when locating the branch collar, run your thumb along the trunk. You'll feel a sli...
Frequently asked questions
Got questions about cutting out tree branches like a pro?
You’re in the right place! Here are answers to the most common concerns—from timing to tools and everything in between. Let’s get growing!
When is the best time to cut out a tree branch?
The ideal time depends on your tree’s type and goals. For deciduous trees, late winter or early spring (just before buds swell) is best—it’s easier to see the structure and reduces disease risk. Evergreens can be pruned in late winter or early summer. Avoid heavy pruning in fall, as it stresses trees before winter. Pro tip: If you’re unsure, prune during dormancy () for minimal stress!
Do I need special tools to cut out a tree branch?
Basic tools like hand pruners (for small branches), loppers (2–6 inches thick), or a pruning saw (for larger cuts) are essential. For branches over 3 inches, a pole saw or chainsaw (with safety gear!) may be needed. Sharp tools matter: Dull blades tear bark, inviting pests or disease.
What if I cut a branch too close to the trunk?
Cutting too close can damage the tree’s bark collar (the swollen base where the branch meets the trunk), leading to poor healing or decay. Aim to leave a ¼-inch stub of the branch collar—no more, no less. If you’ve already overcut, don’t panic! Apply pruning sealant (optional) and monitor for signs of stress like wilting or oozing sap.
Can I cut out a branch without hurting the tree?
Yes! Follow the 3-cut method for branches over 2 inches:
- Make an undercut (12–18 inches from the trunk) to control the branch’s fall.
- Cut top-down (6 inches from the trunk) to avoid bark tears.
- Finish with a clean cut just outside the branch collar.
What if my tree has dead or diseased branches? Should I cut them out immediately?
Dead or diseased branches (identified by hollow centers, mushrooms, or oozing sap) should be removed as soon as possible to prevent pests or disease from spreading. Safety first: Wear gloves and eye protection, and dispose of infected branches far from your yard. After removal, inspect nearby branches for signs of trouble.
Are there alternatives to cutting out a branch myself?
If a branch is too large or high for DIY pruning, consider hiring a certified arborist (look for ISA certification). They’ll assess your tree’s health and make precise cuts. For smaller jobs, rental tools (like chainsaws or lifts) or community tool libraries can help. When in doubt: Call a pro—your tree’s long-term health is worth it!
Wrapping up and next steps
Mastering the art of a tree branch cut out isn’t just about trimming—it’s about nurturing your trees for long-term health and beauty. 🌳 With the right tools, techniques, and timing, you can ensure your trees thrive year after year.
Whether you’re a seasoned gardener or just starting out, every precise cut brings you one step closer to a lush, vibrant landscape.
Ready to take your pruning skills to the next level? Start small—pick one tree, gather your tools, and practice the steps you’ve learned. Over time, you’ll gain confidence, and your trees will thank you with stronger growth and stunning foliage!