
Pruning
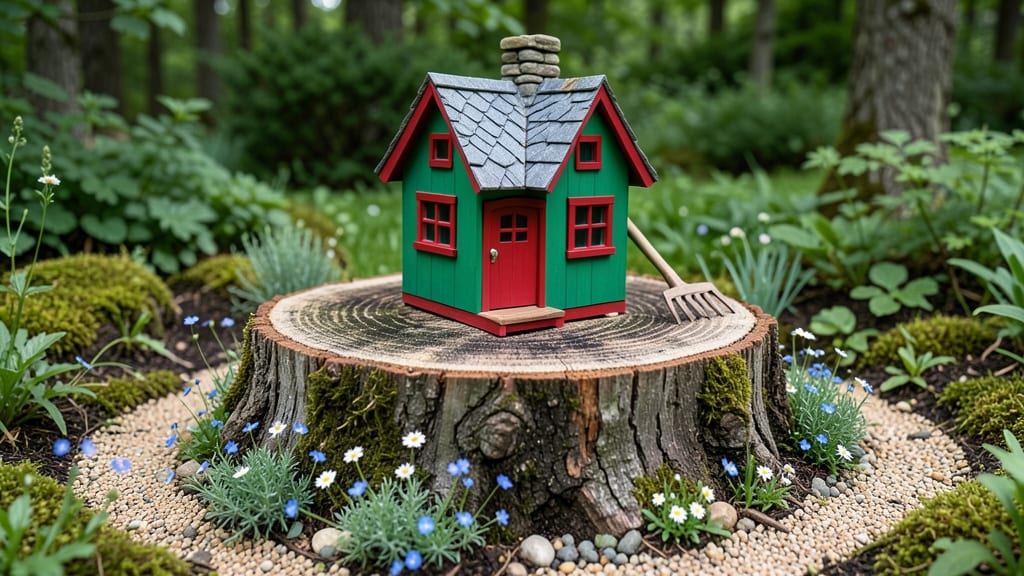
A tree stump gnome house roof turns ordinary garden debris into a whimsical fairy-tale centerpiece. 🌿 I stumbled onto this idea after clearing a fallen oak and couldn’t bear to haul it away—now it’s the heart of my woodland garden.
The magic lies in transforming a simple stump into a tiny, moss-covered cottage that gnomes and fairies would envy.
You’ll need basic supplies: a sturdy tree stump (3–6 inches thick), moss or Spanish moss for that enchanted look, small pebbles or sand for texture, and miniature roofing materials like slate tiles or bark shingles.
A few tools—a pruning saw, sandpaper, and a brush—plus a bit of creativity, and you’re ready to build. The best part? It blends seamlessly into any garden, whether you’re going for rustic charm or full-on fantasy.
By the end, you’ll have a one-of-a-kind garden feature that adds height, texture, and storytelling to your space. Add tiny fairy lights or painted mushrooms for extra magic, and it’ll glow like a secret hideaway at dusk.
Maintenance is minimal—just occasional moss refreshes and a quick sweep of leaves—and it’ll last for years.
Perfect for woodland gardens, fairy-tale-themed spaces, or even as a playful conversation starter. Whether you’re a seasoned gardener or a beginner, this project proves that the best decorations often grow right under your nose. Let’s get crafting!
📚 In This Guide
- What you need
- Instructions
- Tips and common mistakes
- Wrapping up and next steps
What you need
- ● Tree stump – A sturdy, flat-topped stump (6–12 inches in diameter, 12–18 inches tall).
- ● Shingles or roofing material – Cedar shakes, wood shingles, or faux slate tiles (enough to cover the stump’s circumference + overhang).
- ● Roofing nails or screws – Galvanized, 1.5–2 inches long (10–15 nails, depending on size).
- ● Waterproof underlayment – A small roll of tar paper or roofing felt (cut to fit the stump’s slope).
- ● Chimney material – A small PVC pipe (2–3 inches in diameter) or a pre-made gnome chimney kit.
- ● Exterior paint or stain – Weather-resistant, in colors like moss green, rust red, or slate gray (1 quart).
- ● Small roofing screws or adhesive – For securing the chimney (if using PVC).
- ● Hammer or nail gun
- ● Drill or screwdriver
- ● Measuring tape
- ● Saw (hand saw or circular saw for cutting shingles)
- ● Sandpaper (medium-grit, 80–120)
- ● Paintbrush or small roller
- ○ Staple gun (optional, for securing underlayment)
- ● Safety gloves and goggles
- ● Miniature roofing accessories – Shingle trim, decorative ridge caps, or faux moss.
- ● Acrylic paint – For adding gnome-themed details like shutters, a door, or a tiny chimney sweep.
- ● Weatherproof sealant – To extend the roof’s lifespan.
- ● Garden lights or solar-powered fairy lights – For a magical nighttime glow.
Step-by-Step instructions for crafting a tree stump gnome house roof
Transform your garden stump into a fairy-tale gnome home with this charming, step-by-step roof guide!
🪴 Step 1: Measure and Prepare the Stump Base
Start by cleaning the stump thoroughly with a wire brush to remove any loose bark or debris—this gives your roof a smooth foundation. Use a tape measure to determine the stump's diameter at the widest point. Most gnome houses fit snugly on stumps between 12-18 inches in diameter, so adjust your roof design accordingly. If your stump is irregular, sketch a rough outline with a pencil to guide your cuts.
Real talk: A slightly tapered stump works better for drainage, so if yours is perfectly round, lightly sand the edges to create a gentle slope. This prevents water pooling and keeps your gnome's home dry. Mark the center of the stump with a small pencil dot—this will be your reference point for symmetrical roof placement.
☀️ Step 2: Design and Cut Roof Shingles
For a classic gnome house roof, you'll want asymmetrical shingles—think pointed peaks and gentle slopes. Cut cedar or pine shingles (about 4-6 inches wide) into triangles and rectangles using a handsaw. Start with two large triangular pieces for the front and back, then add smaller rectangles for the sides. I like to leave the edges slightly uneven for a rustic, handmade look—gnomes love character!
Pro tip: Test-fit each shingle before finalizing cuts. You'll need about 8-12 pieces total, depending on your stump's size. Sand any rough edges lightly with 80-grit sandpaper to prevent splinters. If you're using pre-made shingles, arrange them in a staggered pattern for a more authentic roof appearance.
🎨 Step 3: Assemble the Roof Structure
Begin by attaching the two largest triangular shingles to the front and back of the stump using outdoor-rated wood glue and small finishing nails (about 1 inch long). Space the nails 1-2 inches apart along the shingle edges, but don’t overdo it—you want the roof to look natural, not nailed down like a fort. Next, add the side rectangles, overlapping them slightly for a layered effect. Use a hammer and nail set to secure them without splitting the wood.
Here’s where it gets fun—leave a 2-inch gap at the base of the roof to create an overhang. This not only adds charm but also protects the stump from rain. Once the shingles are in place, reinforce the structure by adding a horizontal support beam (a small, straight branch or dowel) across the back. This keeps the roof from sagging over time.
✂️ Step 4: Add Whimsical Roof Details
No gnome house is complete without a little magic! Use acorn caps, small stones, or moss to decorate the roof edges. Glue them in place with non-toxic outdoor adhesive for a natural, earthy look. For extra charm, add a mini chimney made from a small wooden dowel or a clay pot fragment—gnomes love their tea! Paint the details with acrylic craft paint in earthy tones if desired, but let them dry for 24 hours before placing the roof on the stump.
Watch for uneven spots while decorating—gnomes notice everything! If a shingle feels wobbly, reinforce it with a tiny nail or glue at the base. Once everything is secure, step back and admire your handiwork. The roof should look sturdy but still feel like it belongs in a fairy tale.
🪴 Step 5: Secure the Roof to the Stump
Lift the roof carefully and position it over the stump, aligning it with your center mark. Use wood screws (about 1.5 inches long) to secure the front and back triangles first, driving them in at a slight angle for extra hold. Then, add screws to the side shingles, spacing them 2-3 inches apart. Avoid over-tightening—you want the roof to stay put but still look like it’s part of the stump, not bolted on.
Final touch: Add a small door or window to the front of the stump (if you haven’t already) to complete the gnome house. Use a miniature hammer or chisel to carve a simple archway from the stump’s side, or attach a small wooden door with hinges. Step back and imagine the tiny gnome peeking out—your garden just got a whole lot more magical!
Tips & tricks for building a whimsical gnome house roof
Between us, these little details make all the difference between a charming garden accent and something that looks like it belongs in a storybook. Let me share what I've learned over years of gnome house experiments—some from trial, others from error!
Material Selection: Cedar shingles are ideal for their natural resistance to rot, but pine works too if you seal it with outdoor varnish after assembly. I've found that pre-cut shingles save time, but cutting your own gives that authentic, handmade feel gnomes adore. For extra durability, consider using redwood if you're in a rainy climate—it handles moisture beautifully. The 4-6 inch width mentioned in Step 2 is perfect for creating that classic cottage-style look without overwhelming the stump.
Symmetry Secret: Here's what nobody tells you—gnome houses don't need to be perfect! In Step 1, when marking your center dot, I like to use a small piece of masking tape to create a crosshair. This helps align your roof even if your stump isn't perfectly round. For the 12-18 inch diameter range, remember that smaller stumps need fewer shingles—about 6-8 pieces—while larger ones can handle the full 8-12 piece range. The key is maintaining that 2-inch overhang mentioned in Step 3, which adds both protection and charm.
Adhesive Strategy: When securing your roof in Step 3, I've learned the hard way that outdoor-rated wood glue alone isn't always enough for windy areas. For extra hold, add a thin layer of glue to the back of each shingle before nailing. For the 1-inch finishing nails, I prefer galvanized ones—they resist rust and last longer. And here's a pro move: lightly sand the nail heads after driving them in to prevent sharp edges that could hurt curious garden visitors (or gnomes!).
Weatherproofing: That 24-hour drying time for acrylic paint in Step 4 is non-negotiable, but I've found an extra trick to speed things up in dry climates. After painting, place your roof in direct sunlight for 1-2 hours before moving it to the stump. The UV helps set the paint faster while still allowing proper curing. For added protection, consider sealing all wood surfaces with outdoor polyurethane after assembly—it'll keep your roof looking fresh for years.
Pro Tips for Tree Stump Gnome House Roof
- Between us, these little details make all the difference between a charming garden accent and something that looks li...
- Material Selection: Cedar shingles are ideal for their natural resistance to rot, but pine works too if you seal it w...
- Symmetry Secret: Here's what nobody tells you—gnome houses don't need to be perfect! In Step 1, when marking your cen...
Frequently asked questions
Got questions about crafting the perfect tree stump gnome house roof? You’re not alone! Here are answers to some of the most common curiosities—because even fairy-tale magic needs a little troubleshooting.
What’s the best material for a sturdy gnome house roof?
A mix of cedar shakes or shingles works best for durability and charm. For a rustic look, try moss-covered bark or even repurposed slate tiles. Avoid flimsy materials like thin plywood—they won’t hold up to rain or wind!
How long does it take to build a gnome house roof?
With basic tools and pre-cut materials, most DIYers finish in 2–4 hours. If you’re adding intricate details (like shingle patterns or moss gluing), budget half a day. Pro tip: Pre-measure and pre-drill to save time!
Can I use a real tree stump, or should I opt for a fake one?
Both work! A real stump adds authenticity but may rot over time. A fake stump (like foam or resin) is low-maintenance and lighter to decorate. For gnome houses, fake stumps often win for longevity and ease of roof attachment.
What’s the trickiest part of attaching the roof?
The overhang is the sneakiest detail! Use waterproof adhesive or small nails (hidden under shingles) to secure it without damaging the stump. If the roof sags, reinforce with hidden brackets or add a lightweight interior frame.
How can I make my gnome house roof look magical?
Add glow-in-the-dark paint for nighttime sparkle, or embed tiny LED tea lights under translucent roofing. Press dried flowers or moss between shingles for a forest-floor vibe. Bonus: A weathered finish (tea-staining wood) ages it perfectly!
Wrapping up and next steps
Transforming a humble tree stump into a whimsical gnome house with a charming roof isn’t just a craft—it’s a celebration of creativity and garden magic! 🌿✨ Whether you’re a DIY novice or a seasoned builder, this project brings joy, personality, and a touch of fairy-tale wonder to your outdoor space.
The best part? Once you’ve mastered the roof, the possibilities for customization are endless—let your imagination run wild!
Ready to elevate your garden’s charm? Grab your tools, gather your supplies, and start building! Your gnome’s new home—and your garden’s new centerpiece—awaits!