
Pruning
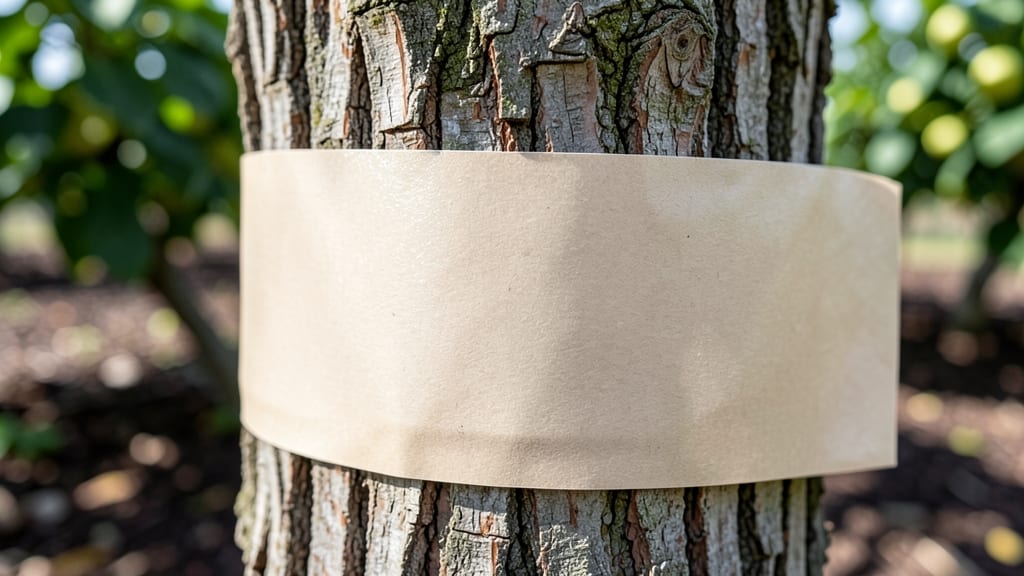
Tree tape for bugs is your secret weapon against sap-sucking pests and bark beetles, offering a non-toxic way to protect your 🌳 without harsh chemicals.
Picture this: You’ve spent months nurturing your trees, only to notice sticky leaves, wilting branches, or tiny holes in the bark. Those are the telltale signs of pests like aphids or scale insects—and they’re already damaging your tree’s health.
The good news? Tree tape disrupts their life cycle by trapping them before they cause real harm, and it’s easier to apply than you think.
This sticky barrier works by creating a physical block that pests can’t cross, forcing them to either fall prey to birds or natural predators or get stuck themselves.
The key is placement: wrap it around the trunk in early spring, just as bugs start their march upward, and check it regularly to avoid overcrowding. Unlike sprays, tree tape is eco-friendly, making it perfect for organic gardens in zones like 6a.
In this guide, I’ll walk you through exactly how to apply it for maximum results—where to place it, how often to monitor it, and when to remove it—plus tips for combining it with other natural pest control methods. Say goodbye to chemical sprays and hello to a healthier, bug-free tree!
How tree tape works: the science behind effective bug control
Tree tape is a simple yet powerful tool in your organic pest control arsenal. This sticky barrier works by trapping crawling insects before they can reach your tree's bark. When pests like aphids, scale insects, or bark beetles attempt to climb up, they get stuck on the adhesive surface.
Over time, their numbers decrease as they can't reproduce successfully on the tree.
The key to tree tape's effectiveness lies in its physical disruption of pest life cycles. By preventing adults from reaching egg-laying sites, you break their reproductive cycle.
This method is particularly effective for soft-bodied insects that can't fly over the barrier. The tape creates a non-toxic, chemical-free solution that's perfect for organic gardens.
🌳
| Pest Type | Effective Against | Best Application Time | Why It Works |
|---|---|---|---|
| Aphids | Crawling nymphs & adults | Early spring (before infestation) | Prevents sap-sucking migration |
| Scale insects | Crawling crawlers | Late spring to early summer | Blocks new infestations |
| Bark beetles | Adult beetles | Summer (peak flight season) | Traps emerging adults |
| Sawfly larvae | Crawling larvae | Spring to early fall | Stops defoliator migration |
| Spider mites | Crawling mites | Summer (dry conditions) | Reduces population spread |
The adhesive strength of tree tape is crucial for effectiveness. A moderate grip (not too sticky) works best because it traps pests without harming beneficial insects like ladybugs or lacewings that might land on it.
The tape should be sticky enough to catch pests but not so strong that it damages the tree's bark when removed.
Timing your application is just as important as the tape itself. For spring application, aim for early spring before pests become active. This creates a barrier when insects first emerge from overwintering sites.
In summer applications, focus on peak pest seasons like when bark beetles are most active or during aphid outbreaks.
🌿
Tree tape works best when combined with other integrated pest management (IPM) strategies. While it excels at trapping mobile pests, it won't catch flying insects or those already established on the tree.
Pair it with pruning infested branches or introducing natural predators like parasitic wasps for comprehensive control. The tape serves as both a monitoring tool and a physical barrier.
The science behind tree tape lies in its ability to disrupt pest behavior without chemicals. By creating an impassable barrier, you force pests to find alternative hosts or perish.
This method is particularly valuable for young trees or sensitive species where chemical treatments might cause damage. The tape's effectiveness increases with proper placement and regular monitoring.
🪴
One common misconception is that tree tape works immediately. In reality, its effectiveness builds over time as it accumulates trapped pests. For best results, leave the tape in place for 4-6 weeks before checking and replacing if needed.
During this period, you'll notice fewer pests attempting to climb your trees, giving your plants a fighting chance against infestations.
Remember that tree tape is most effective as a preventative measure. Once a tree is heavily infested, you'll need to combine the tape with other treatments like horticultural oil sprays or manual removal of pests.
The tape works best when used before pests become established, making it a proactive tool in your gardening toolkit.
Step-by-step guide: applying tree tape for best results
Applying tree tape for bugs correctly is the key to trapping pests like aphids, scale insects, and bark beetles before they damage your trees. The right placement and technique ensure maximum effectiveness while keeping your garden chemical-free and safe.
Let’s break down the process so you can protect your trees like a pro.
Before you start, gather your tools and materials: tree tape (choose a non-toxic, weather-resistant option), a ladder or pruning saw for high branches, gloves, and a sharp knife or scissors for trimming.
Timing matters too—apply the tape in early spring or late summer when pests are most active but before extreme weather sets in.
🌳 Step-by-Step Guide to Applying Tree Tape
-
Step 1: Choose the Right Height
Place the tape 12-18 inches above ground level to target crawling pests. For taller trees, add a second strip 3-5 feet higher to catch flying insects. -
Step 2: Clean the Bark
Wipe the tree trunk with a damp cloth to remove dirt, sap, or debris. This ensures the tape sticks securely and traps pests effectively. -
Step 3: Measure and Cut
Measure the tree’s circumference at the placement height. Cut the tape to fit snugly with 1-2 inch overlaps at the ends. -
Step 4: Apply the Tape
Press the tape firmly around the trunk, ensuring no gaps or bubbles. Use your fingers or a soft brush to smooth it out. -
Step 5: Check Regularly
Inspect the tape every 3-5 days during peak pest season. Remove trapped bugs and replace the tape if it loses stickiness or gets over 50% full of pests. -
Step 6: Remove and Replace
Take down the tape after 4-6 weeks or when pest activity slows. Clean the trunk before reapplying to avoid residue buildup.
Avoid these common mistakes that can ruin your efforts: using tape that’s too weak to hold pests, leaving gaps where bugs can crawl under, or applying it during rainy or windy conditions. Also, never wrap the tape too tightly—it should stay flexible to expand slightly as the tree grows.
For best results, combine tree tape with other organic pest control methods, like introducing beneficial insects (e.g., ladybugs) or applying neem oil to the bark. This layered approach creates a pest-free zone around your trees all season long.
With the right technique, tree tape for bugs becomes a game-changer for your garden. Watch your trees thrive without harmful chemicals, and enjoy a pest-free growing season! 🌿