
Pruning
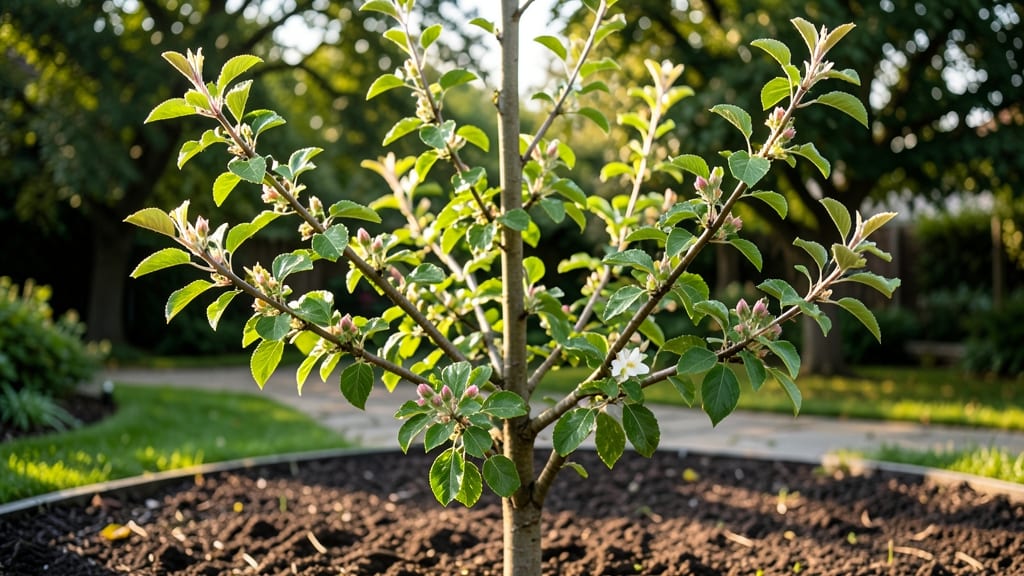
Springtime pruning unlocks apple tree new growth, turning winter-bare branches into a summer fruit powerhouse. ✂️ I’ve watched my own trees go from skeletal limbs to lush canopies in just six weeks—it’s all about cutting at the right time and in the right way.
The key isn’t just removing dead wood; it’s shaping the tree to encourage strong, productive new growth that will bear fruit next season.
You’ll need sharp pruners, rubbing alcohol for sterilization, and a clear day when the tree isn’t stressed by cold or drought. Focus on three types of cuts: thinning out crowded branches, heading back overgrown limbs to encourage bushier growth, and removing any dead or diseased wood.
My best results came from pruning in late winter or early spring, just as buds begin to swell—before the tree puts too much energy into leaves instead of structure.
What you’ll end up with is a tree that looks like a well-groomed giant instead of a tangled mess. New growth will emerge vibrant green and sturdy, with buds forming where you want them.
The tree will also be better equipped to fight off pests and diseases, since you’re improving airflow through the branches. Plus, those new shoots are where next year’s fruit will develop—so you’re not just pruning for looks, you’re investing in your harvest.
This method works for young trees still establishing themselves and mature trees that need rejuvenation. The same principles apply whether you’ve got a single backyard apple tree or a small orchard. Here’s how to get started without overcomplicating it—no green thumb required.
📚 In This Guide
- What you need
- Instructions
- Tips and common mistakes
- Wrapping up and next steps
What you need
- ● Pruning shears: Bypass pruners (sharp, clean, and sterilized) for cuts up to ½-inch thick.
- ● Loppers: For branches ½-inch to 2-inches thick (look for ergonomic handles for comfort).
- ● Pruning saw: A curved-tooth saw for thick branches (2+ inches).
- ● Rubbing alcohol (70%+) or bleach solution: 1 part bleach to 9 parts water for sterilizing tools.
- ● Gloves: Heavy-duty gardening gloves to protect hands from thorns and sap.
- ○ Pruning sealant: Optional but helpful for large cuts (e.g., tree wound paint or pruning wax).
- ● Disposable bags or bucket: For collecting pruned branches (1-2 gallon size).
- ● Ladder (if needed): Sturdy, extendable ladder for reaching high branches (ensure it’s stable and rated for your weight).
- ● Notebook & pencil: To sketch your tree’s structure and mark cuts.
- ● Hand pruners: For small, precise cuts on twigs.
- ● Safety glasses: To shield eyes from debris.
- ● Tree ties or zip ties: For temporarily securing branches during pruning.
- ● Sharpener: A file or honing tool to keep blades razor-sharp.
- ● Hose with nozzle: For rinsing tools and cleaning sap off branches.
- ● Pruning guide or ruler: To measure branch collars accurately.
Step-by-Step guide for pruning apple tree new growth
Spring is the perfect time to shape your apple tree—here’s how to encourage strong, fruitful branches.
✂️ Step 1: Identify and Remove Dead or Diseased Wood
Start by examining the tree for any branches that are brown, brittle, or showing signs of disease like cankers or fungal spots. These should be cut back to healthy wood immediately—diseased branches can spread problems to the rest of the tree. Use clean, sharp pruning shears to make cuts just outside the branch collar, the swollen area where the branch meets the trunk.
If a branch is dead but still attached, you’ll notice it won’t bleed sap when cut (unlike healthy wood). Remove these completely to redirect the tree’s energy toward new, productive growth. I always work from the bottom up, so I don’t accidentally damage healthy branches while reaching for higher ones.
✂️ Step 2: Thin Out Crowded or Crossing Branches
Look for branches that rub against each other or grow too close together—these create weak points where bark can tear, inviting pests and disease. Thin these out by removing the smaller or weaker branch at its base. Aim to leave open space between branches so air can circulate freely, which reduces humidity and fungal risks.
For crossing branches, I prioritize keeping the branch that grows at a better angle (ideally upward or outward). You’ll see the tree’s natural structure emerge as you make these cuts. Never remove more than 25% of the tree’s canopy in one season—this stresses the tree and can reduce fruit production.
✂️ Step 3: Shape the Tree for Airflow and Sunlight
Step back and visualize how sunlight and rain will move through the tree. Open the center by removing inward-growing branches—these rarely produce good fruit and create a damp, shaded environment where diseases thrive. Focus on creating an open vase shape, with branches spreading outward like fingers on a hand.
For young trees, I like to keep the lowest branches about 3-4 feet off the ground to make harvesting easier and reduce damage from mowers or animals. Use a 3-point cut for larger branches (cut just outside the branch collar, then make a second cut to control the branch’s weight before removing it completely).
🌱 Step 4: Encourage New Growth with Strategic Cuts
To stimulate vigorous new growth, make heading cuts just above a bud or lateral branch on vigorous shoots. This signals the tree to produce side branches, which will bear more fruit. Avoid cutting back to stubs—always leave a bud or branch to grow from, or the tree will waste energy trying to heal the wound.
Water the tree deeply after pruning to help it recover. You’ll see new shoots emerge within 4-6 weeks, especially if you prune just as the tree begins to leaf out. These new branches are where next year’s fruit will develop, so give them room to grow strong.
⏰ Step 5: Clean Up and Monitor Progress
Collect and dispose of all pruned branches—don’t leave them on the ground, as they can harbor pests or diseases. Sterilize your pruning tools with rubbing alcohol between cuts to prevent spreading pathogens. I also like to apply a thin layer of pruning sealant on cuts larger than ½ inch to reduce the risk of infection.
Keep an eye on the tree over the next few weeks. If you see excessive sap bleeding from cuts, it’s a sign the tree is stressed—this is normal for a few days but should slow down as it heals. By summer, you’ll notice new leaves and shoots filling in the spaces you opened up, and that’s your reward for a job well done.
Tips & tricks for perfect apple tree pruning
These simple strategies will help you prune with confidence and set your apple tree up for a fruitful season.
Tool Prep: Sterilize your pruning tools between cuts with rubbing alcohol—this prevents spreading diseases from branch to branch. I also like to sharpen my shears weekly during pruning season so they cut cleanly, which is especially important for larger branches. A dull blade can crush wood fibers, making cuts heal more slowly.
Visual Cues for Healthy Wood: In Step 1, when checking for dead wood, look for branches that snap easily when bent—healthy wood bends slightly before breaking. Also, healthy wood will bleed sap when cut, while dead wood won't. This visual test helps you make confident decisions about what to remove.
Branch Angle Strategy: When thinning crossing branches in Step 2, remember the "3 D's" rule: Dominant, Desirable, and Direction. Keep the branch that's dominant (strongest), desirable (best angle), and growing in the right direction (upward or outward). This simple framework makes tough decisions easier.
Seasonal Timing: The 4-6 week window mentioned in Step 4 is ideal because it coincides with the tree's natural sap flow. Pruning just as buds begin to swell gives new growth the best chance to harden off before winter. If you miss this window, late summer pruning is the next best option—just avoid pruning in fall or winter when the tree is dormant.
Pro Tips for Apple Tree New Growth
- These simple strategies will help you prune with confidence and set your apple tree up for a fruitful season.
- Tool Prep: Sterilize your pruning tools between cuts with rubbing alcohol—this prevents spreading diseases from branc...
- Visual Cues for Healthy Wood: In Step 1, when checking for dead wood, look for branches that snap easily when bent—he...
Frequently asked questions
When is the best time to prune for new growth?
The ideal window is late winter or early spring—just as buds swell but before leaves emerge. This timing balances disease prevention and stimulates vigorous new shoots. Avoid pruning in fall, as wounds heal slower and invite pests. For container-grown trees, prune slightly later (March–April) to avoid frost damage.
How much can I cut back without harming the tree?
Remove up to 25% of the tree’s total branches in one season, focusing on dead, crossing, or overcrowded limbs. For young trees, you can be bolder—cut back to a sturdy lateral branch or the main scaffold. Pro tip: Never remove more than 1/3 of the canopy in a single pruning session to avoid stress.
Why isn’t my apple tree producing new growth after pruning?
Several factors could be at play: poor timing (pruning too late), disease (like fire blight), nutrient deficiencies (add compost or fertilizer), or over-pruning. Check for signs of pests (aphids, borers) and ensure the tree gets 6+ hours of sunlight daily. If needed, apply a balanced 10-10-10 fertilizer in early spring.
Can I prune apple trees in summer for bushier growth?
Yes! Summer pruning (June–August) encourages bushier growth and can reduce fruit size for better quality. Focus on suckers, water sprouts, and overly vigorous shoots—cut them back by ⅔ to promote branching. Avoid heavy pruning in summer, though, as it stresses the tree and may reduce next year’s bloom.
What’s the difference between “heading back” and “thinning out”?
| Heading Back | Thinning Out |
|---|---|
| Cutting back a branch to a bud or lateral shoot to encourage more growth in that area. | Removing an entire branch back to its point of origin to open the canopy and improve airflow. |
| Best for: Stimulating new shoots, shaping young trees. | Best for: Reducing density, removing deadwood, or improving fruit access. |
Pro tip: Combine both techniques—thin out crowded branches first, then head back others to guide growth.
Wrapping up and next steps
Watching your apple tree burst with new growth in spring is incredibly rewarding! 🌱 By mastering the art of pruning—using the right tools, timing, and techniques—you’ll encourage stronger branches, better fruit production, and a healthier tree. Remember, patience and consistency are key, so don’t rush the process.
Ready to take the next step? Grab your pruners and get started! 🌿 If you’re feeling unsure, sketch a quick plan of your tree’s structure before cutting. Happy pruning—your apple tree (and future harvests) will thank you!