
Pruning
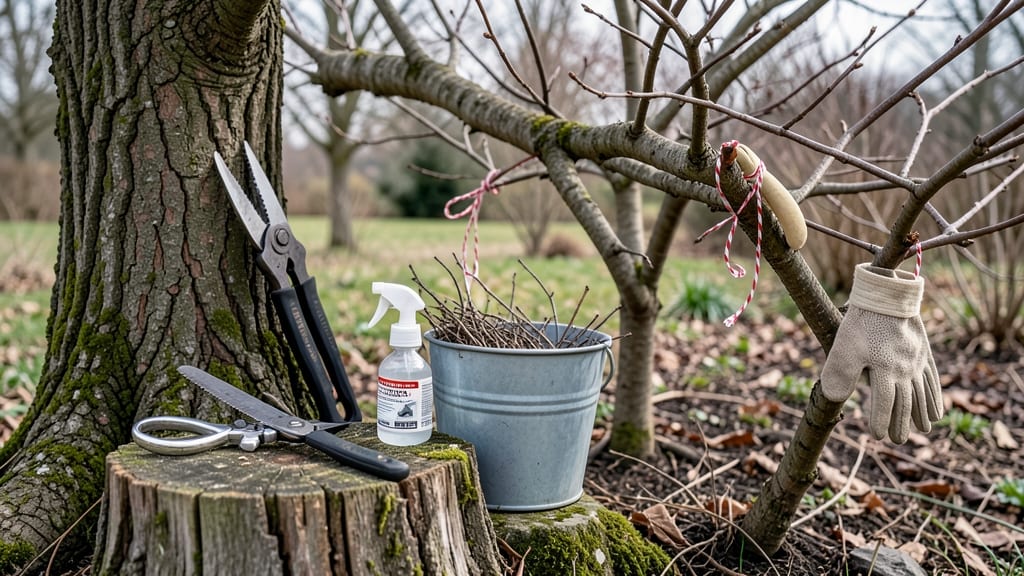
A single clean cut now means stronger branches, more blooms, and fewer disease risks later. ✂️ Pruning cherry trees feels intimidating, but I’ve turned my backyard’s tangled mess into a graceful, productive canopy—without ever losing a branch to rot or breakage.
The key? Timing that matches your tree’s growth cycle and cuts that heal properly.
You’ll need sharp bypass pruners (never dull shears), a sturdy ladder for higher branches, and a bucket to collect clippings. For fruit-bearing varieties, prune just after harvest in late summer, while ornamental cherries respond best to late winter cuts before buds swell.
Always disinfect tools between cuts to prevent bacterial spread.
By summer’s end, your tree will show new growth where you made cuts—thicker stems, more fruit buds, and a shape that catches sunlight for even ripening. The best part? Proper pruning extends a cherry tree’s life by decades, turning a maintenance chore into a long-term investment in beauty and harvest.
Works for both sweet and tart varieties, urban landscapes, and even container-grown dwarf cherries. Here’s how to avoid the three mistakes that send trees into decline—and why your first cut might be the last you ever regret.
📚 In This Guide
- What you need
- Instructions
- Tips and common mistakes
- Wrapping up and next steps
What you need
- ● Pruning shears or lopers: Sharp, bypass-style shears (for cuts up to ¾ inch) or loppers (for thicker branches, 1–2 inches). Pro tip: 💡 Sanitize blades with rubbing alcohol to prevent disease spread!
- ● Pruning saw: A curved-tooth saw for branches over 2 inches in diameter. Look for a foldable, lightweight design for ease.
- ● Gloves: Heavy-duty, cut-resistant gloves (e.g., leather or Kevlar) to protect hands from thorns and sharp tools.
- ● Ladder or step stool: A stable, extendable ladder (or a sturdy stool for smaller trees) rated for your weight + tools.
- ○ Disposable pruning bags or bucket: To collect and dispose of trimmings. Optional: A sharpie to label branches for grafting (if applicable).
- ● Rag or paper towels: For wiping sap and cleaning tools mid-prune.
- ● Safety glasses: Protect your eyes from debris—non-negotiable if your tree is dense!
- ● Long sleeves/pants: Wear lightweight, breathable layers to shield against thorns and sun.
- ○ Tree wound dressing (optional): Pruning paste or sealant for large cuts (controversial but useful for weeping cherry varieties).
- ○ Extension pole saw (optional):strong> For high branches without a ladder—ideal for tall or mature trees.
- ● Notebook & pen: To sketch your tree’s structure or note cuts for future reference.
Precision cherry tree pruning: step-by-step year-round care
Here's how I maintain a healthy, productive cherry tree through every season—no guesswork, just clean cuts.
✂️ Step 1: Assess and Plan Your Cuts by Season
Cherry trees respond best to seasonal pruning—never cut at random. In late winter or early spring (before buds swell), remove dead, diseased, or crossing branches first. These cuts encourage vigorous new growth while preventing fungal spread. I always start with 30% of the tree's total branches to avoid shocking it.
For summer pruning, focus on light shaping and fruit-bearing branches—never remove more than 25% of the canopy. In fall, limit cuts to minor adjustments only, as new growth won’t harden off before winter. Mark branches with flagging tape (bright orange) if you’re unsure—it’s easier to see the tree’s structure when branches are bare.
✂️ Step 2: Use Proper Tools for Clean, Safe Cuts
Sharp tools make all the difference. A bypass pruner handles branches up to ½ inch thick, while a pruning saw tackles thicker limbs. I sterilize blades between cuts with 70% rubbing alcohol to prevent bacterial transfer. Never use hedge trimmers—they tear wood and invite disease.
Make cuts at a 45-degree angle just outside the branch collar (the swollen area where the branch meets the trunk). This ensures the tree seals the wound naturally. If a branch is too large to cut in one go, make a notch on the underside first to control the fall. Always cut on the outside of the branch to direct regrowth outward.
✂️ Step 3: Remove Deadwood and Thin the Canopy
Dead branches are easy to spot—they’re gray, brittle, or hollow. Saw them off at the branch collar and dispose of them immediately. For live branches, look for water sprouts (fast-growing vertical shoots) and suckers (shoots at the base)—these drain energy from fruit production. Remove them completely at the base.
Thinning the canopy improves airflow and light penetration. Aim to open the center by removing 1-2 branches per year that grow inward. Step back often to visualize the tree’s shape—you’re sculpting, not hacking. Leave scaffold branches (major structural limbs) intact unless they’re diseased.
✂️ Step 4: Shape for Balance and Fruit Production
Cherry trees thrive with an open-center form—a vase-like shape that allows sunlight to reach inner branches. Focus cuts on last year’s growth (identified by its darker color and smaller buds) to encourage fruiting spurs. Avoid cutting into old wood, as cherries fruit on 2- to 4-year-old branches.
For sweet cherries, prune lightly to 5-6 main branches by maturity. Sour cherries can handle heavier pruning—reduce to 3-4 main branches for better air circulation. Always prune just after harvest (late summer) to avoid removing next year’s fruit buds. Use branch spreaders to train young limbs outward if they’re growing too upright.
🌿 Step 5: Post-Pruning Care and Monitoring
After pruning, water deeply to help the tree recover, especially if you’ve made large cuts. Apply a 2- to 3-inch layer of mulch (wood chips or straw) around the base, keeping it 6 inches away from the trunk. This retains moisture and regulates soil temperature—critical for root health.
Monitor the tree for epicormic buds (small buds sprouting along the trunk) in the first growing season. These indicate stress—if they appear, the cuts were too severe. Fertilize lightly with balanced 10-10-10 in early spring if new growth is weak. Avoid heavy nitrogen, which promotes leafy growth at the expense of fruit.
Tips & tricks for perfect cherry tree pruning
These precision techniques will help you transform your cherry tree into a thriving, fruit-bearing masterpiece—without the guesswork.
Seasonal Timing Matters: The late winter/early spring window (before buds swell) is your golden opportunity to remove up to 30% of the tree's branches. This timing prevents fungal spread while encouraging vigorous new growth. I've seen trees recover beautifully when pruned this way, but if you miss it, summer shaping is better than nothing—just never exceed 25% of the canopy during that season.
Tool Sterilization is Non-Negotiable: Between each cut, wipe your tools with 70% rubbing alcohol. I learned this the hard way after seeing a healthy tree develop bacterial canker from contaminated pruners. For larger branches, a pruning saw is essential—bypass pruners simply can't handle limbs thicker than ½ inch without tearing the wood.
Visualize Your Cuts: Step back frequently to assess the tree's shape. You're sculpting, not hacking. I use flagging tape (bright orange) on branches I'm unsure about—it makes the tree's structure immediately obvious. For young trees, focus on training limbs outward with branch spreaders to create that ideal open-center form that cherry trees love.
Post-Pruning Recovery Strategy: After making your cuts, water deeply and apply 2-3 inches of mulch (wood chips work best) while keeping it 6 inches away from the trunk. This moisture regulation is critical—especially after removing large branches. I've noticed trees with proper post-pruning care bounce back stronger than those left to fend for themselves.
Pro Tips for Cherry Tree Cut
- These precision techniques will help you transform your cherry tree into a thriving, fruit-bearing masterpiece—withou...
- Seasonal Timing Matters: The late winter/early spring window (before buds swell) is your golden opportunity to remove...
- Tool Sterilization is Non-Negotiable: Between each cut, wipe your tools with 70% rubbing alcohol. I learned this the ...
Frequently asked questions
Got questions about pruning your cherry tree? You’re not alone! Whether you're a first-time pruner or a seasoned gardener, these common queries can help you cut with confidence. Here’s what you need to know:
When is the best time to cut back a cherry tree?
The ideal time depends on your tree’s type. For sweet cherries, prune in late winter or early spring (before buds swell) to avoid silver leaf fungus. Tart cherries can handle summer pruning, but winter cuts are safer. Avoid heavy pruning in fall—it invites disease. Pro tip: Light pruning after harvest can shape growth without stressing the tree.
Can I cut a cherry tree too much? What are the signs?
Yes! Over-pruning weakens the tree, leading to sparse fruit, dieback, or even death. Watch for thinning foliage, excessive water sprouts, or leggy branches. A rule of thumb: Never remove more than 25% of the canopy in one season. If you’ve already over-cut, focus on recovery pruning—thinning out dead wood and promoting new growth.
Will cutting my cherry tree reduce fruit production?
Not if done right! Pruning opens the canopy to sunlight, boosting fruit quality and yield. However, aggressive cuts (like topping) can reduce next year’s harvest. Prioritize structural cuts (removing dead/diseased wood) and thinning branches to improve air circulation. Pro tip: Prune to keep branches 6–12 inches apart for optimal fruit development.
How do I prevent disease after cutting a cherry tree?
Cherry trees are prone to bacterial canker and silver leaf fungus. To prevent infection:
- Sterilize tools with rubbing alcohol or bleach between cuts.
- Avoid wet weather—prune in dry conditions.
- Seal cuts with pruning sealant (optional but helpful for large wounds).
- Clean up debris promptly to remove spores.
Pro tip: If your tree has oozing cankers, consult a local extension service—some diseases require surgical cuts.
What if my cherry tree doesn’t bloom after pruning?
Lack of blooms often stems from over-pruning, poor nutrition, or young age. First, check if your tree is 3–5 years old (young cherries may not fruit yet). Next, ensure it gets 6+ hours of sunlight and well-draining soil. Apply a balanced fertilizer (10-10-10) in early spring. If blooms return next year, your pruning was likely fine—cherries alternate bearing, so some years are lighter.
Can I use hedge trimmers instead of pruning shears?
Not ideal! Hedge trimmers tear bark and create ragged cuts, inviting disease. For cherry trees, use:
- Bypass pruners (for small branches).
- Loppers (for branches up to 2 inches thick).
- Pruning saw (for thicker limbs).
For large-scale shaping, consider hiring a professional arborist to avoid damaging the tree.
Wrapping up and next steps
Pruning your cherry tree isn’t just about maintaining its beauty—it’s an act of love that ensures health, productivity, and year-round elegance. Whether you’re shaping young branches or rejuvenating an older tree, precision pruning unlocks its full potential while keeping pests and diseases at bay. 🌿✂️
Now that you’re armed with the how-to and why, there’s no better time to roll up your sleeves! Start small—even a single cut can make a difference. Next up: Grab your tools, pick a sunny day, and give your cherry tree the care it deserves. Happy pruning! 🌸