
Pruning
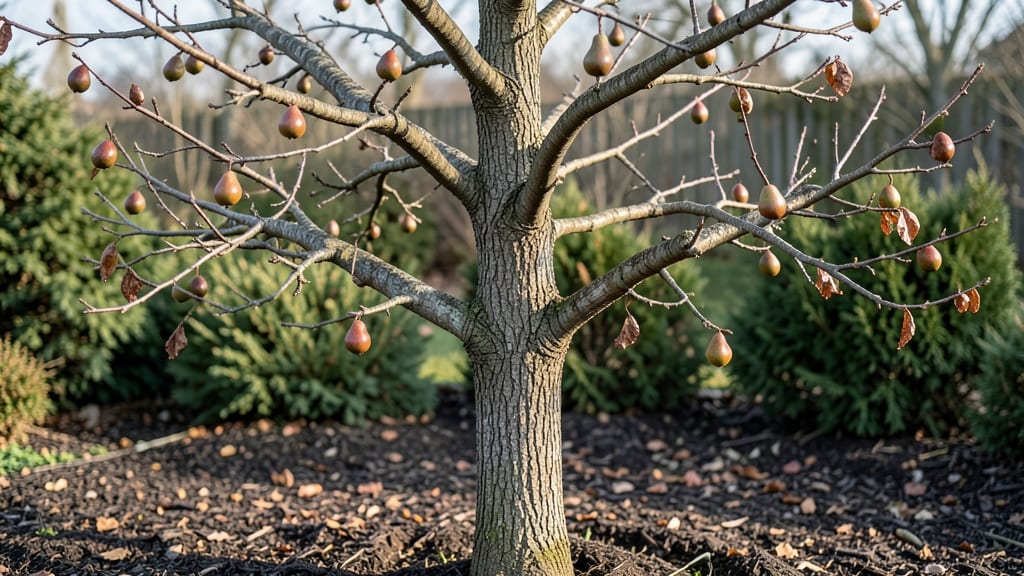
Those tiny pear tree fruit buds hold your entire harvest—protect them, and you’ll get bushels of sweet fruit. 🌱 I’ve watched my pear tree go from sparse clusters to overflowing branches just by learning when and how to prune for bud health.
The key isn’t just cutting branches; it’s understanding which buds will become fruit and how to shield them from frost, pests, and poor circulation.
Pear fruit buds form in late summer on last year’s wood, but they’re delicate until spring. A sharp frost or hungry caterpillars can wipe them out before they even bloom. That’s why I start pruning in late winter—removing dead wood first lets sunlight warm the remaining buds faster.
Thin crowded branches too; air flow prevents fungal diseases that rot buds before they open.
Healthy buds plump up like tiny green beads by early spring, while struggling ones stay shriveled or ooze sap. Once they swell, avoid heavy pruning—you’re risking damage to next year’s fruit. Instead, focus on shaping the tree to let light reach all buds evenly.
By June, you’ll see clusters of white blossoms where those buds were hiding, and soon after, tiny pears forming.
This method works for both dwarf and standard pear trees, whether you’re growing in containers or full sun. The payoff? A tree that produces reliably year after year, with fewer pests and better fruit quality.
Here’s how to spot the signs of success—and what to do if buds still fail you.
📚 In This Guide
- What you need
- Instructions
- Tips and common mistakes
- Wrapping up and next steps
What you need
- ● Pruning shears: Bypass pruners (for cuts up to ½ inch thick) – 1 pair (look for sharp, stainless steel blades for clean cuts).
- ● Loppers: For thicker branches (½ to 1½ inches) – 1 pair (with a long handle for reach).
- ● Pruning saw: For branches over 1½ inches thick – 1 saw (bow or folding saw with a fine-tooth blade).
- ● Gloves: Heavy-duty gardening gloves (cut-resistant) – 1 pair (protects hands from thorns and sharp tools).
- ● Disinfectant: 70% isopropyl alcohol or a blank">pruning sealant – small bottle (prevents disease spread).
- ● Ladder or step stool: Sturdy and tall enough to reach the tree’s canopy – 1 unit (safety first!).
- ● Sharpener: File or sharpening stone for pruning tools – 1 (keeps blades in top condition).
- ● Marking twine or tape: Colored string to tag branches for future reference – small roll.
- ● Pruning paint: Sealant for large cuts (over ½ inch) – small bottle (reduces sap oozing and disease risk).
- ● Notebook & pen: To jot down notes on cuts made – 1_ (track progress and future pruning needs).
- ● Check the weather forecast: Prune on a dry, calm day (avoid rain or wind).
- ● Know your pear tree variety: Some types (e.g., Bartlett, Bosc) have specific pruning needs.
- ● Wear closed-toe shoes and long sleeves to protect from branches and sap.
- ● Have a first-aid kit handy for minor cuts or scrapes.
Instructions for pruning pear tree fruit buds
Here's how I revive spring blooms with precise cuts that keep your pear tree healthy and productive.
✂️ Step 1: Identify and Remove Dead or Diseased Wood
Start by inspecting your pear tree for any branches that are dead, cracked, or showing signs of disease. Dead wood is usually grayish-brown and brittle, while diseased branches may have black spots, oozing sap, or unusual growths. Grab your pruning shears and cut these branches back to a healthy bud or branch junction—this prevents disease from spreading to the rest of the tree.
I always make my cuts at a 45-degree angle, about ¼ inch above a bud that faces the outside of the tree. This ensures water runs off the cut and the new growth heads outward, away from the center where air circulation is poor. If you're unsure whether a branch is dead, scratch the bark with your fingernail—if it's green underneath, it's still alive and should stay.
✂️ Step 2: Thin Out Overcrowded Branches
Next, focus on thinning out the canopy to improve air circulation and sunlight penetration. Look for branches that are rubbing against each other or growing too closely together. These create wounds and block light from reaching the inner buds. Use your pruning shears to remove entire branches back to their point of origin, cutting just outside the branch collar where the branch meets the trunk.
I aim to remove about 20-30% of the tree's branches during this step, but don't overdo it—you want to maintain the tree's natural shape while opening it up. Pay special attention to the center of the tree, where branches often grow too densely. You'll see a noticeable difference in how light filters through the canopy after this step, which is crucial for fruit bud development.
✂️ Step 3: Encourage Fruit Bud Formation with Strategic Cuts
For pear trees, the key to abundant fruit is promoting the growth of fruit buds, which form on last year's wood. Start by shortening branches that are too long or have excessive growth. Cut back these branches to a bud that faces outward, making sure to leave at least 3-4 buds on each remaining branch. This encourages the tree to produce new fruit buds while maintaining a balanced structure.
Here's the thing—pear trees often produce fruit on spurs, which are short, stubby branches. If your tree has these, avoid cutting them back too severely. Instead, focus on thinning out the longer branches around them to give the spurs better access to sunlight. You'll know you're doing it right when you see clusters of plump, green fruit buds forming along the branches by late summer.
☀️ Step 4: Clean Up and Apply Post-Pruning Care
After making your cuts, take a moment to clean up the area around the tree. Remove all fallen leaves, twigs, and debris—these can harbor pests and diseases that might infect your pear tree. Sterilize your pruning tools with rubbing alcohol or a 10% bleach solution to prevent spreading any pathogens between cuts.
Now, give your pear tree a deep watering to help it recover from the pruning stress. I like to add a balanced fertilizer (like 10-10-10) to the soil around the drip line to encourage new growth. Keep an eye on the tree over the next few weeks—you should see fresh, green shoots emerging from the buds you left behind. If you notice any signs of stress, like wilting leaves or yellowing, give it a little extra water and monitor it closely.
Tips & tricks for perfect pear tree fruit bud revival
These simple strategies will help you transform your pruning session into a fruit-bearing masterpiece next season.
Tool Prep is Everything: Before you even touch a branch, sharpen your pruning shears—dull blades tear bark and create larger wounds that heal poorly. I like to use a dedicated file to keep my shears sharp, and I always clean them between cuts with rubbing alcohol to prevent cross-contamination. This small step makes all the difference in how cleanly your cuts heal.
Bud Orientation Matters: When cutting back branches in Step 3, pay close attention to which way those buds face. You want to leave buds that point outward, away from the center of the tree. This creates an open canopy that gets better airflow and sunlight penetration—exactly what those fruit buds need to thrive. Think of it like arranging chairs around a dinner table; you want everything facing outward, not inward.
Seasonal Timing Secret: The best time to prune is actually in late winter or early spring, just before buds begin to swell. This timing gives your tree time to heal before the growing season kicks in. If you must prune later, do it on a cool, cloudy day to reduce stress on the tree. I've found that pruning too early in winter can expose fresh cuts to harsh winds, while pruning too late can interfere with bud development.
Visual Cues for Success: After pruning, look for these signs you're on the right track: branches should form a natural, open shape with sunlight visible through the center, and you should see plenty of outward-facing buds. In late summer, you'll know your cuts worked when you spot those plump green fruit buds forming—this is your reward for precise pruning. If you don't see many buds, you might have been too aggressive with your cuts.
Pro Tips for Pear Tree Fruit Buds
- These simple strategies will help you transform your pruning session into a fruit-bearing masterpiece next season.
- Tool Prep is Everything: Before you even touch a branch, sharpen your pruning shears—dull blades tear bark and create...
- Bud Orientation Matters: When cutting back branches in Step 3, pay close attention to which way those buds face. You ...
Frequently asked questions
Got questions about pear tree fruit buds and pruning? You’re not alone! Here are answers to the most common queries to help you nurture a thriving tree and bountiful harvest.
When is the best time to prune pear tree fruit buds for optimal blooming?
Prune pear trees in late winter or early spring (before buds swell), ideally when the tree is still dormant. This timing ensures you remove dead wood while preserving next season’s fruit buds. Avoid pruning after blooming, as it can reduce fruit production. For summer-bearing varieties, light pruning after harvest can improve airflow.
How do I tell the difference between fruit buds and vegetative buds on a pear tree?
Fruit buds are fatter, rounder, and clustered in groups of 2–5, while vegetative (leaf) buds are smaller, pointed, and solitary. Run your thumb along a branch: fruit buds will feel bumpy with multiple scales, whereas leaf buds are smoother. Preserve clusters to boost fruit yield!
What should I do if my pear tree’s fruit buds are dying or dropping off?
Dropping buds often signal disease (fire blight), frost damage, or over-pruning. First, inspect for oozing cankers (fire blight) and prune 6–12 inches below infected areas with sterilized tools. If frost is the culprit, wait until buds harden again before pruning. For prevention, thin buds in winter to reduce crowding and improve air circulation.
Can I prune pear tree fruit buds if my tree is young (under 5 years old)?
Yes! Young pear trees benefit from light structural pruning to encourage strong branching. Focus on removing only dead, crossing, or inward-growing branches—avoid heavy cuts. Save fruit bud pruning for years 3–5, when the tree’s framework is established. Patience pays off for a healthier, fruitier tree!
Will pruning fruit buds affect next year’s pear harvest?
Strategic pruning enhances harvests by improving light penetration and reducing disease. However, over-pruning (removing >25% of buds) can cut yield. Aim to remove 10–20% of old wood annually, focusing on weak or diseased branches. Thin buds in clusters to 3–5 per spur for larger, higher-quality fruit.
Wrapping up and next steps
Mastering the art of pruning pear tree fruit buds is your ticket to a bountiful harvest—no green thumb required! By understanding the when, how, and why behind strategic cuts, you’re not just shaping your tree; you’re investing in its future health and productivity. 🌱
Now that you’re armed with knowledge, grab those pruners and give your pear tree the TLC it deserves. Start small if you’re new, and soon, you’ll be pruning like a pro—watching those buds burst into life and fruit just as nature intended. Happy pruning!