
Propagation
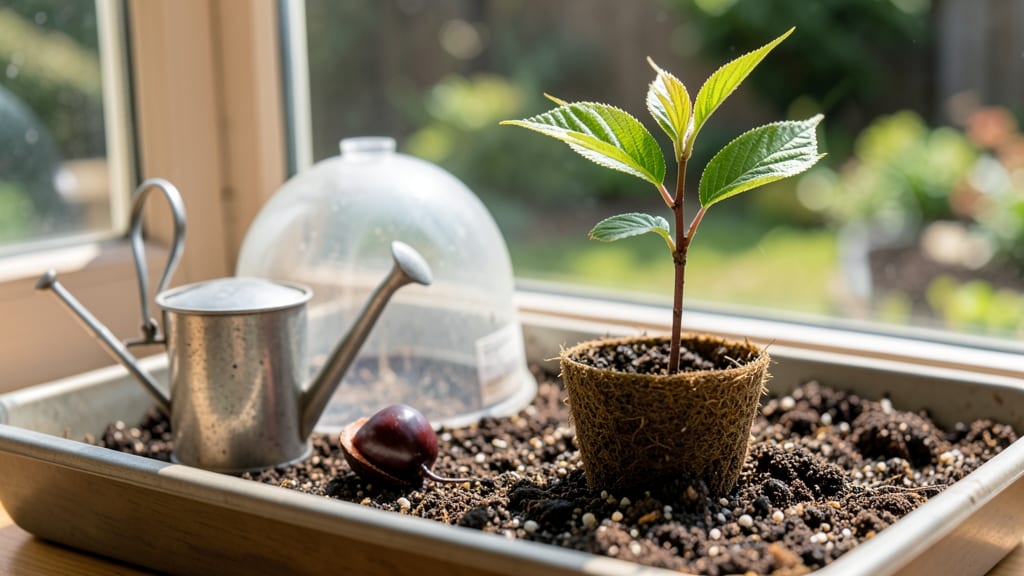
Growing a cherry blossom tree from seed means waiting years for blooms—but the journey starts with 8 weeks of cold stratification that mimics nature’s timing. 🌱 I’ve tried this twice, and while the first attempt took three years to show pink promise, the second batch sprouted reliably after a winter in the fridge.
The key? Patience, precise timing, and understanding that grafted nursery trees bloom faster than seed-grown ones ever will.
You’ll need 3 simple supplies: fresh seeds (from a trusted source—store-bought seeds rarely produce true blossoms), a damp paper towel or peat moss, and a sealed container for the cold treatment.
Most people skip the stratification step, which is why their seeds never germinate. After 60 days in the fridge, you’ll transfer them to soil—just like nature prepares seeds for spring.
By spring, you’ll have tiny seedlings that look nothing like the grand trees you envision. But with proper sunlight, well-draining soil, and 3 inches of water weekly, they’ll grow into sturdy saplings.
The first blooms might take 5-10 years, but the thrill of watching a tree you nurtured from seed unfold its petals makes every wait worthwhile.
This method works best in USDA Zones 5-8, where winters are cold enough for natural stratification. For warmer climates, extend the cold treatment to 12 weeks or use a seedling heat mat.
The real magic? Knowing you’re growing a tree that could live for centuries—just like the ones lining Washington’s Tidal Basin.
📚 In This Guide
- What you need
- Instructions
- Tips and common mistakes
- Wrapping up and next steps
What you need
- ● Cherry blossom seeds – Fresh seeds from a Prunus serrulata (Japanese cherry blossom) or similar species. Aim for 5–10 seeds to maximize success.
- ● Cold stratification setup: Small paper towels or coffee filters (2–3 sheets per seed)
- ● Plastic ziplock bag (resealable, quart-sized)
- ○ Optional: Moistened peat moss or vermiculite (alternative to towels)
- ● Potting mix – Lightweight, well-draining blend (e.g., 50% peat moss + 50% perlite/sand). A 4–6 inch pot per seedling works well.
- ● Small pots or seed trays – 3–4 inch pots (biodegradable or plastic) for germination.
- ● Grow lights or sunny windowsill – A 6–8 hour daily light source (south-facing window or LED grow light).
- ● Spray bottle – For gentle watering (avoid oversaturation!).
- ● Plastic wrap or humidity dome – To retain moisture during germination.
- ○ Fertilizer (optional) – Balanced 10-10-10 or 20-20-20 diluted to half-strength for seedlings.
- ● Pruning shears – For trimming leggy seedlings later.
- ○ Thermometer (optional) – To monitor cold stratification temps (ideal: 35–45°F).
- ● Patience – Cherry blossom seeds can take 6–12 weeks to germinate (or longer!).
- ● Consistent care – Keep soil moist but not soggy during stratification and germination.
- ● Outdoor space (eventually!) – Mature trees need full sun (6+ hours/day) and well-draining soil.
Step-by-step instructions for cultivating cherry blossom trees from seed
Here's how to coax those delicate pink blooms from a tiny seed—it takes patience, but the results are magical.
🌱 Step 1: Harvest and Prepare Seeds for Stratification
Collect seeds from ripe cherry blossom fruit in late summer or early fall. Remove the pit carefully—don’t crush it—and let it dry completely for 3-5 days at room temperature. This prevents mold during stratification. I like to store them in a paper envelope until ready to start.
Cherry blossom seeds require cold stratification to break dormancy. Place each seed in a small plastic bag with a moistened paper towel (not cotton—it holds too much water). Seal the bag loosely and refrigerate for 6-8 weeks at 35-40°F. Check weekly—if the towel dries, mist it lightly. You'll see the seed coat soften and tiny roots emerge after 4-6 weeks.
💧 Step 2: Sow Stratified Seeds in Germination Medium
Fill a 4-inch pot with sterile seed-starting mix (never garden soil—it’s too dense). Press the mix down gently to remove air pockets, then water until it’s evenly moist but not soggy. Use a toothpick to make a ¼-inch-deep hole—just deep enough to nestle the seed.
Place 1-2 seeds per pot (they germinate unpredictably), covering them with a thin layer of vermiculite to retain moisture. Mist the surface lightly with a spray bottle, then cover the pot with clear plastic wrap to create a humid microclimate. Set it in bright, indirect light (no direct sun yet)—a north-facing windowsill works best.
☀️ Step 3: Encourage Sprouting and Early Growth
Keep the soil consistently moist (not wet) by checking daily—tap the pot gently to see if the top inch feels dry. Germination takes 2-4 weeks at 65-70°F. You’ll spot the first true leaves (not the initial cotyledons) as a signal to remove the plastic wrap. This prevents fungal issues and encourages sturdy growth.
Once sprouts reach 2 inches tall, move them to a south-facing window or under a grow light for 14-16 hours daily. Rotate the pot quarter-turns weekly so seedlings grow straight, not lopsided. Avoid fertilizing yet—they’re still too delicate. Weak, leggy seedlings mean your light is too far away.
⏰ Step 4: Transplant and Harden Off Seedlings
After 8-10 weeks, when seedlings have 4-6 true leaves, transplant them into 6-inch pots with fresh well-draining potting mix. Bury the stem up to the first set of leaves—this encourages a stronger root system. Water deeply but let the top inch dry between waterings to prevent rot.
Harden off seedlings over 2 weeks by placing them outdoors in a shaded, sheltered spot for 1-2 hours daily, gradually increasing time. Watch for wilting—if it happens, they’re not ready. Once they tolerate full sun for 6 hours, they’re ready for the ground. Plant in spring after last frost, spacing saplings 15-20 feet apart for mature growth.
🌿 Step 5: Nurture Young Trees for Future Blooms
Cherry blossom trees grown from seed take 5-7 years to bloom, but proper care now ensures vibrant flowers later. Mulch with 2-3 inches of organic matter to retain moisture and protect roots. Water deeply once weekly during dry spells—drought stress delays flowering.
Prune in late winter to remove dead wood and shape the tree. Avoid heavy pruning—it reduces next year’s bloom potential. Feed with a balanced fertilizer (10-10-10) in early spring when new growth appears. Patience is key: these trees reward long-term commitment with breathtaking spring displays.
Tips & tricks for perfect cherry blossom seedlings
These insider tricks will help you navigate the delicate balance of nurturing cherry blossom seeds into thriving trees.
Stratification Timing: The 6-8 week cold stratification period is non-negotiable for breaking dormancy, but here's the secret: place your seeds in the fridge right after harvest—don't wait until fall. I've found that starting immediately after the 3-5 day drying period gives you a head start on the 6-week mark. Use a small refrigerator thermometer to confirm your fridge maintains 35-40°F consistently, as fluctuations can delay germination. Watch for those first tiny root hairs emerging after 4-6 weeks—this is your signal that stratification is working!
Germination Environment: That plastic wrap covering in Step 2 isn't just for humidity—it creates a mini greenhouse effect that maintains 90%+ moisture around your seeds. The key is to mist the soil lightly every 2-3 days rather than soaking it. I use a spray bottle with room-temperature water to avoid shocking the seeds. Place your pots on a tray to catch any condensation that might drip onto the seeds, which can cause rot. The goal is to keep the vermiculite covering damp, not soggy—think of it like a wrung-out sponge.
Light Transition Strategy: Moving seedlings from indirect light to 14-16 hours of direct light at the 2-inch mark is critical, but do it gradually. Start by placing them near the south-facing window for just 2 hours daily on the first day, then increase by 1 hour each subsequent day until they're getting full exposure. This prevents light shock, which can cause seedlings to develop a weak, stretched-out growth pattern. A simple grow light on a timer is worth the investment if your natural light isn't consistent—just keep it 6 inches above the seedlings to avoid burning them.
Transplanting Hack: When it's time to move your 8-10 week old seedlings to 6-inch pots, use the "watering well" technique before transplanting. Water the original pot thoroughly 12 hours before moving, then water again just before transplanting. This creates a moist root ball that's easier to handle and minimizes transplant shock. As you bury the stem up to the first leaves, gently press the soil around the base to eliminate air pockets—this helps the roots establish contact with the new soil immediately.
Pro Tips for Grow A Cherry Blossom Tree From A Seed
- These insider tricks will help you navigate the delicate balance of nurturing cherry blossom seeds into thriving trees.
- Stratification Timing: The 6-8 week cold stratification period is non-negotiable for breaking dormancy, but here's the secret: place your seeds in the fridge right after harvest—don't wait until fall.
- Germination Environment: That plastic wrap covering in Step 2 isn't just for humidity—it creates a mini greenhouse effect that maintains 90%+ moisture around your seeds.
Frequently asked questions
about growing a cherry blossom tree from seed—because every gardener deserves clarity!How long does it take for a cherry blossom seed to sprout?
A cherry blossom seed typically sprouts in 4 to 8 weeks after cold stratification, depending on temperature and moisture. Patience is key—some seeds may take longer, especially if stratification isn’t ideal. Keep the soil consistently moist and warm (around 70°F) to encourage germination.
Can I skip cold stratification and still grow a cherry blossom tree?
Cold stratification is essential for breaking seed dormancy. Without it, seeds may never sprout or could take years to germinate. If you’re impatient, try soaking seeds in warm water for 24 hours before stratification, but the cold step is non-negotiable for success.
Will my seed-grown cherry blossom tree bloom like a grafted one?
Probably not! Seed-grown trees are wild types and may produce small, less vibrant flowers or even different colors. For reliable blooms, grafted cultivars (like ‘Kanzan’ or ‘Yoshino’) are best. Your seedling could still be stunning—just expect a rustic, unpredictable twist.
What pests should I watch for when growing cherry blossom seedlings?
Watch for aphids (tiny green/black bugs), spider mites (webbing on leaves), and borers (holes in stems). Treat aphids with soapy water; mites thrive in dry conditions—keep humidity balanced. Neem oil is a gentle, effective remedy for early infestations.
Can I grow a cherry blossom tree indoors from seed?
Yes, but with limitations. Start seeds indoors under grow lights, then transplant outdoors after hardening off (when frost risk passes). Cherry blossoms need full sun and outdoor conditions to thrive—indoor-grown seedlings may struggle without proper light and space.
How do I know if my cherry blossom seed is still viable?
Fresh seeds should be plump, firm, and brown (not shriveled). Test viability by placing seeds in water: if they sink, they’re likely good; if they float, they’re probably dead. Store seeds in a cool, dry place if not planting immediately—viability drops after 1–2 years.
Wrapping up and next steps
Growing a cherry blossom tree from seed is a rewarding journey that blends patience with the magic of nature. 🌸 While it may take years for your seedling to bloom, each step—from cold stratification to nurturing young sprouts—builds your green thumb and connects you to the beauty of spring.
Once your seedling is thriving, consider transplanting it into a larger pot or garden bed to give it room to flourish.
Ready to take the next step? Share your progress with fellow plant enthusiasts or explore advanced propagation techniques to expand your botanical adventures!